Relics might be the hardest main quests in Outriders, not because of enemy encounters, but because of the final boss. After a few straightforward encounters with Kang's Fighters, you'll be faced against an enemy that can easily one or two-shot your character.
Before you venture into the ruins, upgrade your gear! You can't leave once the boss fight begins. Bring a mid-range weapon that either has passive damage over time (such as the Death Chains mod) or healing properties. Consider speccing for Resistance through armor mods or your passive tree, as this boss outputs an obscene amount of Anomaly damage.
Quest Synopsis
- Set up a receiver above the canopy to retrace the signal.
- Defeat Bailey
Set Up A Reciever

Right past a massive tree is a group of Kang's Fighters guarding the ruins. Most of these enemies are melee units, so either keep your distance or stay aggressive. An enemy near the back, named "Simo White," is effectively a Vanguard Captain. Focus on killing him, then clear out the rest of the enemies.
Hidden Chest #1

There's a dirt path on the left part of the arena, just before you fight the Simo White Captain. Follow the path to find a chest.
Hidden Chest #2

Continue to follow the dirt path from the first hidden chest.
Hidden Chest #3

You'll find this tucked away in a corner directly across from the exit. Turn directly around from the rubble pile to find it.

Destroy the rubble guarding the path to find a hologram you can place a flag at.

Grab the chest to the right of the flag before you continue.
Courtyard

You'll find more of Kang's Fighters on the outskirts of the ruins. Unique to this encounter are two Elites named the "Grady Brothers." They're reskinned Vanguard Captains, one using ice while the other casts fire skills.
These Gady Brothers should be dealt with as soon as possible, especially the ice brother. If one of the brothers freezes you, the other can summon a flaming pillar that can easily kill you. Besides that, this is a trivial encounter.
Chest #1

Found beside an ammo restock station near the exit. This is near impossible to miss.
Chest #2

Look to your right from the first chest, then run straight ahead to grab the second chest.
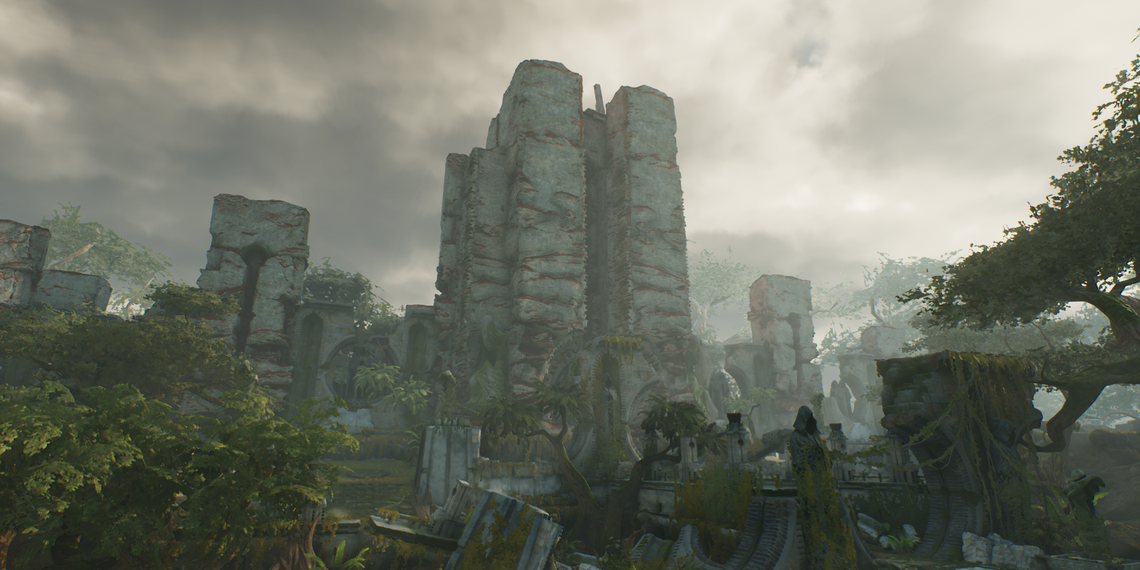
Ruin Stairs

After a short run, you should now be at the stairs to this massive tower. Perforos are guarding the entrance, one of which is an Alpha. Remember to use your melee to absorb any incoming slam attack. A Crawler will also be at the back, using ranged attacks to freeze you. Once you've dealt with the Alpha, focus on the Crawler.

You can also lure the enemies past the stairs if you want to avoid the Crawler altogether. Either way, kill all of the enemies to clear a path to the tower. Prepare for a boss fight.
Hidden Chest

Near the gate that leads to the tower's apex, head left instead. Follow the path down a flight of stairs to find this hidden chest.
Fight Bailey

Altered Bailey is the hardest, most unfair boss in all of Outriders. She's harder than the final boss of the campaign. If you can't kill this boss after a few attempts, lower your World Tier. She doesn't seem balanced for World Tiers 5+.
Bailey is both a caster and a ranged unit, utilizing her rifle and various abilities to damage you. Here's what Bailey can cast:
- Ground Shock: Should you get too close, Bailey will slam the ground, dealing heavy damage over a moderate area. The cast time for this is almost instant, and the ability ignores cover.
- Rock Spikes: Bailey levitates for a few seconds before releasing multiple AoEs near your character.
- Stone Shards: Multiple stones slam into a large AoE, dealing lethal damage at higher World Tiers.
- Stone Wave: Bailey launches a fissure of stone in a straight line. Every third of HP she loses will cause an additional wave to be fired. This attack ignores cover.
- Wall of Stones: Bailey surrounds herself in Anomaly-infused stones, flinging them wildly in your direction at random. These deal AoE damage, meaning they can partially bypass cover if they land near you. You must shoot Bailey to break the ward.
Every ability deals heavy Anomaly damage, one-shotting most characters at higher World Tiers. Unless you have a high Resistance rating, you want to avoid every attack she throws out.

When the fight begins, Bailey will hover in the air for a few seconds to gather her strength. Damage her immediately. This is your only safe window to damage her. When she stops levitating, immediately run to the pillars behind you.

Bailey will slowly move towards you, throwing an ability every now and then. Try to get a few shots in from cover, doing your best to not expose yourself.

You'll want to wait for Bailey to channel an ability with a long cast time, such as Rock Spikes or Stone Shards. When she starts levitating, you have a small window to attack. Damage her until she stops casting. You can extend this damage window slightly by using an Interrupt ability right as she stops casting, causing her to stagger for a second.
Immediately retreat when she's done casting, as she'll throw out a Ground Shock instantly. You can't dodge it solely off of the telegraph; you have to dodge the second she stops levitating or you'll get hit.

You'll want to repeat this process until she's dead, baiting long-cast animations by sticking to cover. A weapon that can deal passive damage, using the likes of Death Chains, is great for moments where you're waiting for Bailey to act.
A few general tips about this fight:
- If Bailey is near your pillar, don't take cover. She can Ground Shock you through the pillar with almost no telegraph.
- Wall of Stones can damage you through cover if it lands near you. Try to stay at the center of the pillar when she first casts this, then land a shot on Bailey to break the ward.
- Stone Wave gets additional waves based on Bailey's HP. She casts a second and third one in quick succession when she loses 66% of her HP. Stay far away from her during the telegraph to give yourself time to avoid all three waves.
- The Resistance stat reduces the damage her abilities deal to you. Consider grabbing a few Resistance mods or nodes in your passive tree before fighting her.
Once you've defeated Bailey, return to Jakub outside the tower to continue your journey.