Quick Links
Character development in Pathfinder: Wrath of the Righteous can be something of a daunting chore - there are so many things to consider when leveling up and creating a build. Should you multiclass? Which feats and spells should you pick? Do you need an animal companion?
Seelah the Paladin is the first companion you'll pick up on your quest through the north of Golarion. She's an iconic character for the Pathfinder franchise, just like Amiri from Pathfinder: Kingmaker, and she's... a little underwhelming, honestly. Luckily, there are ways to make her useful. We have some great builds for you to try!
Seelah's Basic Stats
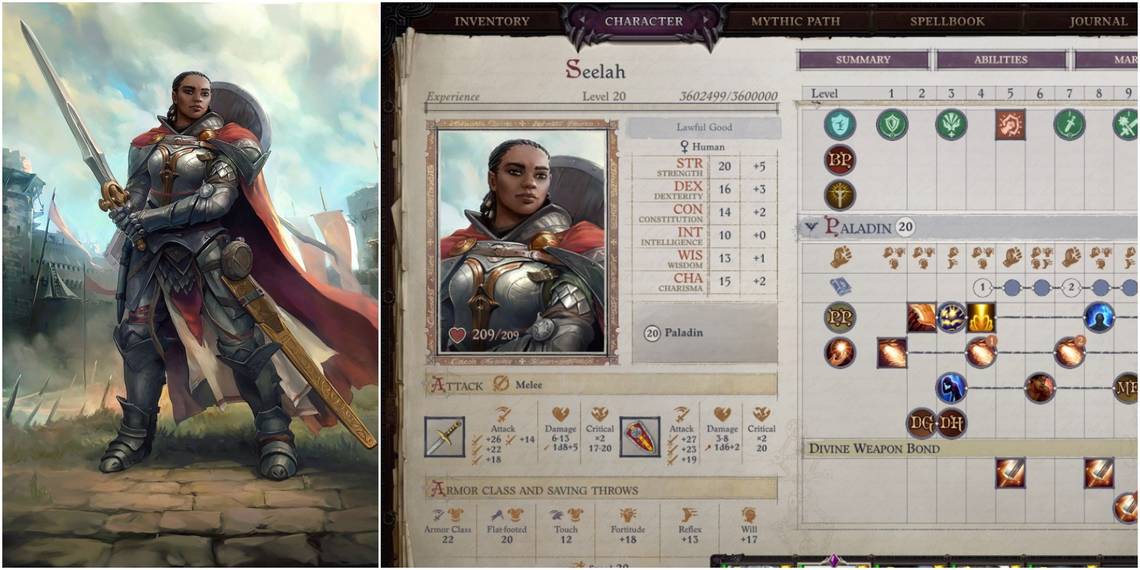
The main problem with Seelah is that her stats aren't too impressive. An 18 in Strength is not bad, but she's a Paladin with only 15 Charisma and a shield-user who only has 13 Dexterity. It's not an optimized loadout, but it's workable.
This is her default loadout:
|
Level |
Build |
|---|---|
|
1 |
Paladin 1 - Dodge, Shield Focus |
This is a tanky start that locks Seelah into being a shield-user if you don't want to waste her feats. Below are three builds that work well. Underneath every build are tips that you can use to adapt the build however you want, whether for personal, lore, or min-maxing reasons.
Shield Bash Pure Paladin Build For Seelah

There's nothing wrong with taking Seelah all the way to Level 20 as a Paladin. Paladins work really well in Wrath of the Righteous thanks to how many Evil opponents there are. While they are not exactly made for tanking, Seelah can manage to get a decent AC with a little Dexterity investment, and this feeds into a Shield Bash Build quite well.
Equip Seelah with the weapon of your choosing, load her up with buffing spells, and set her loose on the demonic hordes of the Worldwound. She makes for a great damage dealer with plenty of support options through Lay On Hands and her Paladin spellbook.
|
Level |
Build |
|---|---|
|
2 |
Paladin 2 |
|
3 |
Paladin 3: Extra Lay On Hands, Mercy - Fatigued |
|
4 |
Paladin 4: DEX +1 |
|
5 |
Paladin 5: Shield Bash, Divine Weapon Bond |
|
6 |
Paladin 6: Mercy - Diseased |
|
7 |
Paladin 7: Weapon Focus (Longsword) |
|
8 |
Paladin 8: DEX +1 |
|
9 |
Paladin 9: Two-Weapon Fighting, Mercy - Exhausted |
|
10 |
Paladin 10 |
|
11 |
Paladin 11: Shield Master |
|
12 |
Paladin 12: DEX +1, Mercy - Blinded |
|
13 |
Paladin 13: Improved Two-Weapon Fighting* |
|
14 |
Paladin 14 |
|
15 |
Paladin 15: Greater Two-Weapon Fighting*, Mercy - Stunned |
|
16 |
Paladin 16: STR +1 |
|
17 |
Paladin 17: Improved Critical (Longsword) |
|
18 |
Paladin 18: Mercy - Paralyzed |
|
19 |
Paladin 19: Bashing Finish |
|
20 |
Paladin 20: STR +1 |
-
*In order to take Improved Two-Weapon Fighting and Greater Two-Weapon Fighting, you will need to equip Seelah with a Belt of Dexterity +2 and a Belt of Dexterity +4 respectively before leveling up. You should have access to these at this point in the game - try looking in shops around town and always check in with the Skeleton Merchant on the world map.
- You will need to boost your effective Dexterity to at least 19 with equipment bonuses for both feats to remain active.
- Alternatively, if you swap one of the later Strength boosts for another Dexterity boost, you will only need a +2 Dexterity enchantment to keep the feat active.
- While Seelah gets Shield Bash at Level Five here, she won't be effective with it until at least Level Nine when she gets Two-Weapon Fighting. Until then, it may be more effective to equip her with your best two-handed weapon - there are lots of Glaives about in the early game that suit her just fine.
- The only crucial Mercies to take would be Fatigued and Exhausted. There are lots of nasty enemies who can inflict these ailments on your party members and they can be extremely bad news - especially the horrific foes who like to use Wave of Exhaustion. The Mercies that heal Blindness and Paralysis are really great as they lessen the need for hoarding curative scrolls or wasting spell slots.
- While this build uses Longswords as Seelah's weapon of choice to stay lore-friendly, you may wish to pick Scimitars or Rapiers instead. They are one-handed weapons with larger critical ranges than Longswords and will improve her damage output.
- We take Divine Weapon Bond instead of the Divine Steed as the weapon bond is probably more useful in the long run. In addition, this build can't really spare any of the feats that would make an animal companion worth keeping around.
|
Mythic Abilities |
Mythic Feats |
|---|---|
|
Unrelenting Assault |
Two-Weapon Fighting (Mythic) |
|
Abundant Smite |
Extra Feat: Critical Focus |
|
Abundant Casting |
Flawless Attacks |
|
Mythic Charge |
Extra Ability: Thundering Blows |
|
Dimensional Retribution |
Sorcerous Reflex |
- The Mythic picks here are largely geared towards making Seelah more offensive. She is likely to have low Speed, so Mythic Charge making closing that gap all the more effective.
- With Abundant Casting, Seelah gains plenty of spell slots that are quite useful for loading up on healing spells. These aren't really for use in the heat of battle, but for topping off hurt allies after a battle when a full rest isn't called for.
- Dimensional Retribution and Critical Focus are probably the easiest picks here to swap out for your own preferences.
|
Useful Spells |
|---|
|
Level 1: Bless, Bless Weapon, Challenge Evil, Unbreakable Heart, Grace, Cure Light Wounds |
|
Level 2: Effortless Armor, Communal Protection From Evil/Chaos, Bull's Strength, Eagle's Splendor |
|
Level 3: Angelic Aspect, Archon's Aura, Prayer, Greater Magic Weapon, Cure Moderate Wounds |
|
Level 4: Eaglesoul, Death Ward, Burst of Glory |
- A Paladin Seelah is never going to be your main caster in any respect, but she can be a decent buffer. Communal Protection from Evil/Chaos is pretty much always relevant in Wrath of the Righteous and handy to keep stocked at all times.
- Later in the game, Angelic Aspect and Eaglesoul make for fantastic self-buffs that make Seelah an even more threatening beast.
- If you have Sorcerous Reflex, you can cast any of the Level One or Level Two spells as a swift action once per encounter - this is a great utility to have when caught by surprise.
Offensive Support Battle Scion Build For Seelah

The Battle Scion (a Skald archetype) is an excellent class that focuses on buffing your team members with Teamwork feats. While Seelah takes a large hit to her own damage output to make this build work, she more than makes up for it with excellent support capabilities.
This build is most useful on teams with lots of melee fighters thanks to the bonuses it grants through Teamwork feats. It is similar to the Paladin build in that it goes for Two-Weapon Fighting through Shield Bash, but it's definitely geared towards support rather than offense.
|
Level |
Build |
|---|---|
|
2 |
Battle Scion 1: Metamagic (Extend Spell) |
|
3 |
Battle Scion 2: Extra Performance, Combat Trick: Shield Bash |
|
4 |
Battle Scion 3: DEX +1, Lesser Fiend Totem |
|
5 |
Battle Scion 4: Lingering Performance |
|
6 |
Battle Scion 5 |
|
7 |
Battle Scion 6: Arcane Armor Training, Outflank |
|
8 |
Battle Scion 7: DEX +1, Combat Trick: Two-Weapon Fighting |
|
9 |
Battle Scion 8: Extra Performance |
|
10 |
Battle Scion 9: Fiend Totem |
|
11 |
Battle Scion 10: Improved Two-Weapon Fighting* |
|
12 |
Battle Scion 11: DEX +1 |
|
13 |
Battle Scion 12: Power Attack, Combat Trick: Hammer the Gap, Fearless Rage |
|
14 |
Battle Scion 13 |
|
15 |
Battle Scion 14: Shield Master |
|
16 |
Battle Scion 15: CHA +1, Shake it Off |
|
17 |
Battle Scion 16: Greater Two-Weapon Fighting* |
|
18 |
Battle Scion 17: Combat Trick: Bashing Finish |
|
19 |
Battle Scion 18: Lethal Stance, Precise Strike |
|
20 |
Paladin 2: WIS +1 |
-
*In order to take Improved Two-Weapon Fighting and Greater Two-Weapon Fighting, you will need to equip Seelah with a Belt of Dexterity +2 and a Belt of Dexterity +4 respectively before leveling up. You should have access to these at this point in the game - try looking in shops around town and always check in with the Skeleton Merchant on the world map.
- You will need to boost your effective Dexterity to at least 19 with equipment bonuses for both feats to remain active.
- Instead of boosts to CHA and WIS (which are taken to round out Seelah's stats and improve her spellcasting somewhat), you may wish to replace them with boosts to STR or DEX for more combat reliability.
- It's totally viable to replace the Fiend Totem feats with Beast Totem feats if you want to change things up.
- It's also viable to move Power Attack to Level Three, move Shield Bash to Level Seven, and end up taking Arcane Armor Training at Level 13. This will improve Seelah's damage output in the early game but may lead to more spell failures as she's likely to be wearing heavy armor most of the time.
- At Level 13 Seelah gains the ability to switch on her Inspiring Rage as a swift action. She can then just switch it off to conserve Rage uses while benefitting from Lingering Performance. If you see yourself using this strategy a lot, it may be worth swapping one of the Extra Performance picks for a combat feat, such as Weapon Focus.
|
Mythic Abilities |
Mythic Feats |
|---|---|
|
Unrelenting Assault |
Two-Weapon Fighting (Mythic) |
|
Inspirational Leader |
Flawless Attacks |
|
Favorite Metamagic (Extend) |
Power Attack (Mythic) |
|
Mythic Charge |
Shield Focus (Mythic) |
|
Abundant Smite |
Extra Feat: Arcane Armor Mastery |
- Grabbing Arcane Armor Mastery is a great idea for making sure Seelah can cast well-enough during combat. Otherwise, you may end up spending a lot of time taking her armor off before fights just to use her buffs - and that's no fun way to play the game.
- Inspirational Leader is there to accentuate Seelah's role as a buffer, but you may wish to swap this for something more offensive if you feel it would impinge on your combat economy too strongly.
|
Useful Spells |
|---|
|
Level 1: Grease, Remove Fear, Expeditious Retreat, Feather Step, Cure Light Wounds, Unbreakable Heart |
|
Level 2: Glitterdust, Mirror Image, Sense Vitals, Cat's Grace, Eagle's Splendor, Cure Moderate Wounds |
|
Level 3: Haste, Good Hope, Communal Delay Poison, Mass Feather Step, Remove Curse, Cure Serious Wounds, Blink |
|
Level 4: Dimension Door, Greater Invisibility, Shield of Dawn, Rainbow Pattern, Cure Critical Wounds, Communal See Invisibility |
|
Level 5: Joyful Rapture, Greater Dispel Magic, Song of Discord, Summon Monster V |
|
Level 6: Brilliant Inspiration, Mass Cat's Grace, Summon Huge Elemental, Overwhelming Presence |
- Once you have Favorite Metamagic (Extend), there is no reason not to apply it to every single spell possible. It's a straight-up buff to your entire spellbook.
- As you can see, this build focuses mainly on buffing spells, healing spells, and spells that don't need Seelah's Charisma stat to be useful, such as Grease and Glitterdust.
- Summon Monster V and Summon Huge Elemental are present mostly for distraction and corridor-blocking purposes.
Frontline Nature Oracle Build For Seelah

This Seelah build takes her passable Charisma and turns her into a full spellcaster. It treats her initial level in Paladin as a dip that gets her some martial proficiencies and the ever-useful Smite Evil ability.
Oracles make for great spontaneous casters that can still wear armor effectively, and Seelah is a perfect candidate for trying this class out. This build is similar to the Battle Scion build but trades some martial ability for better spellcasting, including the ability to cast Level Nine spells. She starts out as a decent buffer who isn't afraid to get on the frontlines and ends up as a very powerful offensive caster who still isn't afraid to be on the frontlines. She also gets an animal companion, and they're fun to have around!
|
Level |
Build |
|---|---|
|
2 |
Oracle 1: Powerless Prophecy, Battle Mystery, Weapon Mastery, Cure Spells, Weapon Focus (Longswords) |
|
3 |
Oracle 2: Metamagic (Extend Spell) |
|
4 |
Oracle 3: CHA +1, Battlecry |
|
3 |
Oracle 4: Power Attack |
|
6 |
Oracle 5 |
|
7 |
Oracle 6: Dazzling Display |
|
8 |
Oracle 7: CHA +1, Animal Companion (Wolf) |
|
9 |
Oracle 8: Shatter Defenses |
|
10 |
Oracle 9 |
|
11 |
Oracle 10: Spell Penetration |
|
12 |
Oracle 11: CHA +1, Combat Healer |
|
13 |
Oracle 12: Metamagic (Heighten Spell), Greater Weapon Focus (Longsword) |
|
14 |
Oracle 13 |
|
15 |
Oracle 14: Dreadful Carnage |
|
16 |
Oracle 15: CHA +1, War Sight |
|
17 |
Oracle 16: Metamagic (Bolster Spell) |
|
18 |
Oracle 17 |
|
19 |
Oracle 18: Greater Spell Penetration |
|
20 |
Oracle 19: CHA +1, Iron Skin |
- The logic behind this build is pretty easy to grasp. It tries to balance Seelah's damage output with her spellcasting abilities and throws in some crowd control feats that rely on her inflating Charisma.
- As this is not really a melee-oriented build per se, it's quite viable to change Seelah's weapon focus for any weapon type you like - Longswords are just lore-friendly as a choice. As she gains levels it's more likely that she'll start using spells as her main offense rather than weaponry anyway. This build lends itself to two-handed weapons more than the other builds in this article.
- Wolf-Scarred Face is a good prophecy to take as its drawback has no mechanical function in the game. The much superior Powerless Prophecy will be taken through Mythic Abilities without any drawbacks whatsoever.
- It's important that you take the Mythic Ability that grants access to the Nature Mystery before you hit Level Eight in order to get your Animal Companion in a timely manner.
|
Mythic Abilities |
Mythic Feats |
|---|---|
|
Second Mystery: Nature |
Weapon Focus (Mythic) |
|
Abundant Casting |
Power Attack (Mythic) |
|
Improved Abundant Casting |
Extra Ability: Favorite Metamagic: Extend |
|
Beneficial Curse: Powerless Prophecy |
Spell Penetration (Mythic) |
|
Greater Abundant Casting |
Sorcerous Reflex |
- With these Mythic Abilities, Seelah will rarely run out of spell slots and gains a ton of spells. This makes her a really effective healer who can always find something to do in battle.
- If you wanted to make Seelah a more dedicated healer, swap out the Nature Mystery for the Life Mystery and take some powerful healing-centric Revelations.
|
Useful Spells |
|---|
|
Level 1: Bless, Divine Favor, Unbreakable Heart, Bane |
|
Level 2: Align Weapon, Communal Protection From Alignment, Grace, Effortless Armor, Lesser Restoration |
|
Level 3: Prayer, Communal Resist Energy, Archon's Aura, Searing Light |
|
Level 4: Restoration, Dismissal, Shield of Dawn, Divine Power |
|
Level 5: Righteous Might, Burst of Glory, Flame Strike, Greater Command |
|
Level 6: Mass Blessing of Luck and Resolve, Joyful Rapture, Heal |
|
Level 7: Holy Word, Greater Restoration, Destruction |
|
Level 8: Shield of Law, Fire Storm, Holy Aura |
|
Level 9: Mass Heal, Winds of Vengeance |
- The majority of Seelah's magical offense comes from the later spell levels, which is why the build pivots so severely at around Level 11.
- Being an Oracle with two Mysteries gives Seelah a lot of automatically learned spells. Make sure you note which ones will be learned automatically so you don't select them accidentally upon level up. These spells include all the Cure spells and notable greats such as Rift of Ruin and Overwhelming Presence.
- Sorcerous Reflex will greatly improve your damage output at the beginning of fights, don't be afraid to pile on the pain or buff up liberally.
- Once you have Favorite Metamagic (Extend), there is no reason not to apply it to every single spell possible. It's a straight-up buff to your entire spellbook.
- Use your Heighten and Bolster Metamagic to improve your most useful spells such as Archon's Aura and Flame Strike.
Animal Companion Build

If you opt to follow this article's Oracle build and take an Animal Companion, you'll have to choose what it gets at level up too. Thankfully, animal companions are really easy to build.
|
Level |
Build |
|---|---|
|
1 |
Bully 1: Fury's Fall |
|
2 |
Bully 2 |
|
3 |
Bully 3: Weapon Focus (Bite) |
|
4 |
Bully 4: INT +1 |
|
5 |
Bully 5: Armor Proficiency (Light Barding) |
|
6 |
Bully 6 |
|
7 |
Bully 7: Armor Proficiency (Medium Barding) |
|
8 |
Bully 8: STR +1 |
|
9 |
Bully 9: Dodge |
|
10 |
Bully 10 |
|
11 |
Bully 11: Improved Critical (Bite) |
|
12 |
Bully 12: STR +1 |
|
13 |
Bully 13: Critical Focus |
|
14 |
Bully 14 |
|
15 |
Bully 15: Power Attack |
|
16 |
Bully 16: STR +1 |
|
17 |
Bully 17: Greater Bull Rush |
|
18 |
Bully 18 |
|
19 |
Bully 19: Staggering Critical |
|
20 |
Bully 20: DEX +1 |
- Power Attack is later on in the build thanks to the animal companions' rather low attack rolls.
- This companion should be quite decent at tripping enemies up. You may decide to boost its DEX instead of its STR to get better trip chances thanks to Fury's Fall.