Quick Links
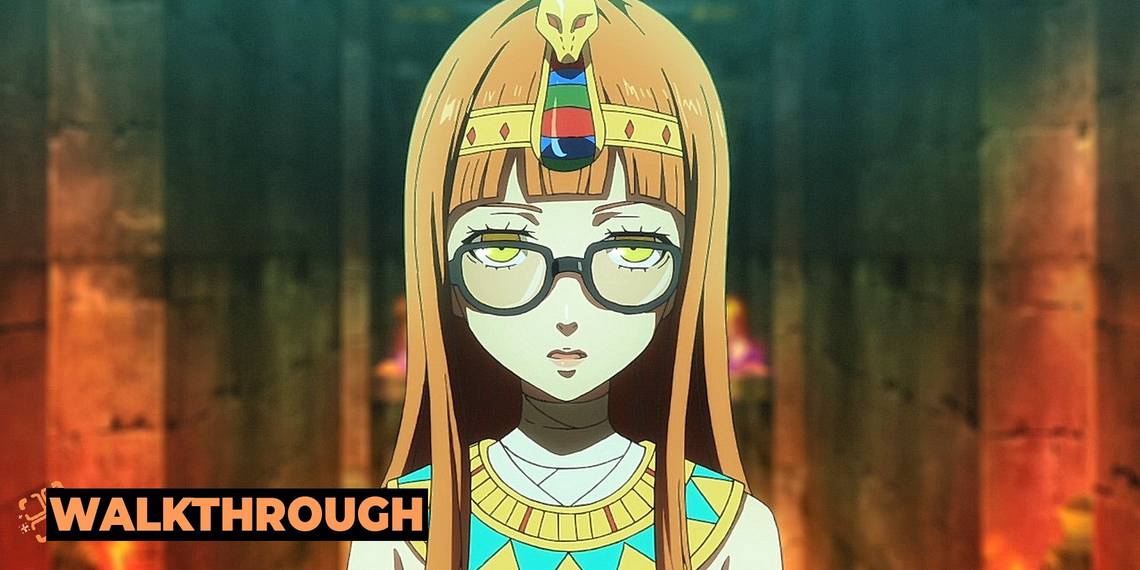
Jarringly enough, your fourth dungeon in Persona 5 Royal is for Sojiro's daughter, Futaba Sakura. You've been staying at Leblanc for months by this point, and you've only recently learned Sojiro's got a daughter because she's severely agoraphobic. She blames herself for her mother's suicide, and she's refused to leave her room or interact with the world in person since.
But she wants more for herself, which is why she contacts the Thieves and asks them to steal her heart so that she can hopefully overcome this paralyzing fear of the world. If you need some help to free Futaba from her self-imposed tomb, we've got you covered.
For this guide, we’ll be focusing exclusively on the dungeon itself and not the goings-on outside the Metaverse. This guide walks you from your first step into the palace itself up to the boss fight. We’ve additionally got guides for how to defeat the boss shadows in each palace, too, as well as a full Will Seeds walkthrough for Futaba's Pyramid.
Preliminary Info

Before you go into Futaba’s Pyramid after all the preliminary stuff in the desert town to formally unlock it, double-check Joker’s Personas and the status of your team. Futaba’s palace is rather long, in comparison to the last few you’ve tackled, so be sure to pop out as often as needed to restock on healing and status-curing items as needed. You’ll once again be up against status ailments once you get to the boss fight, so start stocking up on them or teaching your Personas/teammates moves that heal them early, while you still can.
While we stand by what we said for Kaneshiro’s palace in that Personas with the right moves are more valuable than outright leveling by now, you ought to be between Level 30-35 for this palace for the easiest time with it. You’ll encounter shadows ahead who have no weaknesses but many affinities, so check our table below and try to plan out your party accordingly.
We’ve got suggestions for party setups here, and information on the shadows and mini-bosses within the Pyramid is below.
Table Key
- St: this shadow is strong against this element, and the attacks deal less damage.
- Wk: this shadow is weak to this element, and the attacks deal more damage.
- Rp: this shadow will repel attacks of this type, reversing the damage onto you.
- Nu: this shadow nullifies attacks of this type, and they do no damage to the shadow.
- Dr: this shadow gains health from attacks of this type, and they heal the shadow.
- A dash denotes the attack will deal normal damage to the shadow.
Shadows
|
Shadow |
Level |
Arcana |
Affinities And Weaknesses |
|||||||||
|---|---|---|---|---|---|---|---|---|---|---|---|---|
|
Phys |
Gun |
Fire |
Ice |
Elec |
Wind |
Psio |
Nuke |
Bless |
Curse |
|||
|
Stone of Scone |
20 |
Fortune |
St |
St |
Wk |
- |
- |
- |
- |
- |
- |
- |
|
Sandman |
24 |
Magician |
- |
- |
Wk |
- |
Wk |
St |
- |
- |
- |
- |
|
Naga |
24 |
Hermit |
- |
St |
- |
- |
Nu |
Wk |
- |
- |
- |
- |
|
Anzu |
25 |
Hierophant |
- |
Wk |
- |
- |
St |
Rp |
- |
Wk |
- |
- |
|
Lamia |
26 |
Empress |
- |
- |
- |
Wk |
St |
- |
- |
Wk |
- |
Nu |
|
Isis |
26 |
Priestess |
- |
- |
- |
- |
- |
- |
Wk |
- |
Nu |
- |
|
Andras |
27 |
Devil |
- |
- |
Wk |
St |
- |
- |
St |
- |
Wk |
Nu |
|
Anubis |
24 |
Judgement |
- |
St |
- |
- |
- |
- |
- |
- |
Nu |
Nu |
|
Thoth |
36 |
- |
- |
- |
- |
- |
- |
- |
Wk |
Nu |
Nu |
St |
You may notice that Stone of Scone has more unique affinities than the rest of the shadows. That's because it's not a normal shadow – it's a Treasure Demon, which can be captured for fusion fodder or defeated for a large payout.
Mini-Bosses
|
Shadow |
Level |
Arcana |
Affinities And Weaknesses |
|||||||||
|---|---|---|---|---|---|---|---|---|---|---|---|---|
|
Phys |
Gun |
Fire |
Ice |
Elec |
Wind |
Psio |
Nuke |
Bless |
Curse |
|||
|
Garuda |
29 |
Sun |
- |
Wk |
- |
- |
- |
Wk |
- |
- |
- |
- |
|
Naga |
24 |
Hermit |
- |
- |
- |
- |
Nu |
Wk |
- |
- |
- |
- |
|
Mot |
28 |
Death |
- |
- |
- |
- |
- |
Wk |
- |
- |
Nu |
Dr |
|
Alilat |
? |
Empress |
Rp |
Rp |
Wk |
Dr |
- |
- |
Nu |
- |
- |
- |
Getting Into The Pyramid

Of course, when someone is as closed-off as Futaba has let herself be over the last several years, having them let you in takes some work.
When you arrive to take on the dungeon, it’s a bit worse for wear. Take the left side up across the giant gap that’s opened in the floor, then jump across and examine the door – which is sealed up tight. As you try to leave, Shadow Futaba will stop you and give you a quest.
You’ve got to go into the town across the desert and steal something from the bandit lurking there. To get there, go outside the Pyramid and step up onto the ledge on the far left to look out at the city. Morgana will, kindly, turn into a cat-bus to get you over there.
There are quite a few shadows here, so stay alert. Go left when you first arrive and work on clearing this section out, then go right to move further into the town. There’s a square arena here; entering it will allow you to confront the bandit you’re after.

Except, the bandit takes off running, and you’ll need to corner him. If you leave the arena on the ramp to the left, run forward, then right – the bandit will be standing up ahead. As you run toward him, he’ll remember you’re chasing him and continue running.
The trick to cornering him is as easy as following him. He’ll continue stopping to let you catch up, so do this until you get back to where you first came into town. Go right down the ramp here and run into him, letting him run off ahead and trap himself up ahead.
Thankfully for the Thieves, this is Garuda, whose weakness to gun is rather easy to exploit for perpetual All-Out Attacks for an easy win. When he goes down, he drops the Papyrus you were tasked with finding, so head back to Futaba’s Pyramid.
Turns out, the Papyrus was the map of the tomb you’ll be scouring in just a second. Futaba very kindly returns the map to you to use up ahead – and then shoots the lot of you down into a pit of quicksand.
Underground Passage And Corridor

Once you regain control of Joker, go to the northeast corner and climb up this ledge here, heading south from the top of it. There will be climbable sarcophagi on the south wall, which takes you up to the next area. Here, go northeast until your hand glows, then let the grappling hook take you up to the next ledge for a treasure chest.
Here, drop from the west corner onto the south side of this ledge, and then drop west from here. Climb the sarcophagi in the southwest corner again, then walk west and climb another one. Get to the north ledge here and drop into the low area on the left. Walk north from here, then east for a treasure chest.
Go back west a bit after you’ve cleared the gap and drop onto the southern side of this ledge before walking to the west corner and dropping off the southern ledge again. Keep going on this path south for another treasure chest, then backtrack north and climb the sarcophagi on the eastern wall.
If ever you’re unsure of exactly where the jumping spots are, kick on Joker’s Third Eye to reveal spots with !s above where you can climb or jump.
Go south from here and climb the next set of sarcophagi in the east. From here, go toward the southeast section of the area, and go through the door to land yourself in the Pyramid Underground Corridor.
Go east in here across the corridor, and follow the southern path for a treasure chest before going west toward the stairs, climbing them when you arrive. Take the door to the east to unlock a shortcut back outside the pyramid, then double back into the underground passage again, right back to where you were when you unlocked the shortcut.
Back down the stairs from here, go north, where you’ll battle with Mot. Defeating it clears the path ahead, so go toward the sarcophagi up ahead before taking the western door.
There’s an oversized ballista in here, so go east across these platforms to reach it, then use your grappling hook when your hand glows to get to the upper platform. There’s a switch you need to hit at the end of this path that fires the crossbow and opens the next area for you.

Drop off the western side of the ledge and go through the door here, then through another door into the next area. Here, climb the sarcophagi in the north, then follow the southern path. Enter the door here and grab the gemstone from the Anubis statue.
You’ll still need a second gem, though, so take the door in the northeast and grapple to a ledge in the northeast from here. Go west and grapple yet again to get to an upper ledge in the north. Here, go into the room to your east, where you’ll find another gem in the Anubis statue. Once you’ve got it, leave this room and head west to reach your next section.
Back in the Pyramid Great Corridor, put one of the two jewels on each of the pedestals in the west corner, which opens the path forward. Jump down and continue on this new path, hitting the safe room at the end before entering the next room in the east after you leave.
Chamber Of Rejection

After the cutscene here, grapple across the gap and walk south down the stairs (the area to the north is inaccessible for now). From here, take the path south, then when you’re able, go east, then north to a door in the east. Jump across the platforms inside heading southward, then walk around to the door to the north.
In the next area, go west and take this gem in here, then head west some more and press the switch on the northern wall, which will disengage the trap in the previous area. Go back to that room and snag the gem from the center platform before going east, up the stairs, and past the trap.
There’s a treasure chest in the north wall, so grab that before going in the door to the west. Follow this path northward for another door, then walk east and fire your grappling hook when you can. On your new platform, go to the southern corner and press the switch on the western wall, which opens a door in the northwest corner.
There’s a cleared path in the northwest now, so follow it heading east to find another spot for your gemstones. After you’ve inserted it, go into the room in the east for a chest, then go south once you come back out. Go to the next room to the east, following the path in here to your next ballista-firing switch. Flipping it is the first of the steps for Futaba’s red Will Seed, which you can learn more about here if you’d like to collect them.
After getting it or ignoring it, go back to the Pyramid Great Corridor and check out the statue in the middle here for a cutscene that leads to a puzzle.

Your solution is above - it makes a complete picture of Futaba. Solving it clears the path ahead, so activate the safe room and continue east when you leave.
Chamber Of Guilt

Going east from the safe room, drop off the ledge to the west for another cutscene before you go into the hole in the northeast corner of this path. You should now be in a room with 12 coffins in it – head to the northeast corner of the room for a chest before you climb the steps in the southwest corner, and head north once you’re at the top.
Kick down the bridge here and keep following the path to the door in the east. Go in here, then examine the slab in the west corner, which gives you the solution for the puzzle in the room with the coffins: B01010.
In the room with the coffins again, press the switch before the southwest stairs to activate the puzzle. Starting from the blue globe on your left, flip the switches for the second, fourth, and sixth coffins, then press the switch in the southwest corner again to confirm your input.
From here, go to the southeast corner and climb the ledge here, walking eastward on the large balls here to a platform that has another slab. The puzzle is the same as before, but now has a second set of coffins to work with. Your solutions here will lead you to the next Will Seed, so either proceed using our Will Seed guide or head back to the Great Corridor once again.

You’ll once again need to do a (rather depressing) puzzle at the statue in here following a cutscene. To save you some hassle, we’ve pictured the solution above and got the itemized steps for it below:
- Move R3 to R1.
- Move L3 to R2.
-
Rotate the remaining pieces in the following order:
- R4
- L2
- R6
- L3
- L2
- L3
- L1
This should complete the puzzle and open the next section of the Pyramid, so jump down and activate the next safe room further down the corridor.
Chamber Of Sanctuary

Leave the safe room and enter the door in the west, walking west along the stone platform in here toward the next door. Go through it and go north to find a hole in the west wall, then climb through that. When you emerge, go west, then south to the room here. Press the switch in here to disable the trap by a chest in the north, then leave through the northeast door.
Walk north, then west, then south to a treasure chest. From the chest, go west, then north to a climbable ledge in the east that leads to another ballista switch. Flip it, then get down from the upper path and hit the vent in the north. Going west when you emerge will bring you to another safe room.
When you leave this safe room, take the door in the north, then walk further north from there through another door. There’s a sarcophagus in the right corner on the north wall that has a switch you can press, so do that and then head out of this room.
From here, head south to the room right by the safe room, to the sarcophagus in the northwest corner that has another switch, which reveals a hidden passageway. Grab the gem from the Anubis statue before going through the northern door again, using the west door when you hit it.
Head north, climbing the sarcophagus to the east in order to reach an upper path, which you’ll follow as it turns south to find the next gem pedestal. Stick it in, then follow the glyph path heading east through the door you’ll reach and go east from there to a door in the north.
In here, head to the northeast corner for a chest, then go through the south door, continuing south for another safe room. Leaving the safe room, go east toward the altar to begin mini-boss fights against not one but three strong shadows.

Defeat them using the info from the mini-boss affinities chart at the beginning of this guide, then climb up the ledge in the southwest of the altar for a gem from this Anubis Statue. Next, keep going north and climb the altar and its ledges before taking the door in the west.
Go south from here and cross the green glyph path toward the west, then put the gem on the pedestal here when you reach it. Head to the southwest corner of this area along the glyph path to another ballista switch, which destroys the wall you’re near.
Head back to the start of the glyph path, back in the first room. There’s a treasure chest if you head south from here, and if you continue with this puzzle, you’ll be rewarded with Futaba’s blue Will Seed. For more info on that, check out our Will Seeds guide, and once you’ve got it or have chosen to carry on, make your way back to the Pyramid Great Corridor again.
Finishing Touches

Check out the statue once again, and you’ll solve its final puzzle, the solution to which is in the image above. Once you’re finished, jump into the lower area here, and examine the door. There’ll be a cutscene. Then hit the safe room and fast travel back outside the pyramid once again.
Go right back in, though, because the elevator in the north-most part of the Pyramid Great Corridor has now been unlocked. Use it to ascend to the final chamber, then work your way south, then to the northwest to unlock the treasure room.
Watch the cutscene here and then return to the real world as normal after locating the treasure in the palace. You’ll just have to send the Calling Card and patch up your team before heading back in to fight the final boss for the palace.