Quick Links
By this point in Persona 5 Royal, you've met the wonderfully demure Haru Okumura, daughter of the fast-food magnate, Kunikazu Okumura, who owns Big Bang Burger where you've been taking on the ridiculous burger challenge. When we first meet Haru as she teams up with Morgana, she's stuck in a loveless, arranged engagement to a man named Sugimura, all to further her father's overarching business-centric agenda.
Someone needs to save Haru from this life of control, and that's where you and the Phantom Thieves come in. If you need a little help with this famously frustrating dungeon, we've got you covered.
For this guide, we’ll be focusing exclusively on the dungeon itself and not the goings-on outside the Metaverse.
This guide walks you from your first step into the palace all the way up to boss fight.
Preliminary Info

Be sure to check on your party setup and your equipped Personas. We’d recommend hovering around Level 40-45 for this dungeon, especially toward the end as you approach the boss fight. You’ll have ample chances to gain XP from the shadows ahead, but it never hurts to be prepared.
Haru and Makoto are both good choices for your party in this dungeon, as there will be several shadows ahead that are weak to their psio and nuke attacks, respectively. A number of shadows are strong against gun and physical, or even repel them entirely, so elemental attacks will likely end up being your bread and butter up ahead.
And like we always advise, be sure to hit the Velvet Room to do some fusions before you venture inside. By now, you’ve got an ample selection of Personas you can fuse into something stronger, and with the ability to buy previous Personas again, there’s no reason not to keep your compendium stacked and current as you go through the game.
Table Key
- St: this shadow is strong against this element, and the attacks deal less damage.
- Wk: this shadow is weak to this element, and the attacks deal more damage.
- Rp: this shadow will repel attacks of this type, reversing the damage onto you.
- Nu: this shadow nullifies attacks of this type, and they do no damage to the shadow.
- Dr: this shadow gains health from attacks of this type, and they heal the shadow.
- A dash denotes the attack will deal normal damage to the shadow.
Shadows
|
Shadow |
Level |
Arcana |
Affinities And Weaknesses |
|||||||||
|---|---|---|---|---|---|---|---|---|---|---|---|---|
|
Phys |
Gun |
Fire |
Ice |
Elec |
Wind |
Psio |
Nuke |
Bless |
Curse |
|||
|
Koh-i-Noor |
25 |
Priestess |
St |
Wk |
- |
- |
- |
- |
- |
- |
- |
- |
|
Black Ooze |
29 |
Moon |
St |
St |
- |
St |
Wk |
- |
Wk |
- |
Wk |
Nu |
|
Lilim |
32 |
Devil |
- |
Wk |
- |
St |
- |
Wk |
- |
- |
Wk |
Nu |
|
Decarabia |
32 |
Councillor |
Wk |
- |
Rp |
- |
- |
- |
- |
St |
- |
St |
|
Mothman |
33 |
Moon |
- |
Wk |
- |
- |
Nu |
- |
St |
- |
- |
- |
|
Thunderbird |
34 |
Sun |
- |
- |
- |
- |
Dr |
- |
Wk |
- |
- |
Wk |
|
Arahabaki |
35 |
Hermit |
Rp |
Rp |
- |
- |
- |
- |
Wk |
Wk |
St |
St |
|
Kaiwan |
36 |
Star |
- |
Nu |
- |
- |
- |
- |
Nu |
Wk |
- |
- |
|
Belphegor |
37 |
Tower |
- |
- |
Wk |
St |
St |
- |
- |
St |
- |
Rp |
|
Mithras |
39 |
Sun |
St |
St |
Dr |
- |
- |
- |
Wk |
Rp |
- |
- |
|
Kumbhanda |
42 |
Hermit |
- |
- |
Nu |
- |
- |
- |
Nu |
Wk |
- |
- |
|
Girimehkala |
43 |
Moon |
Rp |
Rp |
St |
- |
- |
- |
- |
- |
Wk |
Nu |
Koh-i-Noor is the Treasure Demon for this palace. You've definitely become familiar by now, so catch it for fusing or defeat it for a payday.
Mini-Bosses
|
Shadow |
Level |
Arcana |
Affinities And Weaknesses |
|||||||||
|---|---|---|---|---|---|---|---|---|---|---|---|---|
|
Phys |
Gun |
Fire |
Ice |
Elec |
Wind |
Psio |
Nuke |
Bless |
Curse |
|||
|
Sugimura |
38 |
N/A |
- |
- |
- |
- |
- |
- |
Wk |
- |
- |
- |
|
Corporobo MDL-WKR (Blue) |
43 |
N/A |
St |
- |
Wk |
St |
St |
Wk |
St |
St |
St |
St |
|
Corporobo MDL-DM (Light Blue) |
43 |
N/A |
St |
- |
St |
St |
St |
Wk |
St |
St |
Wk |
St |
|
Corporobo MDL-AM (Red) |
43 |
N/A |
St |
- |
St |
St |
Wk |
St |
St |
Wk |
St |
St |
|
Corporobo MDL-CH (Yellow) |
43 |
N/A |
St |
- |
St |
Wk |
St |
St |
Wk |
St |
St |
St |
|
Corporobo MDL-GM (Green) |
43 |
N/A |
St |
- |
St |
St |
St |
St |
Wk |
St |
St |
Wk |
|
Execurobo MDL-ED (Black) |
43 |
- |
- |
- |
- |
- |
- |
- |
- |
- |
- |
- |
|
Melchizedek |
? |
Justice |
- |
- |
- |
- |
- |
Wk |
St |
- |
Dr |
Nu |
Getting In

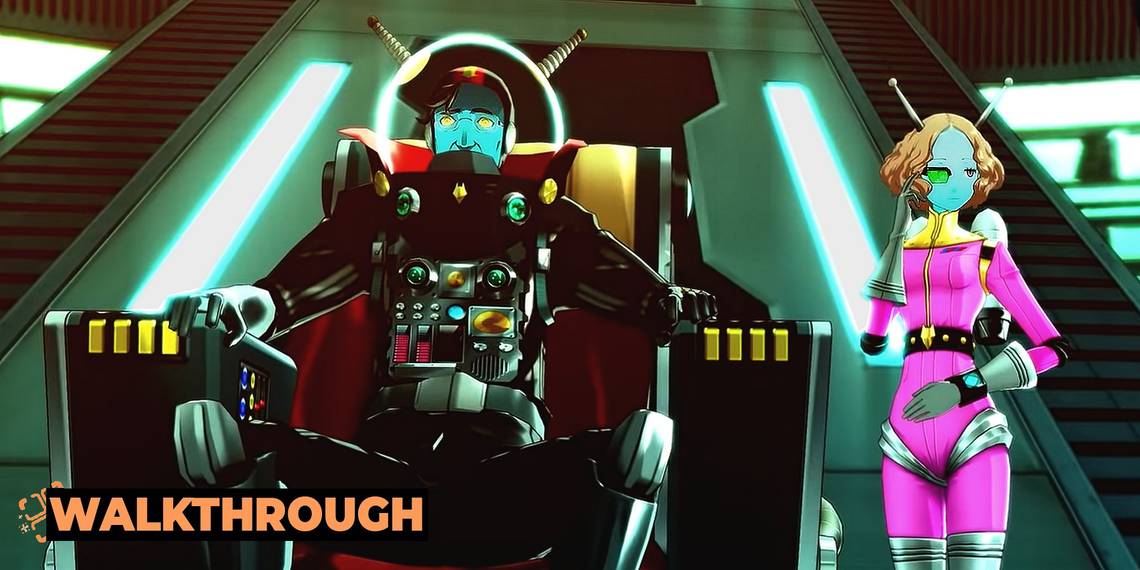
This palace begins as soon as you’ve recruited Haru to the Phantom Thieves, as she’s able to open the biometric door blocking your way in.
Immediately, you’re faced with a mini-boss fight against her fiancé, Sugimura, and one of the worker robots you’ll come to know and loathe by the time you’re done with Okumura’s Spaceport.
Haru will take over for one of your teammates here, which is excellent because Sugimura is weak to her psio attacks. To deal with Corporobo, lob fire or wind attacks at it.
The advice for Corporobo above is only for the blue Corporobo MDL-WKR model. You’ll meet Corporobos in other colors later in this dungeon whose affinities are different.
After the fight, go down the elevator and activate the safe room here, then go right when you come out of the safe room until you hit a locked door. Turn on Third Eye to find a platform behind you that you can climb to that brings you to a grate, so crawl on through.
There’s only one way to go when you emerge, so power through until you get to a vent that allows you to crawl past the locked door in the area. This is where you can find Okumura’s first Will Seed.
After this, examine the door and learn that you need Chief Director authorization, so go back to the elevator in here and head downstairs to find him.
Barracks

You learn here that you’re able to eavesdrop on the robots, so move into the room ahead, picking up hints about the Chief Clerk you’ll be fighting in a second. He’s not the robot you need, but fighting him is an important step to getting there.
The fight against Chief Clerk (Corporobo MDL-CH [Yellow]) will see him joined by three Corporobo MDL-WKR models, which you’ve already dealt with when fighting Sugimura. Exploit the workers’ weaknesses to fire and wind while hitting Chief Clerk with psio to handle the fight quickly. You learn from the Chief Clerk that the Section Chief is weak to nuclear, which will help out later.
Of course, getting the authorization you need wasn’t going to be easy, and the team discusses that you’ll have to fight your way to the Section Chief to get it. The problem is that there are several robots in here who look like the Section Chief, but aren’t. You can fight them if you’re confident and want the XP, but if you’re just trying to go through the dungeon, listen to the robots around here for directions to the correct Section Chief robot.

You learn that the Section Chief is always using the words, “worthless”, “useless”, and “right side”, so use these clues to find the correct robot. His location can be seen in the mini map in the image above.
When you find the right one, you begin a fight against the Section Chief (Corporobo MDL-CH [Yellow]) and another three Corporobo MDL-WKR models. As the Chief Clerk told you, the Section Chief is weak to nuclear, while the drones are still weak to fire and wind, so keep these in mind to handle the battle.
The correct Section Chief will give you an ID that unlocks the final third of this area, which is good because you’ve got to keep pushing onto the Chief Director up ahead. It uses the words, “back when I was young”, “second down”, and “best of the best”, so listen as you sleuth to find the right one. His location can be seen in the mini map in the image below.

You’ve got the pesky three Corporobo MDL-WKRs again as you take on the Chief Director (Corporobo MDL-GM [Green]). He’s weak to psio attacks, too, so use a combination of fire, wind, and psio attacks to handle this battle with ease and take the Chief Director ID.
This was the one you needed for the initial elevator, so head back up there to go through the door that was locked until you had this ID to continue to the next section.
Export Line

After activating the safe room in here in the Facility Surroundings, check for a grappling spot, as this area is rather vacant if you stay on the main floor. This path is also straightforward — deviating will lead you to some items, but the goal is up ahead.
When you arrive at the Export Line, activate this safe room, and follow the ramp for a treasure chest if you’d like. Make your way down this area until you’re unable to move forward — you’ll have to break the arm of one of the robots here to make a bridge.
Go backwards and cross the bridge to find a Console. Interacting with it will let you change the speed of the arms, and you speeding them up is your ticket to breaking one.
Cross over the arm you broke to find yet another Console, and use it to break another robot arm. Cross that one, and you’ll find both a treasure chest and a third console, so do the same thing you’ve been doing to make a third bridge. Head back to the arm you just broke and cross it to reach the door ahead.
Production Line

This is another very straightforward section with very few options for deviation, so follow the path until you hit the next blocked door. This one is blocked by a hydraulic press you’ll need to stop, which is done once again by control panels in the area.
It’s here you learn how inhumane the practices of Okumura Foods have been, as the options on the console for breaks give you literal seconds to do what you need.
The longest option you have on these consoles is “lunch”, which gives 30 seconds before activities resume. It’s not much, but it’ll have to do.
Fight the enemies while you’re able to ahead of time for an easier run when every second counts.
30 seconds isn’t a lot of time, and having shadows stopping you mid-sprint to fight or giving chase as you run is going to eat away your limited window.
When the presses stop, cross the blue press right by you, and run to reach the next panel to deactivate the lasers stopping you from carrying on right now. If you check out the second press, you can find another treasure chest and panel, but the end goal is crossing the press and going into the door on the other side.
Disposal Line

Activate the safe room here, then follow the path out from it. You’ll come across another arm, so start looking for the console to break it. Unfortunately, that console is blocked not only by lasers, but also by a team of Corporobos, neither of which are accessible immediately. Time for another puzzle to shut off the lasers.
To clear this area, stop the blue press with the panel nearby, and run to cross it before it reactivates in the same way you did in previous areas. It’s quite far away — by the purple arm at the start of the room — so you’ll have to haul it to get there in time.
Once you get across, there’s a chest to the left and the next console dead ahead. Use it to break the arm like normal and cross this one, which is on the other side from where you are to deactivate it.
There are a few treasures to the right, but the yellow panel ahead is your end goal, as it stops the presses you need to stop. Activate it and run over to the newly accessible enemy robots, then make sure you’re in good shape for another fight, as you’re about to engage in a tough battle.

This fight is tough because, not only are there five Corporobo MDL-CHs to deal with, but each one is able to continue to summon other workers to aid in the fight against you.
The MDL-CHs have debuffs they can and will use against you to make their attacks land harder, but they, like the other MDL-CHs, are weak to psio attacks.
When you finish the first wave of this fight, another group of Corporobos pop up to do the same thing again. And as if you weren’t frustrated enough already, a third wave will appear once the second has been defeated as well.
Thankfully, the third wave is the final. Keep fighting this fight the same way you’ve dealt with the other MDL-CHs and MDL-WKRs until they’re finally finished coming at you.
This fight can absolutely drag on if you’re not using weaknesses to your advantage.
Even one MDL-CH can summon the MDL-WKRs, and they’ll keep trying until the whole group is down.
Use all-target attacks when possible, especially when it’s just the MDL-CHs, and you can use multi-target psio attacks to your advantage.
Once the fight is finally over, you’re able to carry on through the door ahead and use the elevator here.
Transfer Line Part One

As if this dungeon hasn’t been ridiculous enough already, welcome to outer space! There’s a saferoom here, so hit it before you take on the next section, then head to the blue airlock with the Alpha symbol you see ahead.
You're only able to get through active portals. The area ahead can be rather frustrating if you get turned around at any point, so use your map and follow along closely to speed on through.
There’s another safe room here, so activate that and head back out of the safe room again. In this section, use the singular airlock. Approach the elevator here to unlock all the doors in the first area and snag the chest near the safe room that you can grab after you press the switch in here.
Go through the space rooms until you see a lever, which is how you change the active doors. Thankfully, your map shows you what’s active and inactive (active ones have dotted lines connecting them), so use this overview to your advantage if you get confused.
Flip this first lever and proceed through the new airlock door, and go through the next one at the other end, toward the second lever. Pulling it is your first step to getting Okumura’s final Will Seed. If you got it, make sure you flip the second lever back as it was when you arrived to continue on.

Go through the other active door in the airlock room where you got to the Will Seed, and use the other door to get to a third area (in the north on your map, next to the first lever we pulled). Pulling this and using the door here brings you back to the first lever again.
It seems like you’re backtracking, but this is what you need.
- Flip the first lever again.
- Go back to the third lever again. Pull it.
- Go back to the second lever, and pull that one as well.
This opens a new, final airlock, which leads to the lever you need.
Get to the fourth, golden lever and pull it to open the final door. Now, though, you’ve got to get back to it. Go back to the second lever, and then to the third once again for an easy path back to the first. From there, get to the platform that takes you to the next area and continue onto your last section.
Transfer Line Part Two

You should definitely activate the safe room in here before anything else, as this puzzle is an even more frustrating version of the one before it, and you may need to leave and start again if you get turned around.
- Hop through the only active airlock door, and then do the same thing in the area that brings you to. As soon as you hit the first lever for this area, pull it before continuing on, taking the airlock at the bottom when you reach them. Using this airlock shuts it off behind you.
- Go through the newly-opened door and do the same thing in the room that brings you to, which will bring you to a space with three airlocks, two of which are useable. Use the leftmost one for now to get to a room with a lever, but don’t pull it yet.
- Go back the way you came and use the airlock in the middle in the previous room. In here, go to the airlock on the right, then use the one right in front of you when you land to enter the room with the third lever. Pull this one, then head through the orange airlock.

- Here’s your next golden lever, so pull that before pressing on.
- Go through the green airlock to get to an area that has a long hallway on your left.
- Go through the blue airlock, which brings you to the third lever again. Pull that one now.
- Go back to the green airlock to get back to the room with the long hall.
- Go down said hall and use the airlock here.
- Take a second to celebrate being done with the airlock puzzles before taking the elevator up.
Keep going ahead when you get off the elevator, and make sure you activate the safe room here, as you’ll need it later. Ahead is the treasure, so make note of where you’re going, and head back to the real world to get ready to send Okumura his Calling Card.