Planet Zoo is an incredibly in-depth zoo simulation and management game. It allows you to take control of an existing zoo or create your own. You'll care for animals, keep guests happy, and of course build up the habitats and infrastructure. It's this last part that can be particularly overwhelming for newcomers.
The building system is very detailed but also has a huge difficulty curve. Even for those who have been playing for a while, trying to build from scratch can be frustrating. To help you out we've put together a guide to building with shells and how to graduate from this to full custom builds.
Updated September 4, 2021 By Helen Ashcroft: As Planet Zoo continues to expand with updates and DLC there are more decor options that ever before. Sandbox mode itself has also changed a little. New DLC packs have even brought underwater swimming, a new way to see animals and build more complex habitats. With all this in mind we've updated this guide to offer even more Planet Zoo building tips and trick for beginners.
Start By Building In Sandbox Mode

One of the best ways to learn how to build is to jump into sandbox mode. Here you don't need to worry about finances or goals and you can just learn the basics with no pressure. The 1.6 update also enhanced sandbox so its easier to build your dream zoo thanks to the disabling of most negative effects. Overcrowding, animal stress, fights, fear, animal escapes, negative guest happiness, stale food and dirty water are all off my default. This means fiddling with settings you don't quite understand is a thing of the past as by default your zoo should run much smoother.
While you can start totally from scratch, it's actually easier to begin with an existing scenario zoo. This is because you have examples to work with and copy.
The very first scenario zoo is ideal for learning the basics of building. This is because it contains a half-built custom shop area that you can simply edit and adjust. It's also a functioning zoo so if you want to see how your buildings work with customers, everything is already up and running. There are a few minor adjustments you can make to the existing exhibits, especially regarding foliage, and hiring a few extra staff means fewer management issues, but generally, the zoo is fine as it is.
By the zoo entrance and exit are two brick buildings with shops in. If you click on one of these you can choose to edit the structure. You can now click on individual pieces and see how they fit together. This building is basic in terms of pieces it uses but still looks great. The basic pieces you'll discover in buildings are:
- Foundations
- Walls of differing heights
- Walls with gaps for doors and windows
- Roof tiles
- Roof trim
- Accent pieces
Spending some time moving things around to see how they join together helps you learn how to structure buildings but basically you can add a shop shell and then build around it, making sure to check you use pieces that contain gaps wherre the doors and windows are.
How To Add Shops To An Existing Building

Once you've figured out how things go together you can try adding stores into the building. There's a ready-made gap next to the Loony Bloons store and a store will fit into this space. To place it first find the store you want and choose the basic shop with no fancy decor. Then click the main building to add the shop to the structure.
As a default, the shops want to link to a path. As such the store should fit easily into this space with no adjustments needed. However, if you do need to adjust them keyboard shortcuts are the trick.

These handy tricks will help you adjust the buildings:
- Holding shift allows you to move items up and down with the mouse and enables you to place them at the right level if they are trying to slot in higher or lower than the gap.
- You can also press z to rotate a shop if it wants to connect the wrong way.
Just using these keys can make a huge difference and mostly they will enable you to place stores into buildings. You can also try removing paths nearby if you still have trouble. Often replacing a path resets the connection and allows things to connect better.
You can also use these same tricks to add shops or small exhibits to the pre-built shells you'll find in the facilities menu. These allow you to theme your zoos easily without building too much and are the first step to customization. You can edit all the shells to adjust or add little details and make them feel like your own.

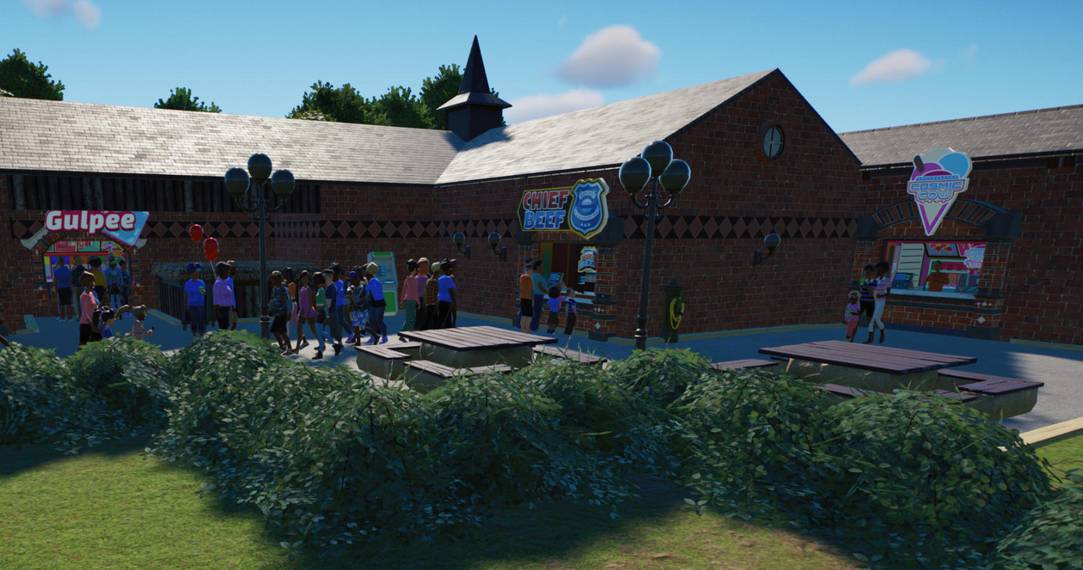
For instance, in the building above you simply need to remove the wall where the Cosmic Cow shop is and duplicate the two-piece facade that's in front of the Chief Beef store to replace it. The shop wants to connect to the path behind but hitting z turns it around. You can then use the advance move tools to place the shop signs.
The easiest way to get signs right is to place them close by and then use the advanced move option.
- Adjust each angle using the circles
- Get the sign close to your desired location
- Change the camera angle to check how it matches up to the building.
You can also use the snapping options to get them to line up with the walls with less effort. Different people will prefer different settings so feel free to fiddle with these and see which you prefer.
Building From Scratch In Planet Zoo

Behind the building we just edited, there is a patch of land great for testing out builds. However, you'll need to use a trick to get the paths to match up if you want a square path up to your new building.
You first need to connect a regular path to the existing path as usual. You'll see it place just off the existing path and you only need to place one short piece. You can then choose select grid, tick square edges, and click on the path you just placed to get its grid. You'll then be able to create a path that matches up.
If you click the path that's already placed as your grid the paths won't match up, as shown above. It's a weird terrain quirk and one that often frustrates players.
Once your space is ready it's time to start building.
Flooring

Placing flooring isn't essential but it can help you arrange things in a grid shape and you can always delete it later. You'll notice that items you place on top of it will snap to the edges. Long grass will also poke through flooring so it looks better if you edit the terrain underneath it.
Make sure when you add pieces that you follow the prompts if required to add them to the group. This makes life much easier as your building can then be moved as one item.
Walls

There are different types of walls and these fit with the items you'll need to build around. You'll find plain walls as well as those with gaps for doors, windows, and storefronts. Use the shift key and mouse to move walls up and down if required. Clicking z will rotate the pieces.
It's often easier to build a basic shell then add your buildings and restructure around them. All buildings are under facilities, while the individual building pieces are under construction.
Buildings

The buildings should snap into place but you may need to adjust them using shift to change the height, especially if you keep the flooring. The terrain underneath your building may adjust itself as you build but it will be covered so you don't need to worry too much.
Check the terrain looks ok around the building before you go too far as terrain is difficult to edit once it has a building on it.
If you need a path up to a walkway and it won't place the trick is to add a building to the gap so the pathway automatically places and then delete the building.
Roofs

Roofs are the trickiest part but thankfully there are usually pre-built pieces that help. The main thing you need to remember is once you've selected the roof click the clipboard on the right-hand side and tick the box that says auto stacking. This will allow the roof pieces to place on top of your structure by default. Then follow these steps.
- Start with the corners first
- Use z and your mouse to align each piece.
- You can then add in the main roof pieces.
- If pieces won't place simply adjust the camera angle a little and that should fix the issue.
- You can also change the camera settings in the options to be able to get into tighter spaces and see what you are doing.
- Experiment with different settings to see which feels easiest to use.
If you want to make the inside look a little neater you can place a flat roof on top of your buildings directly to neaten up the gaps.
Roof Edging

Placing roof edging is the fiddliest part. You'll need to find the right pieces then hold down shift while moving them into place. If they snap too high it can be easier to take off object snapping then move them up from the ground.
The easiest way to finish a basic roof is to place flat pieces across the gap at the top and use the edging to neaten them up. The process is fiddly but it's like a giant jigsaw and you will get faster as you build more frequently.
Most of the building process in Planet Zoo is simply trial and error. Don't be afraid to change settings, pull apart existing buildings, experiment with editing, and generally just get a feel for how things match together. It can take a while but once you've got a rhythm that works for you then you'll be able to adjust and create buildings in no time.
Finishing Touches

The finishing touches are what will set your building apart. You can add signs, decals, lettering, and even statues. When adding lettering or decals to walls or signs checking the align to surface and position snap buttons will allow for easier placement.
The best way to build a beautiful building is simply to experiment. Every decorative item can be moved using the advance move tool so you can position things precisely. You can also add lighting to the area but it's a good idea to check how it looks by adjusting the time of day using the atmospheric conditions button while in build mode. This is because many of the lights are very limited.
As with everything in this game, taking your time and trying different things is key to learning to build. There's also a lot to be said for the speed of pre-built shells and blueprints from the workshop so don't be afraid to mix and match custom designs, shells, and blueprints together to create something truly unique.
If you want more help with your zoo planning make sure to check out our other Planet Zoo articles.