The original Resident Evil 3 ended in the Dead Factory, a drab setting that – while narratively interesting – was marred by a muddy aesthetic and level design that pales in comparison to the rest of the game. Resident Evil 3 (2020) received quite a bit of flack at release for cutting and replacing key locations from its PS1 source material, but RE3 is arguably better off without the Dead Factory.
In its place, Resident Evil 3 Remake replaced the Dead Factory with NEST-2, in turn creating greater equilibrium with Resident Evil 2 (2019). Before Jill can enter NEST-2, however, she needs to pass through the Hospital Warehouse. Inside, Nikolai shuts down all the power and tasks Jill with finding three Fuses so she can access NEST-2.
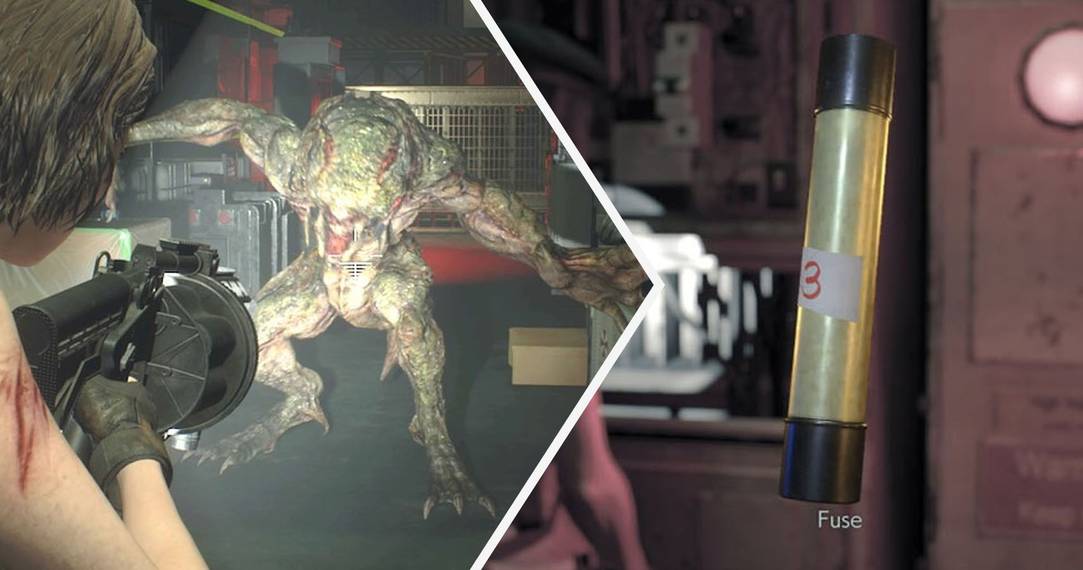
The three Fuses in Resident Evil 3 are hidden throughout a maze-like Warehouse that Jill has to navigate in the dark, all while fighting off enemies. There’s even an achievement for finding all three Fuses in five minutes, but doing so requires a keen understanding of the Warehouse, how to traverse it, and all the different monstrosities lying in wait.
The First Fuse

From the Underground Storage Office, make sure you pick up the Hip Pouch and head into the Warehouse. Jill will notice Nikolai taking a phone call in the Surveillance Room up ahead. As you approach the elevator up to Nikolai, the power will go out inside of the Warehouse and Jill will need to find the three Fuses to get things running again.
Head to the control panel to the north side of the room and interact with it to lower the platform up ahead. As you do, a Palehead will fall from up above. Pale Heads are a new type of enemy who tank damage hard, so make sure you always aim for the head and only with your Magnum ammo. Once the Pale Head is dead, stand on the platform and activate its control panel to ride it up. The first Fuse will be right in front of Jill and it will be labeled “3.”
The Second Fuse

After grabbing the first Fuse, look to your left and take the ladder down. As Jill is walking down here, several passageways will be blocked off by falling crates – leaving the path forward completely linear. Two dogs will ambush Jill in the process, but they can be put down fast. There will be a zombie waiting to attack Jill as you’re turning the corner, so pull out your Shotgun and blast him in the head before squeezing through the nearby shelves.
Run up the stairs ahead of you and follow the path until you hit a dead end. Trigger the control panel to raise a platform, creating a bridge that leads to a ladder. Take the ladder down and equip the Grenade Launcher. Approach the further Transport Container to trigger an ambush from both sides. The closest Container will have six zombies, while the further Container houses a Hunter Gamma. Once everyone’s dead, grab the second fuse by the zombie Container and climb the ladder back up.
The Third Fuse

From here, follow the path back to the stairs and open the door into the Small Storage Room. There will be 2 zombies roaming around, along with a single Pale Head. Drop the zombies with your Shotgun and then pull out the Magnum to finish off the Pale Head. Unlock the door up ahead for a shortcut back to the Office, then hook left back into the Warehouse.
The third Fuse will be right up ahead, but a regular Hunter will ambush Jill. Pull out the Grenade Launcher or Shotgun and drop them fast. Once safe, grab the final Fuse and cut through the Office back to the Warehouse entrance. As you jump down to where the elevator is, three parasite zombies will wake up. Kill them fast and then place the Fuses into their electrical box. With the power back on, take the elevator up.
Into NEST-2

Jill will have missed Nikolai by the time she gets to the Surveillance Room, but examining a nearby computer will trigger a cutscene and Tyrell’s reappearance. The two agree to head into NEST-2 together. From here, gameplay is mostly scripted until you reach NEST-2 proper. Jill and Tyrell have a brief chat in the Corridor and then they’re both ambushed by Nemesis in the NEST-2 Entryway. While Jill fortunately manages to escape with her life, Tyrell is killed by Nemesis before he can so much as fight back.