Quick Links
Salt and Sacrifice is a game that will require you to defeat many mages over the course of a playthrough. Once defeated, you devour their hearts, gaining many great crafting items that you can use to become stronger. These mages won't give up the goods without a fight, though, so you'd better learn how to take on these magic adversaries.
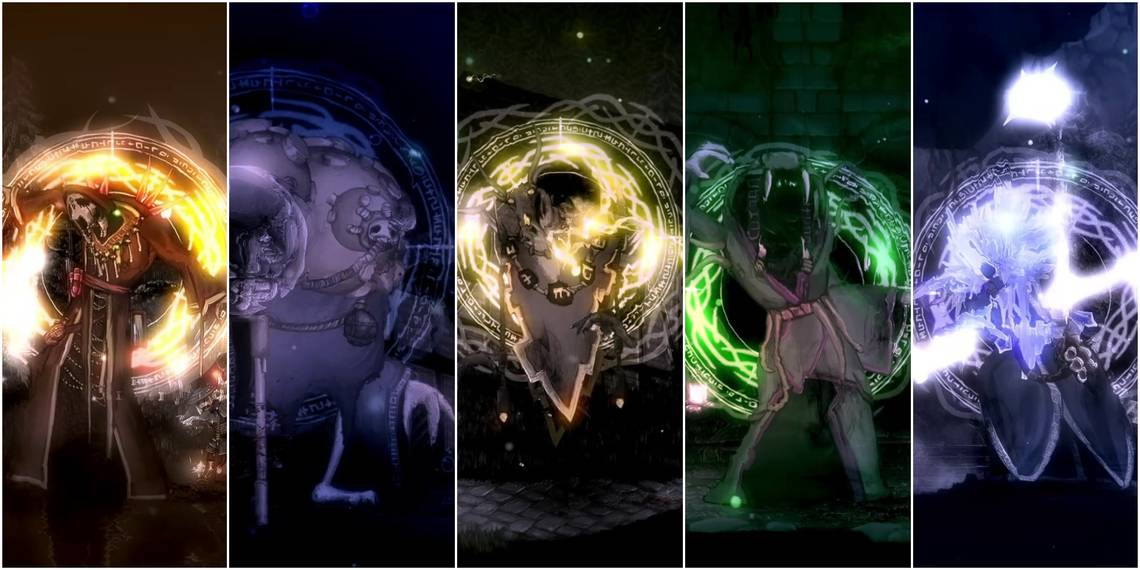
Ashbourne Village has five different mage types to take down, but don't feel relaxed because it's the first area of the game. The mages here pose a significant challenge. Here's how to find the Named Mages and how to beat them.
Pyromancers // Arzhan-Tin, The Ceaseless Fury

|
Fire |
|---|
As you’d expect, Pyromancers primarily use fire-based attacks and take less damage from the element. As you chase him around the map, he'll summon the following monsters:
- Embered Sickles, flying creatures that are easily dispatched.
- Ashwalker, demons with pokers that have a decent amount of range but low poise.
- Sootwalkers, large spider-like creatures that love to pin you down and deal a ton of damage. They drop the important Ash-Caked Lungs.
The Hunt For Arzhan-Tin
The hunt for Arzhan-Tin begins in the gatehouse that serves as an entrance to Ashbourne Village. To access this gatehouse, you’ll need to defeat Uryks Necklace-Of-Ears, get the Grappling Hook, and make your way up to Ashbourne Village through Craterstone Mine.
Once you have started the hunt, head out of the gatehouse to the east to find him attacking some of the local monsters. Attack him a few times and he’ll start teleporting away from you, gradually heading down through Craterstone Mine and then through to Greymoss Mire.
Pyromancer Attacks


- Fire Jet: The Pyromancer will shoot a jet of fire from their fingertip. This move has some decent tracking towards you, so rolling through the Pyromancer might not deal with it. This does low damage, but will lock you in place and set you on fire.
- Flame Sword: The Pyromancer summons a sword made of light and slashes in front of them twice. This move deals a ton of damage if you get hit with both slashes, so try to learn the timing quickly. You should roll through this move, not away from it, and punish the Pyromancer with a counterattack.
- Eruption: The Pyromancer will raise their hands int the air, causing small puddles of fire to form on the ground around the battlefield. These won’t damage you initially, but they will erupt with fire after a short moment. Try to roll out of the way in time. This does a decent amount of damage and will set you on fire.
- Flaming Wheel: The Pyromancer creates a ball of flame with four larger balls of flame that slowly rotate around the center. The flame is then sent in your direction. You’ll need good timing to roll through this attack and the Pyromancer likes to follow it up with a Flame Sword to catch you on the roll. Consider blocking it and healing up immediately after.
Pyromancer Strategy
- The Flaming Wheel attack has a long startup. Use this opportunity to fire off ranged attacks at the Pyromancer.
- Staying close to bait out easily dodged Flame Sword attacks is a decent strategy, but you’ll have to dodge away if he decides to use Eruption.
- Be wary of the burning status effect in this fight. Every time you get hit with a fiery move, you'll start losing health, and this can stack. Getting hit with multiple fire attacks in a row is certain doom.
Cryomancers // Celus Zend, The Mourning Winter

|
Cold |
|---|
Cryomancers use the Cold element as well as any frosty foe, as you'd expect. As you chase a Cryomancer around, they'll summon the following foes:
- Ice Thralls, creatures made of ice that leap around to do damage. They’re quite easy to beat with a few attacks.
- Ice Knights, creatures that resemble Ice Thralls but have a sword and shield. These are very annoying as they like to block your attacks and respond with a riposte that sends you flying.
- Shunned Furclads, big brutes that rush at you, sending you flying if they connect.
The Hunt For Celus Zend
The clue that begins the hunt for Celus Zend can be found in a small room near Ashbourne Village’s starting point. Head west from the village and head up the hill instead of into Root-Ceil Cave. Fight the enemies as you go until you reach a Skallin and a Brute together near a ledge.
You can grapple over the ledge and enter the door ahead to find a frozen person. Interact with this icy statue and you can begin the hunt.
The exit to the right of the statue leads to Shopkeeper Arnald, who will move to Pardoner’s Vale for business once talked to. Heading up the large ladder will lead you to more Grappling Hook platforming, eventually netting you a chest containing an Exotic Strand, which is used to upgrade
Follow the particle trail until you find the Cryomancer. As per usual, you’ll end up facing new summoned creatures as you chase the mage down through the area.
Cryomancer Attacks


- Icy Rain: The Cryomancer summons a crystal of ice in the air that will travel towards you, firing icicles at the ground as it goes. These icicles deal a tiny amount of damage but will inflict frostbite, dealing damage over time.
- Ice Traps: This attack will randomly place a few shining crystals around the battlefield. If you accidentally make contact with one, you’ll be knocked into the air and sustain a decent chunk of damage. This attack is mostly dangerous as it leaves you open for a physical followup attack.
- Icicle Shot: The Cryomancer raises their hand up into the air, summons some large icicles, and fires them directly at you. These deal a good amount of damage and are very quick, so they’re quite hard to dodge. Wait until the last moment to dodge.
- Thrusting Sword: There are two versions of this attack. The first is a two-strike hit that the Cryomancer uses at short range and does a lot of cold damage. The second is preceded by a dashing attack across the battlefield that the mage uses as a gap closer. Try to roll through the mage to avoid it.
Cryomancer Strategy
- This battle is all about keeping your cool and not rushing in - there are a lot of moving parts to this battle, between the Icy Rain, the Ice Traps, and possible Icicle Shots. Stay to one side of the battlefield and wait for a decent opening.
- Save all of your Ammunition for the fight against the mage and unload everything into them when you get the chance. Staying close to the mage is dangerous, so you’ll want to make the absolute most of your ranged weapon.
Venomancers // Varren Ovrin, The Vilest Hatred

|
Poison |
|---|
It doesn't take a genius to figure out that it would be a good idea to stock up on Antidotes before taking on a Venomancer, but they are not strictly necessary.
You need Wispleaves to make Antidotes, and they can be made in the middle of battles if required.
As usual, the Venomancer has a set of enemies it can summon to ruin your day:
- Harvesters, reptilian warriors with spears. They’re quite easy to avoid and defeat after rolling through them.
- Venomous Clusters, annoying enemies that float but fall to a few strikes.
- Overseers, brutish enemies with a longer reach than you might realize at first. Be careful with them.
The Hunt For Varren Ovrin
To start the hunt for the Named Venomancer, you’ll need to enter Stonehall Dungeon. The sealed door to this area is inside Craterstone Mine. Head down the ladder, go east, and you’ll find the particle trail clue in the large room.
Venomancer Attacks


- Stab: This is a simple downward stab that the Venomancer uses when you’re at a close range. Easily rolled through.
- Poison Needles: The Venomancer releases a flurry of needles that will fly towards you. This can be rolled through with precise timing, but will be a pain if you’re dealing with a summoned enemy.
- Circle Of Needles: This attack creates a circle around your current locations which fires needles directly into the center. The needles are the same as the last attack. Dodge out of the circle if you see this attack used.
- Poison Puddles: This attack will create small, black circles on your current location and that burst with needles after a short while. Multiple puddles are created successively, so you’ll have to stay on the move to avoid this attack - luckily, it’s quite slow.
- Every attack except the Stab can inflict poison if you get hit too many times.
Venomancer Strategy
- Try aggroing the Verdant Guard underneath the boss arena before confronting Varren Ovrin. It might jump up through the floor during the battle, providing the Venomancer another powerful target who will help you fight her. Be careful, though, it’s a tough foe in its own right.
- The Venomancer’s attacks don’t deal all that much damage, apart from the Stab. It’s feasible to get up close and wail on it, taking hits until you need to dodge away to heal. You’ll need some antidotes for this strategy, though.
- As long as you keep on top of any poison effects and roll through her stabs, any fight against a Venomancer should be pretty easy.
Hydromancers // Kundry Kahn, The Drowned Behemoth

|
Cold / Dark |
|---|
Battles against Hydromancers can be pretty hectic and chaotic, as they like to control the battlefield with lots of difficult-to-avoid water attacks. This is made very clear during their chases, where they’ll summon the following monsters:
- Panphibians, frog-like warriors who fall quickly to sustained attacks.
- Hydropods, very large creatures that can seem overwhelming, but have low poise.
- Krayarks, massive crab-like creatures that can deal a lot of damage but can’t deal with enemies to their backs.
The Hunt For Kundry Kahn
The hunt for Kundry Kahn, the Drowned Behemoth begins in the Archridge District, in a square off to the east of the central building.
Hydromancer Attacks


- Staff Smash: Exactly what it sounds like. This is an easily-dodged attack usually, but the chaos of the battle can make it difficult to avoid.
- Homing Bubble: After slamming their staff on the ground, the Hydromancer summons a large bubble of water that follows you in spurts. When it hits you, it’ll knock you back and deal a chunk of damage. It’s incredibly hard to avoid this and it cannot be rolled through.
- Bubble Rain: The Hydromancer waves their staff in the air, calling down a hail of bubbles that fall randomly. Getting hit will knock you back a bit and deal damage, and how hard this attack is to avoid depends entirely on the placement of the bubbles.
- Geysers: The Hydromancer raises their hand into the air and creates multiple geysers on the ground. After a second, they start spewing water into the air. Avoid the geysers as they’ll do constant damage and immobilize you, making you a fine target for a Staff Smash.
Hydromancer Strategy
- Staying at high-health at all times is important, as you can never predict when the randomness of Bubble Rain or Geysers will screw you over. Don’t go into this fight with an un-upgraded Hearthen Flask.
- Most of a Hydromancer's moves will knock you around the arena, making you an easy target. Consider equipping armor and accessories that grant you poise - every little helps.
Electromancers // Ekriks Graycloud, The Precipice Of Chaos

|
Fire / Light |
|---|
Electromancers are easily the hardest mages that you can face in Ashbourne Village. They have a ton of tricks up their sleeves and they pack a punch. Not only that, but they float - you’ll need to alter your usual tactics here. They summon the following enemies during a chase:
- Sparklights, small creatures with long arms but nevertheless are easily smacked.
- Runebrighters, spear-wielding monsters who are a bit more challenging to take down, but not too tough when isolated.
- Lerkeseekers, floating enemies that fire lightning at you from afar. Try getting out of their range and using your own ranged attacks.
The Hunt For Ekriks Graycloud
You’ll find the start of this hunt in Valesnight Square, atop the platforms located just behind The Green Huntsman’s boss arena. Jump up and start the hunt - the mage should be very nearby.
Electromancer Attacks


- Electric Spear: The Electromancer summons a bright, glowing spear and stabs it towards you at a downward angle. This attack is immediately followed up with a ground stab that summons a line of telegraphed lightning strikes that you need to roll through. Sometimes, the Electromancer will summon two consecutive lines of lightning.
- Static Shock: The Electromancer will raise both hands and start charging electricity, with one of the hands producing a consistent bolt that points downward. They will then fire lots of electricity at a close-range, incredibly hard-to-dodge attack that you should roll away from. This seems designed to stop you rolling under the Electromancer.
- Ranged Static Shock: This is a long-range version of the previous attack, and you can tell that it’s being used if the consistent bolt of lightning is slowly moving upwards or downwards. The mage faces the direction of their lightning, so if you find yourself in the firing line, defend. If you are behind the mage, use this attack to punish with attacks of your own.
- Lightning Orb: The mage creates a slowly traveling orb of lightning that turns into three fast, homing projectiles. You can dodge this quite easily on its own, but it’s often paired with Electric Spears that make timing difficult.
Electromancer Strategy
- This battle is a test of two things: pattern recognition and your ability to punish enemies. You need to learn quickly that the best (if not only) time to safely attack the Electromancer is when they are using a Ranged Static Shock attack facing away from you.
- Don’t get greedy with attacks. You’ll likely have to use aerial attacks to damage them, and these are easily punished. The melee part of the Electric Spear attack comes out quick enough to punish any player stuck in the air. Pick your moments carefully.
- If you are sustaining too much damage, consider farming the enemies that the mage’s summons drop and crafting some Lerkeseeker Armor Set pieces. These will give you a hefty amount of Fire and Light resistance, reducing all damage sustained in the fight. The set requires Class 3 Light Armor. Alternatively (or additionally), craft the Red Amulet that you unlock with a Pyromancer heart.