Quick Links
Three regions down, only two to go! Dreadstone Peak represents quite a big step-up in difficulty in Salt and Sacrifice. There are some really tough enemies here that will attack you mercilessly, and the bosses are nothing to sniff at, either.
Luckily, you should be trained quite well by now, especially if you've been exploring thoroughly and taking on every challenge that comes your way. With that said, it's always possible to miss some things - here's our guide to Dreadstone Peak.
How To Get To Dreadstone Peak

To access Dreadstone Peak, you'll need to use the Luminstone at the top of The Great Tree in Corvius' Mire. This requires beating Marega Gredanya to get the Luminstone and beating the Sapblood Heart to get to the stone circle required. Once you learn the rune, you can travel to Dreadstone Peak through the Mirrorgate in Pardoner's Vale.
Whitecrag Path

Head to the east, platforming up the walls using the grappling hook. Grapple over the building, picking up the Grimgrip Cap on the way. Touch the obelisk for safety, and then enter the building, being wary of the enemy inside. Open the shortcut.

Head to the temple just to the east, and you'll fight The Two That Remain.
How To Beat The Two That Remain

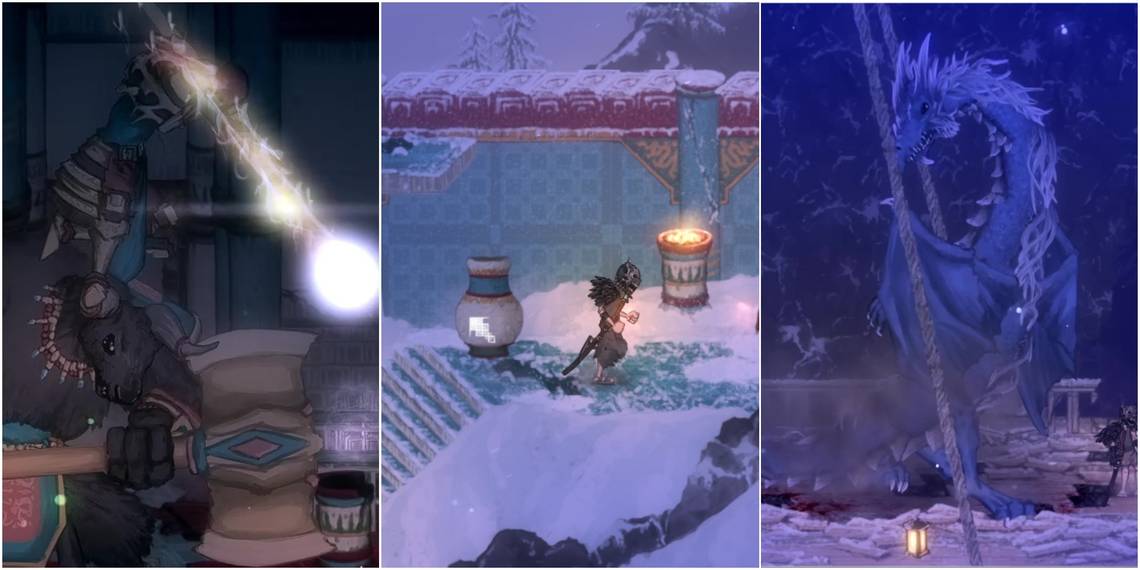
This boss has you fighting against two individuals: Ouros, the Living Will, and Tenur, Valorous Blade. Ouros is the one with a bull's head (remember, it's like Taurus!).
Ouros, The Living Will's Attacks


- Charging Axe: Ouros charges at you with the axe placed on the ground. You can roll through this attack, but it has a huge hitbox.
- Downward Thrust: Ouros stoutly thrusts the axe down at you.
- Uppercut: This attack involves Ouros thrusting the axe into the air with both hands.
- Leaping Smash: Once the pair reaches half health, Ouros' leap will now have an attack attached, smashing either the axehead or the butt of his axe on the ground.
- Runic Explosions: When close to death, Ouros can smash the ground with his axe, summoning runes that hover in the air on either side of him. After a short moment, these runs will explode.
Tenur, Valorous Blade's Attacks


- Sword Slam: Tenur raises his sword high and then slams it down at you.
- Backward Leap: Tenur leaps backward and immediately thrusts his sword forwards.
- Uppercut: Tenur sweeps his sword up in the air.
- Kick: A simple kick that might send you flying.
- Light Projectiles: When low on health, Tenur can leap up into the air and fire a ball of light at you. When close to death, more balls are fired. The balls will track you slightly.
The Two That Remain Strategy
- The vast majority of the attacks you'll face in this battle are very easy to dodge. The problem is that there are two of them attacking you at once. You can't even try to split them up, as they both have fantastic leaping gap-closers, which Ouros eventually turns into an attack of its own.
- As long as you don't panic, this battle is incredibly easy to finish. You should have plenty of moments to heal, both bosses have highly-punishable moves to exploit, and there's plenty of time to learn their attacks at the start of the fight before they get too aggressive.
- The pair share a health bar - you can't make the fight easier by finishing one off quickly.
Obtain The Ethercloth Bolt

Head east from the boss arena and use the Grappling Hook to get to the higher levels of the temple. There will be some ledges on the east that you can wall jump up and a small room next to a permanent updraft.
Check the corpse in the small room to get the Ethercloth Bolt, the latest in the line of Inquisitor Tools that you can use to access new areas.
To use the Ethercloth Bolt, press the block button whilst in midair.
The Temple Of Eleven

You’ll have quite a bit of the temple to explore when you first arrive, but the rest of the area is blocked off by sealed doors, and you know what that means!
The first and only Named Mage Hunt you can take on is located halfway up the temple, on the western side, and underneath a grapple point. Use this to hunt the Neuromancer. Hunting the Neuromancer should lead you all around the temple - use this opportunity to get to know the enemies here, and loot everything you can.
For tips and the locations of all mages in Dreadstone Peak, click this link to open our guide.

With one mage beaten, you can unlock the sealed door at the very top of the temple - this is usually where the Neuromancer will have a showdown with you. Behind the door, you’ll find the hunt for the Chronomancer, who you might have spied beforehand.
To progress to the final area of the region, you’ll need to beat two more Named Mages. Your options are the Chronomancer, the Umbramancer, the Diablomancer, and the Dracomancer, who are all now available to you now that you’ve beaten the Neuromancer and acquired the Ethercloth Bolt.
Apart from the Chronomancer, who is found at the top of the Temple of Eleven, the rest of the Named Mages are found in technically optional areas, but it makes sense to detail them all as the chases will take you through all of them, so they’re listed in the most natural order below - barring the Umbramancer, thanks to the significant step up in difficulty that the Umbramancer represents.
Old Annex

To access this area, you’ll need to unlock the sealed door on the ground floor of the Temple of Eleven. It only requires one Named Mage heart.
Start dropping down in this area, and eventually, you’ll find a large updraft underneath a wooden platform. Drop down and use your Ethercloth Bolt to survive the fall. Talk to the individual here to unlock the Chaos Feast Faction.

Head to the west and use a combination of the updraft and the grapple point to get a chest that contains the Highblade Set and a Steel Blade. A little northwest from that point is the entrance to Pilgrim’s Respite. Ignore this exit and travel up the narrow passageway above. Activate the Magnesin pulley here, and you can head down to another Named Mage Hunt, this time for the local Dracomancer.
Pilgrim’s Respite

Form the entrance you find in the Old Annex, grapple over the gap. You’ll discover invisible enemies here that spit ice at you, so be wary and be ready to dodge at a moment’s notice.
If you head to the west on the upper level of the area, you’ll find the hunt for Nephael Mos, the resident Diablomancer. Now double back on yourself and drop down the gap you jumped over. Keep heading down until you reach a choice between a set of wooden stairs and stone stairs to the west. The wooden stairs lead to a shortcut door to Whitecrag Path.
If instead, you head east instead of choosing one of the stairways, you’ll reach the Blasphemer’s Vault by using your Luminstone and an ethereal grapple point up to a semi-hidden entrance.
Blasphemer’s Vault

Drop down immediately and open up the main doors, so you don’t have to use the Luminstone method again.
The large Vault Retainer enemies here hit hard and have a ton of health, but they have quite easily-avoided attacks. Just be wary of their icy bursts - roll away when they use that ability.
Head to the eastern wall on this floor, and you’ll reach a door that leads to an obelisk and an updraft. Ride the updraft and do a precise wall jump at the very top to reach the sack. It contains an Exotic Strand. The door behind it opens up a shortcut to the Old Annex.
Back in the main room of the Vault, drop down the platforms near the door. You’ll reach some enemies and a sack containing some Blazepyr Clusters. The stairs to the east only lead to some enemies, so drop down the platforms on the west instead. Keep heading west to find a long, fragile platform. Run across it and be ready to grapple over the gap at the end to get an artifact and some Frospyr Trios. The nearby door leads to the bottom of the Pilgrim’s Respite.

Drop beneath the platforms to the east of that long platform to find an obelisk. Definitely rest here, as the upcoming grappling challenge is tricky and dangerous. Head to the east and grapple across the top of the room. Succeeding at the grapple challenge will lead to a sack containing a Bluestone Mushroom and a short updraft challenge. If you take the updraft, you’ll be faced with a fight against Inquisitor Selet if you've been keeping up with his sidequest. For tips and strategies for this fight, check the optional section at the bottom of this guide.
On the ground in this room, you’ll find lots of Temple Highblades and Vault Retainers, but the eastern exit leads to some crafting materials, and heading west leads to a new area of Pilgrim’s Respite. This area contains an Umbral Creeper and leads to a Magnesin pulley you can use to connect the areas more conveniently. This is also a great area to mine some consumable materials.
The Falling Star

Once you have beaten at least three of the Named Mages in the area, including the Neuromancer, you can access the Falling Star, which is located in the sky above Whitecrag Path and the Temple of Eleven. To get there, head as west as you can go from the sealed door at the top of the Temple of Eleven, where the Chronomancer Hunt starts.
Grapple across to the large, hanging weights in the sky and then climb up to the floating shipwreck. The only way to get in is an entrance on the west.

Once inside, head straight to the west to find an obelisk. From here, climb up and then grapple across to the east, above the entrance you used to get inside. Start making your way up through the ship, taking a short detour to open the convenient door that leads outside. Head as northeast as you can go to reach a sack with an Umbral Creeper inside.
Head back down a little until you reach the large gap that leads to some stairs that go northwest. There’s a semi-hidden grapple point you can use to get across. This is followed by an easy platforming challenge that involves running across a breakable platform and then grappling across. You’ll have to fall down the hole here, aiming to the left to fall onto the tallest ledge instead of falling all the way to the ground. Keep moving upwards, and you’ll reach a door to the outside.

Once outside, immediately head to the northwest to find a sack with some Frospyr Clusters inside. Drop down the west side of the ship, using your Ethercloth Bolt to survive, and open the door at the bottom - it leads to the ledge above the obelisk.
Now, head back up to the main part of the ship and step onto the deck - you’ll face a boss battle.
How To Beat Kraeaxenar, Wyrm Of Sky

This big, brutish dragon can dish out the hurt, but if you've been leveling up plenty and training against the more difficult mages, you'll have no trouble felling the foul thing.
Kraeaxenar's Attacks


- Frost Breath Flyby: Kraeaxenar will take flight and start drifting across the arena slowly, with a flame forming in its mouth. After a few seconds, it'll start breathing a huge jet of frost at the ground. To avoid this, get underneath and behind the dragon before the breath comes out.
- Hovering Frost Breath: The boss will take flight and start breathing frost at the ground immediately. The radius for this attack is huge. This attack is used once the dragon hits half health.
- Frost Breath: The boss emits a huge jet of frost breath from its jaws. Beware that the boss may aim this at the ground and slightly behind itself, so being at the dragon's back is not necessarily a safe zone.
- Claw Combo: A swift swipe to the front, followed by a pound on the ground.
- Bite: A swift lunge forwards with a biting attack. This is very quick, so roll when you see the attack starting.
- Tail Swipe: A melee attack using the tail.
Kraeaxener Strategy
- The attacks that keep the dragon busy - namely those that keep it up in the air - are great opportunities for healing or for pelting the boss with ranged attacks.
- You can tell whether the dragon's frost breath will be able to reach you behind the boss by how it's standing when the attack starts. If it's standing upright, the dragon can fire the attack slightly backward.
- You may need to roll a lot in this fight, depending on how often or aggressively the dragon uses its various frost breath attacks. Consider dropping down to a light equipment load if you haven't already.

Once the battle is over, make your way past the boss arena, opening the shortcut to the northeastern corner of the ship on the way, and then speak with the talking tree at the very front of the ship.
The tree will reveal how to get to Elder Copse, the next area of the game. Float down the updraft behind the tree to find the Cyan Tome of Fates and a Magnesin pulley that leads to the Temple of Eleven.
EVERYTHING BELOW THIS POINT IS OPTIONAL
Sentinel Caves

You'll find the Sentinel Caves to the west of Whitecrag Path, just down the hill from the starting point of Dreadstone Peak. There's a tricky set of updrafts that you'll need the Ethercloth Bolt to navigate here.
There are two entrances at the top. The east entrance leads to Sentinel Caves, while the west leads to a small room where you'll find Inquisitor Amben. The grappling you'll need to do to get to Amben is tricky - try getting to the eastern platform first and then jumping past the right-most grapple point - you should be able to latch onto the middle grapple point in a way that makes getting to the western door easy.

Inside Sentinel Caves, you'll find a nice collection of loot - namely some Voidepyr Clusters and a Shimmering Bud. In addition, there's also a chest containing the Dusken Set and an Iron-Band Stave. This is also where you'll find the Umbramancer Hunt, which is made far more difficult than it needs to be, thanks to how dark the caves are.
Right at the top of the caves is an exit that leads to the bottom of The Falling Star through a series of stone circles and ethereal grapple points.
How To Beat Inquisitor Selet

Beating Inquisitor Selet will net you some crafting materials and the Manganian Set, which is what he wears.
Inquisitor Selet’s Attacks


- Double Slam: Selet raises his sword before bringing it down in your direction. He will do this twice, facing you at the start of both strikes.
- Double Thrust: Selet thrusts his sword at you twice. Unlike Double Slam, Selet will be locked into one direction during this move.
- Twisting Uppercut: Selet will spin on the spot and slash his sword upwards before performing a horizontal thrust.
- Leaping Slam: Selet leaps at you, bringing his sword down hard. This attack doesn't have much range.
Inquisitor Selet Strategy
- Selet is an aggressive opponent, but he's also quite slow to keep up with you if you make an effort to create distance. Use this to heal and pelt him with ranged attacks.
- The best move to punish is Double Thrust - when he uses it, roll through him and attack from behind.
- If you have a quick weapon, such as a rapier or a highblade, you may also be able to punish Double Slam quite effectively. Strike when Selet holds his sword up, then immediately roll through him. You can repeat this if you're quick enough. Watch your Stamina, though!
Optional Tasks

- Once you have beaten all five mages, there is a sealed door outside of the Temple of Eleven that has a Nameless Hunt behind it.
-
There is a sealed door on the eastern side of the Temple of Eleven that requires you beat two Named Mages before you can enter it. If you spoke to them in Pardoner's Vale, inside is the Royal Retinue - speak to them to learn why they're there.
- If you then leave the region and then return, there will be a chest here that contains the Royal Set.
- At the bottom of the Magnesin pulley underneath The Falling Star, there is a stone circle. Use the Luminstone here and quickly head back up the pulley. Sprint across to the west and use the ethereal grapple point across the gap to reach the Nameless Neuromancer Hunt.