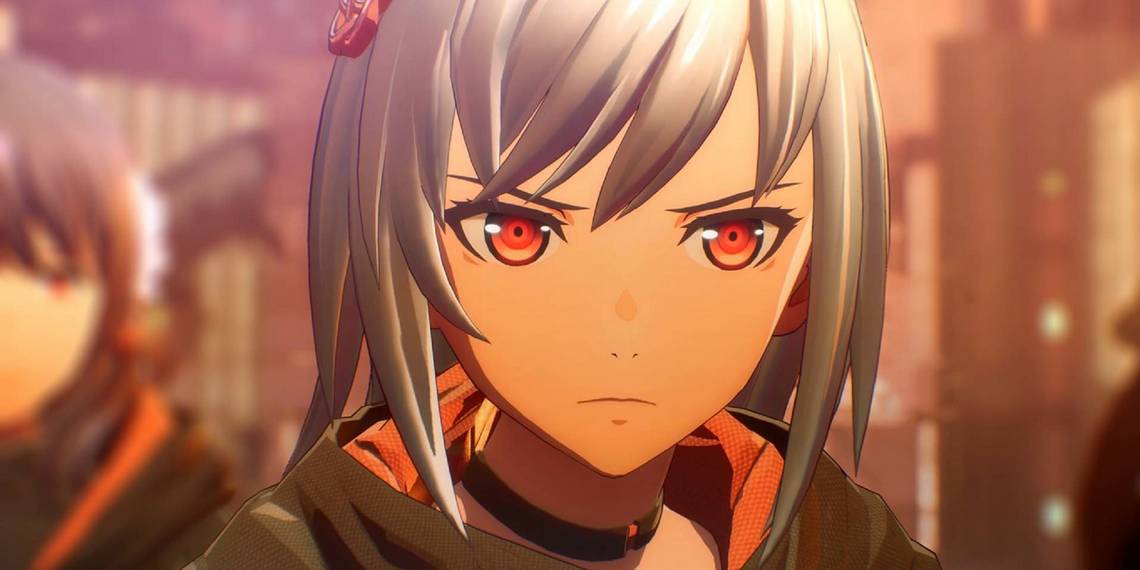
The brilliance of Scarlet Nexus stems in large part from the game's ability to keep players invested in two separate story paths each featuring its own protagonist. Even more so than older JRPGs such as Tales of Xillia, Scarlet Nexus manages to segment the plot between hero and heroine, Yuito and Kasane. Fans have argued over which of the two paths is harder, as their key divergences prompt several wholly unique encounters.
Regardless of where you fall on that heated topic, it's difficult to deny a few handy tips for every major foe who stands in Kasane's path. Scarlet Nexus' leading gal has some tough ones ahead of her, and more than once the game swerves something challenging enough to warrant the usage of guides. Guides like ours, in fact. So keep our tips in mind as you save the world one urban mystery at a time.
Strategies for Every Boss on Kasane's Route

Wither Sabbat

Kasane shares her first boss fight with Yuito, as befits the standardized and all-purpose start to Scarlet Nexus. In fact, you'll fight alongside the game's co-protagonist in this bout, making things easier and relieving you of some rigors of the game's latter conflicts.
- Don't hang out near Wither Sabbat for long. Get in and get out; it'll hit you with its legs as a counter strategy if you remain within range.
- Wither Sabbat's forward charges are exactly that – forward-facing. This means you can predict that when it rears up like it's about to rush, it will only rush in the direction it's presently facing. Move to the side or behind.
- If it seems to be getting up on two legs, it isn't; instead, it's about to roll its head back and forth angrily. Run out of its range immediately.
Dispen Perry
By this point, you will have encountered and dealt with a debuff or two. Dispen Perry's favorite debuff is Wet, which slows the target's movement speed. In a game like Scarlet Nexus, that's pretty irritating.
- Watch out for when the boss' legs start to wobble. This is your clue that it's about to jump forward for a ranged strike.
- The water cannon is how Dispen Perry gets Kasane's speed lowered, so try to stay out of range of it, but know that there will be times when you'll likely get hit at least a bit. Don't sweat it.
- Use Psychokinesis on the dump trucks that the arena cleverly marks for Kasane. Your goal is to shatter Dispen Perry's cannon with the trucks, which will not only make it vulnerable to your attacks but even inflict Wet on the boss itself. Nice.
Brawn Yawn
The beam that Brawn Yawn fires is no joke. It's probably at least a little more powerful than one might expect so early into the game, so do your best to get out of Dodge, as the saying goes, with well-timed dodges whenever it's en route.
- Like Digletts and Dugtrios from a certain entirely different franchise, Brawn Yawn loves to dig deep underground and then emerge where Kasane is situated for a strong blow. The great news here is that, by evading its arrival spot, you can actually unload on Brawn Yawn, as it will be temporarily vulnerable to attacks after its emergence.
- You'll see us say this a handful more times going forward, but Invisibility and Duplication truly are Kasane's best tricks here. Both will keep this beefy monster on the defensive. Pair Duplication with Psychokinesis for excellence.
Yuito Sumeragi (Phase 3)

It's time for Kasane to go all-out against a fellow humanoid. A humanoid with a propensity to deliver relentless sword strikes, at that.
- Keep your distance whenever Yuito begins his flurry of sword strikes. They're short-ranged, but speedy enough to maintain a threat. Getting hit by one may mean soaking damage from several more.
- Yuito's relationship with Psychokinesis is something of a double-edged... well, sword. The irate fellow can use it against Kasane, meaning she'll need to Intercept what he throws at her (or Perfect Dodge if possible). But on the other hand, he's weak to Psychokinesis, so go ham in exchange.
- The fight changes, or rather its opportunities are altered, when Yuito's health is low. At this point, tap into the parking lot's various pole-like objects; a QTE button-mashing sequence thus occurs, so mash away and victory's yours.
- Mind you, don't fret if you lose. The story continues on regardless!
Kodama Melone (Phase 4)

Like Yuito, Kodama's got a real thing for slashing her sword around. These attacks have high priority, so don't try to tango with them. Stay out of their way whenever possible.
- When Kodama hops up a little in place, there's a good chance she's about to use an attack that affects a wide-ish area. You'll know the one; it's got a distinctly lightning-esque look to it. Use Sclerokinesis to alter the lightning's flow, leaving her vulnerable.
- Confuse State is probably the most worrying thing Kodama can inflict. WIth the Confuse debuff, the game's inputs are changed so that players will find maintaining momentum quite tricky.
- If you're struck by this, do your best to keep your distance rather than attempting to attack. Your end goal is to shatter her shield, and as usual, Psychokinesis shall help here.
Shiden Ritter
The nice thing about Shiden is that his flashy baton antics make evasion a (relative) piece of cake. Sure, he'll try to close the gap with Kasane, but so long as you're light enough on your feet, he'll never get you.
- Once his baton combo has concluded, Shiden's vulnerable for a couple of seconds. Use this timeframe well, hitting him with physicals of your own.
- By now, you'll know that breaking shields is pivotal. There's a bit of a twist. Well, not so much a twist as a feature? Regardless, the gist is this: once his shields are broken, Brain Crush is the best move you've got. The thing is, Shiden's shields come back online as part of the equation, but it's give-or-take, and it's distinctly in your favor.
Karen Travers

Veteran JRPG fans will know that there are some fights you're just not supposed to win. Think of Karen in this fashion and save yourself some hassle. For drama's sake, you can pummel away as best you can, but as soon as he unleashes his Brain Field, the fight concludes regardless.
Winery Chinery
With Yuito by her side, Kasane's odds are improved considerably. Rather than Winery Chinery itself, your best bet is to focus on Yuito instead. You'll still want to avoid the boss' attacks, but here's what we mean.
- Keep Yuito's health topped off so that he can continue to whittle away at the enemy.
- Simultaneously, keep Winery fixates on you. Run around the battlefield, taking pot shots. Think of it as maintaining "threat" or "aggro," to borrow MMO terms.
- Psychokinesis some objects when possible, but after enough time a healthy enough Yuito will carve away at its HP respectably.
Yuito Sumeragi (Phase 4)

It's a rematch against Yuito, and this time, it's a battle of attrition. You win by keeping Kasane alive until a certain point, upon which the story kicks in, and the plot treats things as something of a draw. The main thing to bear in mind now is that Yuito's sword flurry will last longer, so you'll want to stay way that much longer by proxy. In fact, perhaps it's best to just keep your distance the entire time until the cutscene triggers.
Yuito Sumeragi (Phase 5)

Things are on the rebound now, which is awfully fitting considering our best advice is to make sure Kasane knows the Rebound ability. Let's talk about why.
- Yuito, now more than ever, is capable of stunning Kasane for uncomfortably long periods of time. Since this, of course, leaves her open to further attacks your best bet is to keep the Rebound ability around to decrease the amount of time this is the case.
- We're back to familiar territory here, but Yuito's going to launch objects at Kasane with Psychokinesis, meaning you're going to want to do the same thing right on back at him. Perfect Dodge is another fine alternative when necessary.
- Kick up Brain Field Convergence as soon as possible to knock some sense into Yuito bit by bit.
Rotunda Pagoda
Scarlet Nexus sure does love its silly names, doesn't it? But don't take Rotunda Pagoda too lightly. Whenever this giant boss opens itself up, Kasane can get stunned as well as soak up a ton of damage if she's too close.
- Over the course of the fight, an increasing number of pillars will surround themselves with area-of-impact electric circles. First, there's just the one. Gradually, up to four will be enabled. Avoid these.
- The bulk of the fight is actually not so much against Rotunda Pagoda as the Filler Pillers it launches at you. These come in several "flavors," so to speak, including bombers and gunners.
- Although most of the time you'll simply treat this as a barrage from regular-tier enemies, the Filler Piller Bombers are sort of your best friend. The nicest way to kill Rotunda Pagoda, and by nicest we mean deadliest, is to enlist aid from Duplication, raising the number of Bombers altogether and then tossing them all at the boss. Ruthlessly efficient.
Yuito with Tsugumi and Luka

This guy just can't seem to take a hint, can he? It's almost like Yuito is possessed of a protagonist's grit.
- We recommend the following order of operations here, because as is typical of ARPG multi-enemy battles, the faster you reduce their number, the better your odds of survival.
- Tsugumi should be taken down at the earliest opportunity. Tsugumi's got the ability to launch attacks at your team from afar, which can keep Kasane frustratingly afar. By eliminating this foe, you can begin to close the gap.
- Yuito taps into Luka's Teleportation like there's no tomorrow. So, let's stop that nonsense by getting rid of Luka.
- There are numerous objects in this battle that can be used to your advantage. Mind, they can be used to your enemies' advantage as well, so beat them to the punch, especially once Yuito is isolated. These include vending machines, electric accoutrements, and barrels of water that are just perfect for inflicting the Soak debuff.
Kodama Melone (Phase 7)
Getting toppled is no fun, so keep your distance from Kodama's wide-range slash combos.
- There's not a lot to say about Kodama's rematch. That's not to imply it's especially easy, but it's hardly as challenging as many other climactic encounters.
- Hypervelocity, when paired with good old-fashioned standbys, can help you whittle away at Kodama. Brain Field is one such standby; trigger it once Kodama is down to about a third of their health, and the battle should come to an end.
Yuito with Gemma and Hanabi

By now, you must be thinking, "Yuito, good grief." And if you've played Yuito's route already, then you'll know the feeling's mutual. As in, you were telling Kasane good grief not so terribly long ago. Anyway, that's just the kind of game Scarlet Nexus is, so let's figure out how to finish things off with the guy once and for all.
- Gemma and Hanabi are going to annoy you. Accept it. Embrace itt. Hanabi's Pyrokinesis will tear through Kasane's health like the fire that it well and truly is. As old hat as it is to say, maintain your distance. Now more than ever, really. Gemma's whole shtick is in reverse – Sclerokinesis should be quite familiar to you by now, but yes, it's going to buff him with Scarlet Nexus' rendition of Final Fantasy's Protect spell.
- Like the last time Yuito hooked up with allies, we've got a recommended order of elimination. Lose Hanabi first. The sooner his over-the-top flaming charade is past you, the better. Afterward, you can more comfortably dodge Yuito's tried-and-true sword flurries whilst gradually removing Gemma from the board.
- After Yuito drops to a set amount of HP, your boss battle concludes.
Coil Moil
Brawny Yawn used to burrow underground and emerge in a predictable pattern. Coil Moil burrows and emerges unpredictably. To counter this, rely on Clairvoyance to tell you where the beast is headed.
- Your aim is to shatter the shell, of course, but Coil Moil tosses a wrench into the proceedings by enveloping its perimeter with pillars of water that rotate around it like squalls. Kasane's best bet is thus to employ Hypervelocity in order to bypass the dilemma altogether, hitting Coil Moil as planned thereafter.
- Slam Coil Moil with Electrokinesis and you can, believe it or not, prevent Coil Moil from moving for a prolonged period of time. Suffice it to say, unleash armageddon on the boss when this happens.
Kyoka Eden
Hypervelocity to the rescue once again! Kyoka's crossbow isn't just stylish. Its spread is wide and its range is downright ridiculous. This is coupled with the fact that tapping into Brain Drive grants Kyoka boosts in both regards, turning her into a full-time dodge fight without Hypervelocity.
- We'll go ahead and use Hypervelocity in a sentence for the third time in a row here, because it's seriously that important. Kyoka's pretty much cake if you can get buzz past her attacks.
- At one point, Kyoko will triple herself. Don't even worry about it – keep your speed up, and you'll do fine. You've been through far worse.
Kodama Melone and Yuta Melone

Kodama and Yuta team up for double the trouble on all counts. Bubble Slash inflicts the Confusion debuff, which as we've been over already can really put a damper on your battle strategy while it's active. The pair will also prance across the battlefield with their slash combos, essentially causing a scissor-like attack.
- Choose one and focus on them whilst avoiding Bubble Slash at all costs. From this perspective, it's a bit like an easier variation on those trio bosses you've been through before, but it can admittedly be harder to stick to either Kodama or Yuta.
- If you're having trouble with this path, then simply drop them each to around a third of their health pool and then use something mighty (like Brain Field most of all) to shore things up.
Dispen Fisher
After all Kasane's been through, there's not much Dispen Fisher will do to rattle prepared players.
- One thing to watch out for: Dispen Fisher will unleash a flurry of rather hateful little fishes once it's up on the ceiling. Hypervelocity your way away from them.
- That ceiling strike tends to occur most frequently once its backside's been struck with Psychokinesis, which should tell you all you need to know about when to prepare for it!
- Electrokinesis is your god-tier ally during the bout with Dispen Fisher. Its water-based lifestyle makes it highly susceptible to this attack. Rely upon it whenever and wherever you can.
Dominus Circus
You're going to want Clairvoyance and Hypervelocity shored up for Dominus. The bug-like boss drills ahead at you with its screw-like forward weaponry, and it does so in a fashion that sometimes even Perfect Dodge won't be enough to deflect.
- Clairvoyance will once again come to the rescue if and when Dominus Circus fills the battlefield with a foggy wind, masking its whereabouts. Without it, expect the dastardly creature to hit out of nowhere, and heal up immediately whenever it does.
- A barrier will go up whenever Dominus Circus is ready to be pummeled. We don't much care for barriers where Kasane is from, so utilize Teleportation to crack past it.
Karen Travers (Phase 12)

Karen, as befits a final boss, comes in not one but two stages. Your best bet is to tackle these separately, with the following techniques at the ready, respectively:
- In Stage One, shore up Kasane's defenses with Sclerokinesis and dodge Karen's considerable speed with a boost of your own via Hypervelocity. Save these up, using Perfect Dodge when Karen comes swinging in with his fists. Top off Kasane's health every quarter or so of the HP gauge that you remove from Karen, as he'll fire off a powerful Brain Field Convergence in response. Clairvoyance should indicate which of the duplicated Karens is the real one whenever he pulls that particular trick out of his bag.
- In Stage Two, you must contend with the statues of Sorrow, Rage, and Rancor. Sorrow comes first, and your goal is to destroy its bigger fan. Rancor is next, and ravage its Cluster Crystal (in the form of a truck), but look out for massive damage upon its arrival as well as the cyclones you must evade. Rage is last, and we recommend Pyrokinesis here.
- If you've kept up with your Bond Levels throughout the game, now is the time to cash in on them big-time. Combo Visions will obliterate bits of Karen's health in true anime JRPG form!