Quick Links
The fourth chapter of Scars Above focuses more on puzzles than on combat, which might be a welcome change after some of the battles you fought in the mountains. There are two main objectives; powering the elevator to transit control, then exploring Site Ven-Septa in search of Tamara.
Exploring the Transit Hub requires moving power sources around to activate several bridges and elevators, eventually bringing the batteries to a central point. In Site Ven-Septa, you'll need to decipher alien technology as Kate learns more about the Metahedron and the Custodian. With this guide, you'll know what to do every step of the way!
How To Enter The Transit Hub

Picking up immediately after Kate destroys the Construct, walk through the pipes you melted at the end of the previous chapter and turn right; the left-hand path is a dead end. Keep an eye out for a Knowledge Cube on your right.
At the end of the corridor you'll see a round blue pad on the floor to your left. This is an elevator; stand in the center and activate it to reach the second floor. At the top, shoot the orb to the left of the giant door with VERA to rotate the lock, completing the circuit and opening the way forward.
Follow the only path until you cross a bridge. On the far side, remove the power source from the terminal immediately to your right. This will remove the bridge, so you won't be able to go back unless you replace the power source. For now, place it in the other terminal nearby to turn on the elevator.
Take the lift back to the first floor, pick up the Knowledge Cube on your left, and use the bridge to cross the canal in front of you. There's another Knowledge Cube on the left after crossing the bridge. Collect it, then take the right-hand path; you'll find a pillar and a third Cube.
How To Power The Main Elevator

As you approach the pillar, the Apparition will point out the elevator that you need to take in order to reach Transit Control. Both terminals are inactive, so you'll need to find a way to bring two power sources here. Start by continuing along the path to pick up the power source and Knowledge Cube at the other end of the bridge.
Taking the power source removes the bridge back to the pillar. As before, turn on the elevator nearby and take back to the upper floor. While crossing the bridge that you find there, you'll be attacked by a Security Drone. A couple of shots to the green light on its front with your new Chemical Atomizer should be all it takes to eliminate the threat. Scan it and take the elevator it was guarding.
On the third floor, follow the corridor until you encounter a pair of Mechanical Arachnids. Destroy them and scan them, then pick up the Knowledge Cube to the left. A second pair of Arachnids will be coming from around the corner, so be ready!
Drop into the pool past the Arachnids and climb up to the other side. An automated turret will activate; its heat ray can deal heavy damage if you let it stay focused on you, so dodge repeatedly until it has to cool down, then blast the turret with the Chemical Atomizer to quickly destroy it.
Check the path to the left for a Knowledge Cube, then cross the bridge. Another turret is behind the right-hand column on the far side. Use the column for cover and destroy the turret between shots.
Take the power source from the terminal to the left and move it to the other side of the room. This time, nothing happens. On the wall above the new terminal is another rotating lock; shoot it three times with VERA to direct the circuit to the elevator. Note that you can also use this lock to send power to the elevator below you, but you can't power both at the same time.
You can refill your ammo by checking the blue storage container next to the elevator terminal.
For now, take the elevator down. At the bottom, turn right and remove the power source that you find there. Next, go to the other end of the path; by standing at the edge and aiming upward, you can rotate the circuit from the platform above, redirecting power to the elevator nearest you. Do so, but don't take the elevator back to the pillar just yet. Instead, use your power source to activate and cross bridge at the center of the platform.
Take the power source from the elevator terminal on the far side, then return and deactivate the bridge. You now have two power sources in hand; take the only remaining accessible elevator back to the pillar.
Use the Power Sources to activate the main elevator, and ride it to the Transit Hub. Use the orange terminal to activate the system, triggering a brief cutscene. Afterward, look behind you for a Knowledge Cube near the terminal, then board the sphere to move to the next area.
How To Get Through The Lab

Upon disembarking, check to the right at the bottom of the ramp for a Knowledge Cube, then continue along the main path. Pass through the door at the end of the hall and listen to a brief conversation with the Apparition. When she finishes, check to the left for a Knowledge Cube, then continue to the right of the DNA hologram. There's a second Cube to grab as you make your way to the next room.
After the cutscene, go through the door ahead of you. There are four Mechanical Arachnids guarding the elevator on the other side. Ride to the lower level, take the Knowledge Cube on your right after stepping off the elevator, and continue straight ahead.
Near the far end of the next room, two automated turrets will activate. Quickly duck behind the crates to the right to stay out of the line of fire - there's also a Knowledge Cube there! To destroy the turrets without taking damage, freeze one or both with the Cryo Launcher, firing over the crates to stay in cover. Once they're frozen, finish them off with the Chemical Atomizer.
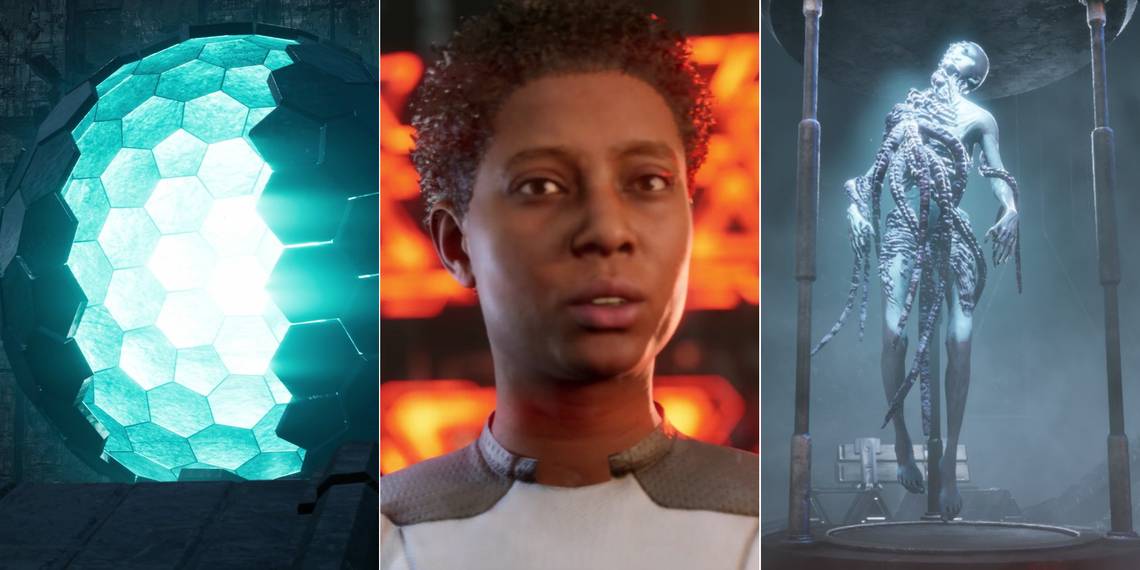
To the left of the turrets is an orange console. Translate the glyphs, then remove the power source. The main door is gene-locked, so take the path to the right. The specimen room has two Knowledge Cubes; one to the right as you enter, and one in the storage room behind the humanoid specimen.
After collecting the Cubes, look for a pair of ramps near the spot where the Apparition was standing. Insert the power source into the terminal at the bottom, then take the upper ramp to activate the console above.
How To Solve The Specimen Cylinder Puzzle

To solve the puzzle, you need to move the humanoid specimen to the slot on the left. Start by moving the humanoid (the rightmost cylinder) to the dead end in the upper-right corner.

Next, move the second cylinder from the left up one space (you can't see that there's a path available until the cylinder has been moved). Move the third cylinder one space to the left, then bring the leftmost cylinder all the way along the bottom path to put it in the spot that you just emptied. This should give you a path to move the humanoid to the goal.
How To Reach The Central Control Room

Retrieve your power source and take a DNA sample from the specimen. Return to the gene-locked door and use the scientist's DNA to open it. Use the elevator on the other side. Pick up the Knowledge Cube on the left, midway between the two holograms, then go through the door straight ahead. This optional route contains several gene-locked doors that can be opened with the blood sample, as well as an elevator that requires the power source. It rewards you with three Knowledge Cubes and an upgrade for the Thermic Charger, making it well worth the extra time it takes to explore.
Return to the main path from the hologram chamber and pick up the Knowledge Cube and audio log in the next hallway. There's a second Cube on the other side of the crates, which you'll only see if you turn around after passing them. Collect it, then go through the door ahead.
In the control room, follow the outer path counter-clockwise. Halfway across a cutscene will trigger. Afterward, continue along the path, picking up the Knowledge Cube to your right along the way. You'll reach the central pillar; activate the console there to complete the chapter.