Quick Links
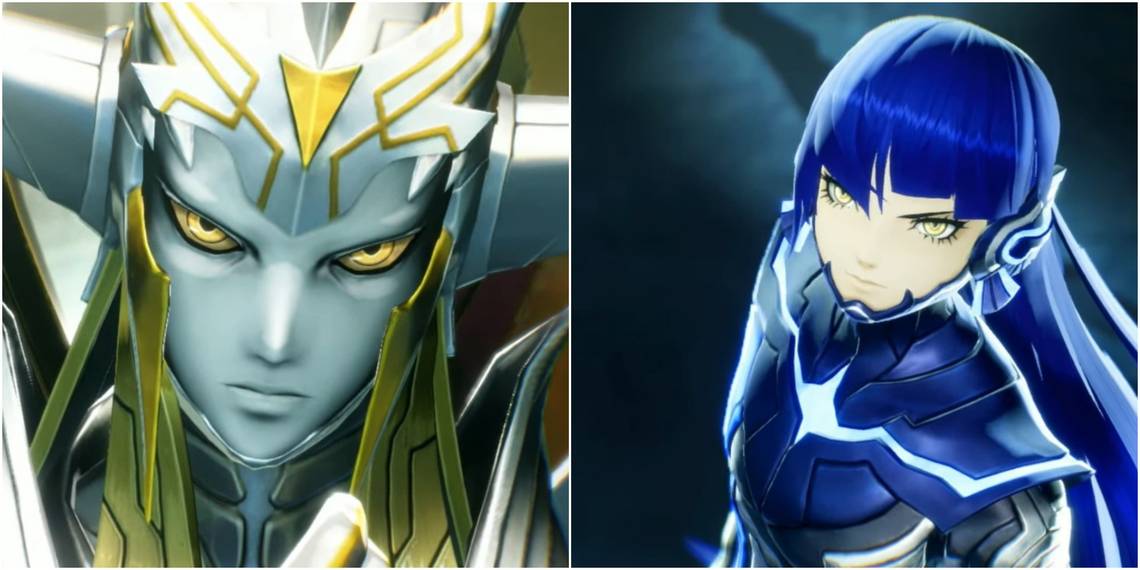
Killing Lucifer is no easy feat. I mean, he’s literally Satan who has murdered - and then absorbed - actual God. Guy’s a total beast in combat. Thankfully a few firm Hell Thrusts from Mara does the trick. The thing is, Lucifer isn’t the final boss of Shin Megami Tensei 5 - well, not the one you fought the first time around.
To fight Lucifer at full strength, you must first obtain the Secret Ending, which is easier said than done. Your reward for all that busywork is a truly monstrous New Game+ foe who will slap you around something rotten if you aren’t prepared for his overwhelming damage. Needless to say, you will need more than a dingus on wheels to best him this time.
We’ve got a guide covering the standard Lucifer battle if you have come to the wrong place.
Lucifer’s Potentials, Attacks, and Resistances

Potentials
|
Potential |
Value |
|---|---|
|
Physical |
8 |
|
Fire |
8 |
|
Ice |
8 |
|
Electric |
8 |
|
Force |
8 |
|
Light |
8 |
|
Dark |
8 |
|
Almighty |
8 |
|
Status |
8 |
|
Healing |
4 |
|
Support |
4 |
The above list of Potentials is not a typo - Lucifer really is that good at using everything. Because Lucifer has some of the highest potentials in the game, and those potentials are in everything, you need to go into this fight with a team that is weak to as little as possible. Best case scenario? Your team is straight-up weak to nothing.
As you can imagine, very few demons are up to the task, and many demons you’ve relied on up until now, are not going to make the cut. You have two options - spend a lot of time and resources transferring skills to craft the perfect demon(s), or, spend a lot of time fusing a whole new team.
Attacks
Phase One
|
Attack |
Explanation |
|---|---|
|
Agibarion +8 |
Lucifer deals Severe Fire damage to one party member. |
|
Bufubarion +8 |
Lucifer deals Severe Ice damage to one party member. |
|
Ziobarion +8 |
Lucifer deals Severe Electric damage to one party member. |
|
Zanbarion +8 |
Lucifer deals Severe Force damage to one party member. |
|
Megidolaon +8 |
Lucifer deals Severe Almighty damage to all party members. |
|
Falling Star +8 (Fire) |
Lucifer deals Severe Fire damage to one party member. This attack ignores affinity resistances and pierces through. |
|
Falling Star +8 (Ice) |
Lucifer deals Severe Ice damage to one party member. This attack ignores affinity resistances and pierces through. |
|
Cold Dark Matter +4 |
Lucifer maximizes his defenses for three turns |
|
Omagatoki: Critical |
All Lucifer’s attacks, including Magic-based ones, have a 100% chance of inflicting a Critical Hit. |
Lucifer has a whopping THREE phases, with each phase being substantially more powerful than the last. Looking at his phase one skill list, he isn't messing around and is planning on overwhelming you with elemental damage.
Few bosses in any game have a first phase as devastatingly powerful as Lucifer. All of his “Barion” skills are brutal. They’d deal massive damage if cast by a regular enemy, let alone one with the overwhelming power of Lucifer. If you are weak to any of these elements, there is a high chance you will straight up lose that demon. Thankfully, they are all single-target, preventing a total party wipe.
The only thing to look out for is Cold Dark Matter, which will once again raise his Defense to silly levels, and his Falling Star attacks.
Falling Star will conjure up two new ‘enemies’ for you to take down. If you don’t destroy these stars before Lucifer activates again, then you are getting nuked from orbit. These are priority targets.
Megidolaon is another spell of concern since this bugger will hit you for Severe Almighty damage, which can't be defended against. Be sure to bring demons who can take a punch.
Phase Two
|
Attack |
Explanation |
|---|---|
|
Freikugel +8 |
Lucifer Deals Severe, Strength-based damage to one party member. This attack has a high chance of landing a Critical. |
|
Gaea Rage +8 |
Lucifer deals Severe Physical damage to all party members. |
|
Magma Axis +8 |
Lucifer deals Medium Fire damage to random party members, three to eight times. This attack ignores affinity resistance and pierces through. |
|
Deadly Fury +8 |
Lucifer deals Severe Physical damage to one party member. |
|
Wild Dance +8 |
Lucifer has a chance of inflicting Confusion on all party members. |
|
Hot Dark Matter +4 |
Lucifer maximizes his Attack for three turns. |
|
Contempt Of God |
Lucifer adds two Press Turns to his next round. |
|
Holy Crucifixion +4 |
Lucifer minimizes Attack, Defense, Accuracy, and Evasion for one party member for three turns. |
|
Omagatoki: Critical |
All Lucifer’s attacks, including Magic-based ones, have a 100% chance of inflicting a Critical Hit. |
Lucifer’s second phase is no easier than his first, and his lineup of attacks, whilst not as varied, can be much more dangerous. Freikugel, for example, is more than capable of taking out an ill-prepared demon, or even Nahobino.
Gaea Rage is one of his only AoE attacks in this phase, and thankfully, it can be countered fairly easily. Physical resistance and immunity is a prime transfer, giving you plenty of opportunities to strip turns from Lucifer. Additionally, Retaliate and Counter are both great utility skills that can proc from Gaea Rage.
Magma Axis isn’t likely to do much damage, but the fact it punches through your resistances makes it particularly troublesome. It’s functionally the same as an Almighty attack but doesn’t do quite as much damage.
Deadly Fury can be an issue if you don’t have a burly demon capable of tanking the hit, ideally with resistances. Like with Gaea Rage, you can get Retaliate to go off with this skill, and it incentivizes some sort of Physical immunity - maybe from a Damper or Mirror. What’s more, this is Lucifer’s most-used skill during this phase.
Wild Dance is a pain to deal with. So much so, you might want to consider bringing demons who are immune to Confusion. Being crippled with such a debilitating ailment in a fight this difficult is not a good thing. At the very least, make sure you have one demon immune so you can throw an Amrita Shower and clear it before things go sideways.
Contempt Of God is just cruel. Whilst it doesn’t do anything the turn it’s cast, those extra Push Turns during his next activation can mess you up. There is no way to counter this other than hoping he tries to get physical with you, and you strip those extra turns with a block.
Holy Crucifixion is arguably Lucifer’s most devastating attack, and if he uses this on Nahobino and follows up with something like Freikugel, you might be handed a Game Over right then and there. Once applied, all your efforts should be put into getting rid of the debuff.
Hot Dark Matter is Lucifer’s only buff, and it’s hilariously good. Lucifer’s stats are already catastrophic, and when his Attack is pushed beyond that, things go from bad to worse. If used in conjunction with Holy Crucifixion, then say goodbye to your mate, because they’re about to be deleted. Stripping this buff is a priority.
Phase Three
|
Attack |
Explanation |
|---|---|
|
Inferno Of God +8 |
Lucifer deals Severe Fire damage to all party members |
|
Hailstorm Of God +8 |
Lucifer deals Severe Ice damage to all party members |
|
Lightning Of God +8 |
Lucifer deals Severe Electric damage to all party members |
|
Tornado Of God +8 |
Lucifer deals Severe Force damage to all party members |
|
Megidolaon +8 |
Lucifer deals Severe Almighty damage to all party members |
|
Morning Star +8 |
Lucifer summons a giant star. If this star survives until Lucifer’s next turn, Lucifer will deal Severe Almighty damage to all party members. Lucifer's Resistances will change to match the Morning Star whilst it is on the field. |
|
Cold Dark Matter +4 |
Lucifer maximizes his defenses for three turns |
|
Evil Gleam +8 |
Lucifer has a chance of inflicting Charm on all party members. |
|
Omagatoki: Critical |
All Lucifer’s attacks, including Magic-based ones, have a 100% chance of inflicting a Critical Hit. |
Lucifer comes in swinging in phase three with just about every element, in their strongest form, using nothing but AoE. Because this phase exists, you need demons who are not weak to anything - ideally demons who are resistant or immune to most things.
Lucifer isn’t just a master of the elements, however. Medidolaon is his trump card in this phase because there is no counter - there is no defense. Almighty damage punches through practically everything, and if you aren’t packing a seriously high health pool, it’s going to kill - especially if it’s cast multiple times.
When it comes to utility, Lucifer is well and truly covered too. Cold Dark Matter boosts his already ludicrous defense to an even higher plane of bafflement, and Evil Gleam will punish you for daring to take demons who aren’t completely immune to Charm. Because these skills exist, you must bring skills to strip buffs and cure ailments.
Finally, Lucifer is packing Morning Star. Morning star, like Megidolaon, deals massive amounts of unblockable Almighty damage. The trick with this skill is that it takes a full turn to go off. When cast, a new ‘enemy’ will join the battlefield, the Morning Star. If you kill it before Lucifer’s next turn, then you prevent the damage entirely. Fail, and you are looking at a potential party wipe.
Resistances
Phase One
|
Resistance |
Value |
|---|---|
|
Physical |
Resist |
|
Fire |
Null |
|
Ice |
Null |
|
Electric |
Null |
|
Force |
Null |
|
Light |
Drain |
|
Dark |
- |
There are three avenues for attack during phase one - Piercing damage, Almighty damage, and Dark damage. Thankfully, all three are very common on late-game demons, so this shouldn't be too hard to cover. Even a hearty Hell Thrust can do the trick here.
Do note that Lucifer can change his resistances when casting Falling Star. Since you should be focusing down Falling Star, this won’t be an issue since his resistances reset to his default once the celestial body purged from existence.
Phase Two
|
Resistance |
Value |
|---|---|
|
Physical |
- |
|
Fire |
- |
|
Ice |
- |
|
Electric |
- |
|
Force |
- |
|
Light |
Weak |
|
Dark |
Drain |
This is where your Light casters come out to play. You want to target Lucifer’s weakness here as it will generate bonus turns. Failing that, you can use practically anything and deal decent damage. Naturally, avoid Dark.
Phase Three
|
Resistance |
Value |
|---|---|
|
Physical |
Null |
|
Fire |
Null |
|
Ice |
Null |
|
Electric |
Null |
|
Force |
Null |
|
Light |
Drain |
|
Dark |
- |
Same as phase one - bring your Piercing, Almighty, and Dark demons. Similar to Falling Star, when Lucifer casts Morning Star, it will result in his resistances temporarily changing. Again, this isn’t an issue because your efforts should be focused on the star, not Lucifer when this happens.
Recommended Party Setup

Very few demons are capable of surviving Lucifer without some work done to them, so your priority should be to take demons who require the least amount of work to sing. Thankfully, there are a bunch of late-game demons who fit the bill.
As a standard rule, every demon here has amazing stats, and Potentials to die for.
Metatron
Metatron is the golden child of the bunch. He has no weaknesses and he is resistant to every standard element. This alone makes Metatron a must-have demon. He can fight in every phase, and is very unlikely to die.
Metatron also comes with the amazing Freikugel doubled with High Almighty Pleroma as standard, giving him amazing Almighty damage potential. Not only that, but he can also use Hamabarion to generate bonus turns during phase two.
Finally, Metatron comes with Dekaja and Dekunda allowing you to strip buffs from Lucifer, and debuffs from your party. Metatron is unmatched when it comes to utility, damage, and resistance.
Danu
Another one of those rare demons that resists, or is immune, to practically everything Lucifer has to offer. She is a supporting powerhouse with access to Luster Candy and a potent AoE Heal/Cleanse. In a pinch, she can whip out Hamabarion too, which can generate bonus turns during phase two.
Sandalphon
Sandalphon is almost a must-take because of his innate immunity to Physical damage. This makes him especially potent during phase two, whilst his immunity to Electric gives him an edge in the other phases. Topping off his kit are Freikugel and Hamabarion, similar to Metatron.
The only downside to Sandalphon is his weakness to Force, meaning you will need to remove that ASAP.
Maria
For support, very few demons can stand up to Maria. She comes with single-target and AoE healing, High Heal Pleroma, and a revive, and Luster Candy. These are all high-priority skills. She backs this up with immunity to Force but stumbles with a weakness to Electric. Because Lucifer tends to throw lightning around, this will need to be removed.
Belial
Belial is the Physical brawler of the bunch. When it comes to his skills, there is nothing special about him other than his access to Hell Thrust combined with a stupidly-high Strength stat. He is weak to Ice, so that will need to be removed, but comes with Null Fire and Force to make up for it.
Preparing For Battle

Essence Fusion
To get Nahobino ready for this scrap, you will need to transfer as many resistances as possible onto him. Thankfully, there is an Essence for that - Metatron. Like the demon that should be in your party, Metatron’s Essence gives Nahobino a resistance to practically everything. A must-take. If you want to get fancy, you could also transfer over some Null-based skills, but this shouldn’t be required.
For damage, the best way for Nahobino to go would be to heavily invest into Almighty damage. Using Miracles to buff your Potentials and transferring High Almighty Pleroma is a must. You could also consider bringing some powerful Light-based attacks to take advantage of Lucifer’s phase two.
Dampers And Mirrors
One of the easiest ways to bypass Lucifer’s elemental damage is to bring Magic Mirrors. These consumables will reflect any magic damage onto Lucifer - the only exceptions being Piercing and Almighty. These are catch-all super Dampers and can give you an edge during the first and third phase.
Physical Dampers are also fantastic in this fight but should be saved for Lucifer’s second phase. Because Lucifer favors Deadly Fury, you can punish him heavily without much investment.
Elemental Dampers are nowhere near as effective in this fight as Physical Dampers or Mirrors, but they can be handy if you have demons weak to a specific element and you haven’t been able to remove them.
Amrita
Because Lucifer can Charm and Confuse your party, having a stock of Amrita Showers can help purge your party. Spells can also do this, but those cost MP. May as well convert all that Macca into significantly more efficient Items.
Max Magatsuhi
Having Max Magatsuhi is always a good idea, and this mentality doesn’t change against Lucifer. Popping this early and laying into Lucifer for massive damage before he gets rolling just makes sense. It will shorten his phase one and catapult you into phase two, which is easier to deal with in some ways.
Battle Strategy

Like with every boss in Shin Megami Tensei 5, preparation is the key to success. If you go in with the right party and have put in the work to cover their weaknesses, Lucifer will be significantly easier.
That being said, there are still things you can do to smooth out your path to victory. Firstly, ensuring Luster Candy is always active is a must. Similarly, applying Debilitate is also a fantastic use of MP. Because Lucifer has no way of cleansing or stripping, you can drastically tilt the balance of power by keeping these active.
Be wary of Hot/Cold Dark Matter, however. Both of these abilities are nasty and should be removed with Dekaja immediately. Dekunda should be used the moment Lucifer tries to get tricky with Holy Crucifixion too.
Outside that, use Light, Dark, or Almighty attacks based on phase, and take him out.
Congratulations, you’ve completed the Secret Ending to Shin Megami Tensei 5.