Quick Links
Sniper Elite 5 is a fantastic addition to a beloved franchise. The combat, along with the creative third-person shooter level design, combine to create an experience that's not only entertaining, but challenging and memorable as well. Each mission in Sniper Elite 5 features multiple ways to tackle your objective and includes a versatile layout.
The Atlantic Wall is the first mission in the main campaign, but that doesn't mean it's going to be a walk in the park. Here's everything you need to know to effectively tackle The Atlantic Wall, along with some useful tips for how to finish every optional objective.
How To Start The Atlantic Wall

The Atlantic Wall is the first campaign mission in Sniper Elite 5. Launch the game and click on the Campaign button. Choose "The Atlantic Wall", and a menu will pop up where you can customize the difficulty, among various other options.
Additionally, you can choose to turn on or off the Axis Invasion option. If you choose to keep it on, then other players can invade your match and attempt to kill you during the mission. After selecting the correct settings, you can start the campaign.
Neutralize Searchlights

After watching a short cutscene, you'll be placed on a submarine just off the coast, where you'll need to shoot two searchlights along the coast. The searchlights are very bright, and you can easily see them using your rifle's scope. Shoot the searchlights and the soldiers operating them will be hit at the same time due to the blast.
After destroying the searchlights, you'll be transported to the beach. You then need to follow your quest marker north through the beach. Upon coming across a climbable platform - climb it and then climb the vines to the left.
Secure The Beach

After walking to the west and sliding down a hill, you'll soon encounter enemies patrolling the crossroad path. You can crouch down into the tall grass for cover and whistle in a patrolling soldier's direction to get them to come to you, then sneak up behind them and defeat them with a melee attack.
While performing melee attacks, you can choose to kill the target or only incapacitate them. Melee is the easiest and least risky option on this first encounter. Search the enemies for supplies and then continue onward.

Take a right at the crossroad after defeating the enemy near the grass, you'll then come across a clearing with structures to the left and right of you. There are a few enemies who can spot you if you're not careful, so you may want to defeat the soldier standing on the left-hand side's ledge with your rifle.
Climb up a wall of to the right, defeat the enemy on the right-hand side, and search him to get the Boathouse Key. You can now open the door to the Boathouse next to the officer, which contains the Resistance Captured document on the table in front of you.
Upon leaving the Boathouse through the western door, you'll need to defeat two soldiers who drive into the area in their car - either use a grenade to kill them as they get out of the car, or separate them and take them out stealthily. Now continue west up the path.

On the right side of the road, there's a ledge you can climb up. You'll encounter an enemy directly after climbing onto the ledge, but he won't see you right away if you wait until his back is turned, so take this opportunity to defeat him quietly.
There are two more soldiers that you need to defeat nearby. Either use your rifle to defeat them, or hide behind objects for cover and do it quietly.
Help The Resistance

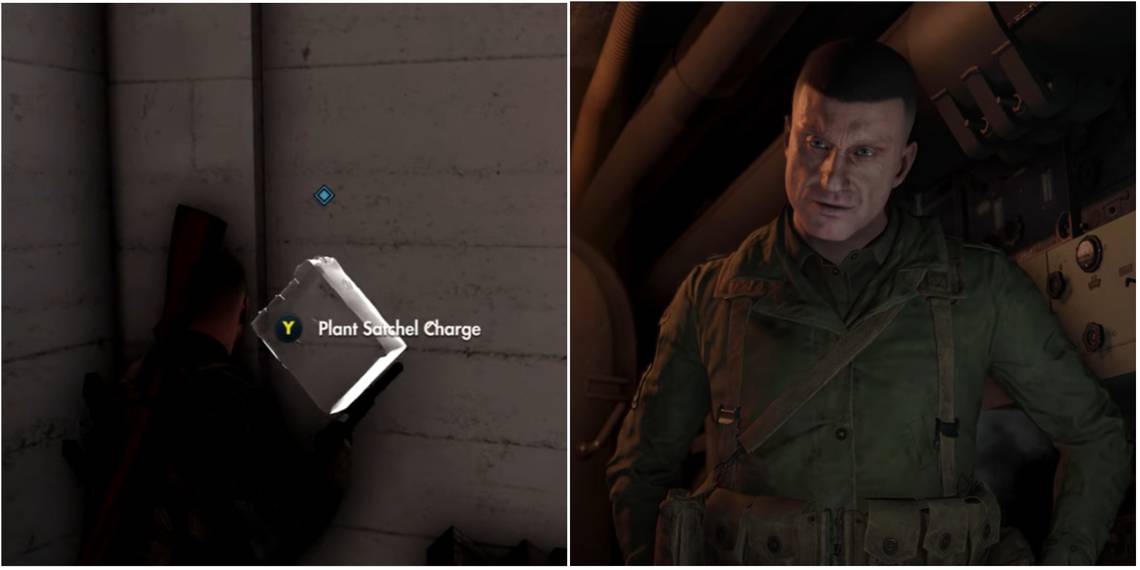
After defeating all three soldiers in the area, walk into the building on the right side of the checkpoint via the door. Blue Viper, also known as Charlie, is inside this building. After a brief conversation, you can travel through the door to the left and pick up the Bolt Cutters on the left side of the room.
After walking up the stairs, you'll encounter a door that you need the Bolt Cutters to open. There's a soldier inside this room, but you have the element of surprise. There's ammo in this room, along with a Rifle Workbench that you can use to customize your weapons. After you're done, travel through the door on the left side of the room to exit the building, then move through the tunnel in front of the door.
Neutralize Radar

Continue traveling north after exiting the building, and you'll eventually see a Radar Tower in the distance. There's a lot of tall grass that you can hide in to avoid combat or take easy shots at soldiers without them spotting you, so use this to your advantage to continue advancing through the fields.
You'll encounter soldiers regardless of staying on the left or right side of this area. However, there's enough grass and cover that you can sneak past them with little trouble. Once you travel further north, you'll come across the Radar Tower, along with trenches in front of it.

There's a truck in front of the trenches, near the middle of the field. Interacting with this type of truck gives you the option to sabotage the vehicle, distracting nearby soldiers, and allowing you to advance into the trenches with much less enemy resistance.

There's an opening into the trenches on the left-hand side, and you can simply sprint into it after defeating the enemy sniper that's sticking his head out, along with the other soldiers patrolling the area. You will encounter a few enemies that walk around within the trenches, but if you stay undetected and defeat them one by one, you won't have to deal with reinforcements. Prioritize stealth above all else in this area.
If the Nazis send for reinforcements, shoot the alarms near the Radar Tower. This will stop more soldiers from arriving to the area.

You need two Satchel Charges to blow up the Radar Tower.
You can find one directly behind the Radar Tower, after exiting the trenches. It's next to a bunker entrance. A second Satchel Charge is inside the trench tunnels next to a stash of military supplies.
After defeating every enemy in the area, you can climb it by approaching it from behind, where you'll find a ladder. Once you reach the highest level, you'll have quest markers indicating where to place the Satchel Charges.
Ignite the Satchel Charges once they're both in place, but make sure you choose to slowly ignite them to give yourself time to get off the Radar Tower safely. Once both Satchel Charges are set to explode, interact with the Zipline on the right side of the Radar Tower's platform.
After reaching the bottom and seeing the Radar Tower explode, you'll now have multiple optional and mandatory objectives to complete. However, there's also an optional way to deactivate the Radar Tower without explosives.
Option B: Sabotage The Radar's Power Source

You can sneak into the trenches next to the Radar Tower and enter the bunker through its entrances. The door on the northern side of the bunker is open by default, so travel through it, defeating the patrolling soldiers. Now that you're inside the bunker, travel down the stairs next to the doorway, dealing with guards along the way.
Next, look for the generator in the south side of the bunker's bottom floor. There's a Crowbar on a desk in the room to the east of the generator, so pick it up and then walk up to the generator and interact with it.

There's a safe on the right side of the generator, in the next room. If you use a Satchel Charge to blow it up, you can collect the Lacking Air Support document, which will mark the location of three Anti-Aircraft Weapons on your map. You don't need to get this intel to destroy the Anti-Aircraft Weapons, but it'll be easier since you'll know exactly where they are.
Leave the bunker and head back through the trenches. There's a second open bunker behind the Radar Tower that you'll see after exiting the trenches from the back, north of the first bunker. After defeating the enemies outside it, walk in, and you'll see a panel that you can interact with on the wall, completing the objective.
(Optional) Destroy The Anti-Aircraft Weapons

There are three Anti-Aircraft Weapons within the area that you can destroy. For the first one, you'll need to travel northwest of the Radar Tower. You'll find the exact location on the map above. There are two soldiers near the Anti-Aircraft Weapon and another one nearby, walking around the area.

Incapacitate or kill the soldiers and place a Satchel Charge on the AA Weapon. Once it blows up, there'll be three more soldiers that will run towards it, either avoid them by using objects nearby as cover or defeat them and make your escape. You can find a Satchel Charge on a table in the barn next to this Anti-Aircraft Weapon.

Leave the area and travel to the location above, which is south and the site of the next Anti-Aircraft Weapon. However, there are four soldiers in the immediate area, but there's a lot of tall grass that you can use as cover.

Either kill or knock out each of the soldiers, then you can attach a Satchel Charge to this Anti-Aircraft Weapon. If you don't have any Satchel Charges, you can collect one inside the trenches directly next to the second Anti-Aircraft Weapon.

The last of the Anti-Aircraft Weapons is west of the last gun you destroyed. There's a car, along with three soldiers patrolling in various positions around it. It's easy to sneak up behind the defenses in the area and defeat each soldier with a melee attack, but you can also shoot them from afar using your rifle.

It's fine if you don't have a Satchel Charge because you'll find one right next to the Anti-Aircraft Weapon itself. Set the Satchel Charge to blow up, then leave the area quickly. After you destroy all three of the Anti-Aircraft Weapons, you need to travel west to your next optional objective.
(Optional) Destroy The Gun Battery

Now travel to the far north-western section of the map, where you'll encounter the gun battery. There's an opening in the barbed wire fence that you can crawl through in the southern section. Head left after the fence, and you'll find a Satchel Charge outside the Gun Battery, inside a box that you can lockpick on the eastern side. Enter the building after defeating the two patrolling soldiers.

Once you walk through the door, jump off the railing to the floor below you, then enter the door in the middle of the curving hallway. There's a shell that you can sabotage with inside this room, as you see in the picture above.

After sabotaging the shell, you can leave the building through any exit and this optional objective will be complete. You can now travel southeast to complete the next optional mission. Be careful as you leave the area, since there are soldiers patrolling multiple sections of the building's interior and exterior.
(Optional) Neutralize The Coastal Defenses

Travel southeast to the location on the map above. You'll encounter two soldiers outside this location, but you can easily defeat them both.
After they're dead or incapacitated, walk into the bunker and turn to the left. You'll encounter a spot on the wall where you can place a Satchel Charge and light it to explode. Now leave the building and head northwest to the next location. There's a Satchel Charge inside the wheelbarrow right outside the bunker's main entrance, so grab it if necessary.

After you destroy the first set of defenses, travel northwest to the location above. There are three soldiers near this building, so keep your eyes peeled. There's a Satchel Charge northeast of the bunker's entrance, so pick it up before walking to the location on the map and placing it. Light it and then leave, traveling west into town.

Now travel southwest to the last set of Nazi defenses. This location is a house with a soldier inside it. Defeat him and climb up the ladder in the front of the building. You'll see a Mounted Gun where you can attach a Satchel Charge. Light it and leave the final building. If you need a Satchel Charge, then pick one up on the bottom floor of the building or by searching soldiers. You can now complete the Kill List objective inside this town.
(Optional) Kill List: Steffen Beckendorf

Killing Steffen Beckendorf is one of the quickest optional objectives in The Atlantic Wall. Steffen drives around the southern town in a car, but you can follow him using the quest marker on your map. Occasionally, Steffen's car will stop moving and he may even get out of the vehicle for a short time.

Once the car is stationary, you can shoot him in the head with your rifle. There will usually be a few soldiers near him, so you need to plan to either flee the immediate area or defeat them after killing Beckendorf.
The easiest way to kill Beckendorf is to wait until his car stops moving, then throw a grenade at him, killing him and the nearby soldiers. Killing Steffen with an explosion of any variety will also finish this quest's bonus objective.
Recover The Resistance Intel

Travel west until you reach the location on the map above, a quest marker will mark this house directly on your in-game map. The house is swarming with soldiers patrolling both, the interior and exterior, and you'll need to defeat them before continuing. You can lure them all out and kill them from a distance using your rifle. Alternatively, sneak inside and defeat each soldier using melee attacks.

The final strategy you can employ is killing the two soldiers near the door by shooting them in their heads or chests. After that, you can ambush the soldiers who come out to investigate.
Next, walk behind the house and into the backyard. You'll find some vines that you can climb on the house's back, which will lead you into the attic through a window. Marcel is dead in the attic, but you can search him to find Marcel's Key. There are lots of supplies in this room as well.

Walk through a door on the right side of the attic and destroy the planks leading downstairs. Enter the bedroom on the left. Open the safe in the floorboards underneath the bed to find the safe and the items you need to progress in the mission.
Exit the house through the front entrance and turn onto the left side road. You can follow this road further west to meet Charlie. There may be more enemies guarding the buildings nearby, but it will depend on how many soldiers you defeated earlier. Regardless, the road to the left of the house won't have many soldiers patrolling it.
Exfiltrate

After recovering the intel, you can meet with Charlie again by traveling west while following your quest marker west up the main road. Your quest marker will guide you to the exact location, and you should only encounter one enemy right before you enter the area where Charlie is.

The soldier is standing near a vehicle checkpoint. You can get an easy headshot from far away, then enter the western building your quest marker points toward. After a quick cutscene, the mission will conclude.