The opening chapter of Star Wars Jedi: Survivor ended pretty terribly. Only Cal Kestis and (hopefully) Bode Akuna survived the attack by the Ninth Sister and the Empire on Coruscant.
However, the Mantis suffered significant damage and won’t fly much longer. Kestis navigates the ship to land on the planet Koboh where Greez Dritus is located. This guide will help lead you through Koboh and safely find Pyloon’s Saloon.
Gorge Crash Site

Once Kestis lands the Mantis, follow the path and run along the wall. Squeeze through the opening and you’ll officially arrive at Gorge Crash Site.
Equip BD-1’s visor and place a beacon on the Trontoshell in the distance; now you can identify the beacon on the holomap.
Continue down the path and step on the lift to reach the ground below. Use the Meditation Point for Groge Crash Site, and take note of the Stances and Training sections.
You can change the lightsaber stances or train here. Be sure to use the Skill Point you earned from defeating the Ninth Sister.
Gathering Tempest is a useful early attack skill to learn for the double-bladed stance.
By holding the Attack Button, Kestis unleashes a series of quick strikes.

After using the Meditation Point, head to the right to scan the Echo near the drill. Be mindful of the Shiverpede hiding in the water; these creatures will die quickly, but they strike without warning.
Continue running past the drill to find a databank for BD-1 to scan, then head back toward the Meditation Point.

You won’t be able to open the gate at the end of the path, so turn around and use the grappling hook to pull yourself up the cliff.
Open the crate to find the Scrapyard Photoreceptors for BD-1. Jump down the cliff and run along the wall to reach the next area that has a B1 droid patrol.
Have BD-1 scan new enemies that you defeat to use in the minigame Holotactics later in the game.
On the right, you’ll see a group of droids in a room; head down the path on the left first. Double jump on the left wall to run on it to reach the ledge. Pull yourself up and find a Priorite Shard.
Jump back down and head across the bridge to fight the droids and a Bedlam Raider. The droids don’t cause a lot of damage, but they can interrupt combos. Target the droids first and then focus on timely blocks and quick attacks to kill the raider.

Climb up the ledge and continue down the dark tunnel. Scan the databank in the tunnel and kill the Shiverpede hiding on the right side.
Squeeze through the opening and examine the Trontoshell in the distance. Leap across the ledge and climb up the vine wall. Jump over to the metal bar, causing it to break. Keep moving to the left and destroy the droid peeking over the edge.
Cut plants with green fireflies for seeds to grow in Kestis’s garden at Pyloon’s Saloon later in the game.

At the end of the path, BD-1 will activate the rope line to connect to the other end which creates a shortcut back to the Meditation Point.
Use your grappling hook to attach yourself to the vines and crawl around the side of the rock. After you climb up the ledge, you’ll wall run and perform a sky attack on a raider.
Sky attacks usually kill enemies in one hit; otherwise, they cause massive amounts of damage to a stronger foe.

Take down the B2 droid and climb the side ledge to reach another wall to run to reach the above platform. The pipe will break, causing Kestis to fall into the sinking Koboh Tar.
Quickly move to the platform and Force Pull a roller mine from the tar. Force Push the mine to hit the dam, causing tar to flood in and raise the platform you’re standing on.

Cut the rope across the ledge to create a shortcut that leads you back to the first shortcut. Head around the walkway and speak to the Pit droid.
Unfortunately, its ship is stuck in the tar and Kestis can’t help right now. Continue heading down the path and jump across the gap. Before walking through the opening on the left, open the crate on the right to find the Short Beard cosmetic for Kestis.
Derelict Dam

After opening the crate, head through the opening and you’ll now be in a new area on Koboh: Derelict Dam. Run down the path to the left and Force Push the droid off the ledge.
Continue heading down the path and perform a sky attack on the raider below to kill him immediately, then be prepared to block the B2 droid’s blasters.
There’s a second raider down the path who might hear the commotion, so watch your back when fighting the droid.

Keep running down the path and you’ll find an Echo on a dead body near a pole. Activate the Meditation Point, allowing you to now Fast Travel to other Meditation Points found on the planet.
Head across the broken bridge behind the Meditation Point, and you’ll see a giant Gorocco destroy two battle droids. Dodge the boulders the beast will throw at you and carefully strike against it.

After killing the Gorocco, Force Pull the metal off to create an opening and climb the ledge to find a Health Essence powerup and a BD-1 databank scan. There’s nothing else in this area, so head back toward the Meditation Point and continue moving forward.
Be careful anywhere on Koboh because Shiverpedes are most likely hiding. Perform random Force Pulls to unearth and quickly kill them.

On the right side of the lift, you’ll find a crate with Light Metal cosmetics for Kestis’s lightsaber. The lift doesn’t work, so head up the path with the yellow metal plates on the ground and there will be a workbench.
Speak to the Prospector to learn more information about the raiders in the area.
The lift next to the Prospector also doesn’t work, so drop down the ledge and pick up the Priorite Shard. Turn back around and wall run to return to the area near the workbench.
Jump across to the middle platform and have BD-1 scan the dam wall. Drop down to the platform in the tar and use the grappling hook to climb the vines near the dam.

Shimmy on the ledge and climb up to destroy the droid and kill the raider. Keep moving down the path and sky attack another raider down on the platform, then eliminate the remaining droids.
Interact with the Echo at the end of the cave then head down the other end to fight a raider and BX droid.
The BX droid is nimble with quick attacks. Fight cautiously against this enemy, as it can jump around quickly and climb on walls.

Run on the wall to reach the platform above to find an area with a fire pit and a large door. You won’t be able to open the door, but you’ll find a Priorite Shard on the side.
There will also be a crate in the room but BD-1 won’t be able to open it. Double wall run to reach the highest ledge in the room and open the crate to find Anodized Metal for BD-1 Materials.

Leave the room and drop down into the open hatch to reach a new hallway. A raider will be waiting behind the tanker to the right, so stay at the ready.
Slice open the crate on the right to find the Tactical Jacket for Kestis. BD-1 will use a machine at the end of the room that will summon a roller mine for Kestis to use to blast the wall in front of you.

Summon another roller mine and guide it outside for you to blast the rocks to lower the bridge. Summon another roller mine and guide it up the path toward the workbench and use the mine to destroy the wall where you found the Priorite Shard.
Head through the new area and fight the Gorocco that’s above the ledge.
Kill the Shriverpedes in the water and climb up the rope at the end of the path. Swing to the side and destroy the roller mines and droids before finding a Force Essense power-up.
Step on the lift at the end of the path to unlock a shortcut back to the workbench. Return to the area with the roller mines and use BD-1 to summon another one.

Guide the mine across the bridge and use the Force to destroy the dam wall. The tar will fill in the pit and raise the platforms, allowing you to reach the other side.
After the cutscene with the Trontoshell, cut the plant on the right for a Fire Pineapple: Felucian Yellow seed. There will be a mechanism that Kestis cannot use down the path to the left, so keep moving forward and step on the lift to descend to the lower level.
Head down the hall into a bigger area and destroy the droids inside. There will be roller mines nearby, so be careful dodging those explosions and rockets from the B2 droids.
After destroying the droids, use the Force to push the block to the right wall. Use the block to wall run to the ledge and find a crate with the Scrapyard Head for BD-1.

Cut the rope behind you and use the Force to pull the Shiverpede toward you for an easy kill. Jump on top of the yellow canister and Force Pull the rope to you and use it to swing across to the other side. Follow the Boglings and scale the wall by alternating jumps to reach the surface.

Use the Southern Ranch Meditation Point, then continue heading down the left path to meet with a local who knows Greez.
Exploring Koboh

Following the conversation with Mosey, head down the path and you’ll find her again off to the side. She’ll tell you about visiting the stables to ride the Nekkos. Climb up the ledge behind the Nekko and run around the side to find a crate with the Full Beard cosmetic.

Drop from the ledge and run straight ahead to encounter two Gorgers. These beasts can string together two and three-hit combos, so keep your guard up. You won’t be able to Force Pull them, only stagger them slightly.

Continue moving forward, killing Gorgers and Shiverpedes in your way. When you reach the ledge that’s overlooking the Gorocco, don’t head toward the beast yet.
Turn around and climb the ledges to find an opening in the stone wall. Walk down the pipe but be careful of the Groger on the right. Open the crate at the end of the pipe to find the Scrapper Hair.

Now, head toward the Gorocco and defeat the beast. Jump down from the ledge and take out the raider and droids. Cut the rope nearby to create a shortcut to the main ground, then walk up the rock path.

Collect the Echo against the stone wall behind the Boglings hopping, then wall run and use the Force to pull the rope so you can swing to the next platform. Run up the rocks and use your lightsaber to cut the vines blocking the cave.

Kill the Bramlik in the cave and use the bar to swing across to the other side. Loop around the path and spot a crate to the left. Kill the hiding Shiverpede and open the crate to find Kashyyyk Paint for Weapon Materials. Exit the cave and drop down to the rope you originally used to reach this area.


Return to where you sensed the Echo and continue heading down the path and find an experience points powerup. Head back to the shortcut where you destroyed the droids and run down the path on the lower side. Collect a Tuber Maw: Alderaanian Blue seed near the rock wall, then look over the ledge to see a rope.

Drop down from the ledge and use the Force to pull the rope toward you and swing to the Riverbed Watch Meditation Point.
Cut the rope nearby to create a shortcut to the main ground. Take down the Bedlam Raider patrol below, then run across the yellow bridge to find an Echo on a dead body.

Keep heading down the path past the Nekkos and you’ll find the Rambler’s Ranch Outpost Meditation Point. Speak to the Prospector to receive a rumor about missing prospectors in the mine.
If you want to complete this rumor, you’ll need to turn around and head down the open mine shaft behind the Meditation Point. However, a nasty surprise awaits you at the end.
Continue running on the right side of the mine shaft opening and you’ll enter Hunter’s Quarry. Join the massive fight between droids and the wildlife near another mine.
After all the enemies are eliminated, open the crate near the fire to find Light Metal for BD-1 Materials. Be sure to sense the Echo nearby as well before leaving the area.

Don’t head up the stairs to the building on the left because the door is sealed shut. Instead, walk down the path a little and then jump up the rock ledges on the left and double back to toward the structure.
Wall run on the right side and climb the ledges on the rock wall to a section of vines. Use the vines to reach a patch of ground and then head down into the opening of the structure.

Scan the databanks in the room and collect the Priorite Shard from the table. Use BD-1 to slice the machine and summon a roller mine. Guide the mine back up the ramp and use the Force to blow up the opening.

Summon another roller mine and guide it outside to the sealed area underneath the ledges that you climbed to reach the wall. You’ll find a Force Essence power-up inside the room.
Boss Battle - Zeik The Raider

Keep heading down the path and you’ll enter Rambler’s Ranch Outpost. Walk through the town and speak to Gido and Gulu near the end of the pathway for directions to the saloon.
As you enter the saloon, it’ll trigger a cutscene and the start of a boss fight against Zeik the Raider. Zeik has a long staff with an electric pincer at the end. Zeik will jump in the air and fly toward Kestis to pin him to the ground.

Another unguardable attack by Zeik is a massive staff swing. But overall, Zeik is similar to fighting other raiders on Koboh, only with more health. Carefully dodge his attacks while striking periodically and dwindle him down.

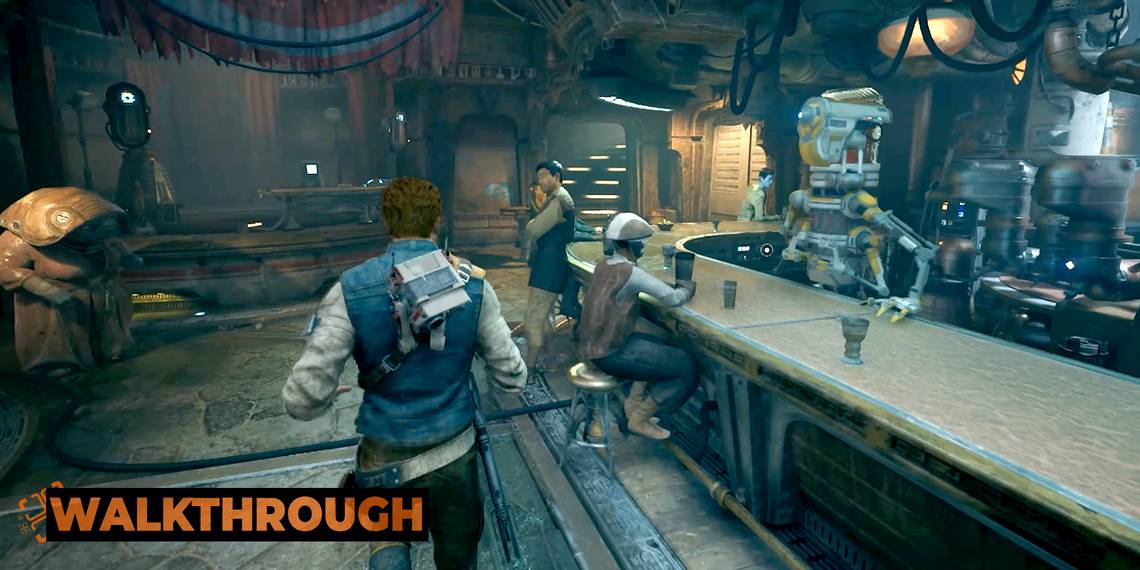
After killing Zeik and saving Turgle, the frog will introduce you to Doma, a local shopkeeper. Once you’re done speaking with them, finally head into Pyloon’s Saloon and look for Greez.