In the five years between Star Wars Jedi: Fallen Order and Star Wars Jedi: Survivor, Cal Kestis has become a more experienced Jedi Knight, and one who has a ton more tricks up his sleeve. This is most evident in the three new lightsaber stances you can unlock, including Dual Wield, Blaster, and Crossguard.
Although Dual Wield is unlocked within the first hour of the game, Blaster and Crossguard require a bit more effort to unlock and have some specific outside of combat. The first out of the remaining two new stances that you'll unlock is the Blaster stance, so let's get into how you can find it and what it can be used for.
How To Unlock The Blaster Stance

The Blaster stance is unlocked on Jedi: Survivor's third planet, Jedha. Once you arrive on the planet, you'll be tasked with meeting someone at a specific location in order to talk to a familiar face. After getting to the rendevous point, your path will become fairly linear for an hour or so until you meet some characters and kick off some story events.
Once you've completed the first main story quest and reunited with a few key characters, Cal will be given the choice to travel to two different destinations to continue the story. Before setting off to either of these two planets, Bode Akuna will give Cal a blaster and then briefly train him how to use it, unlocking the Blaster stance for the rest of the game. It's unmissable and, unlike the double-sided blade in Fallen Order, can't be unlocked any earlier in the game than this point.
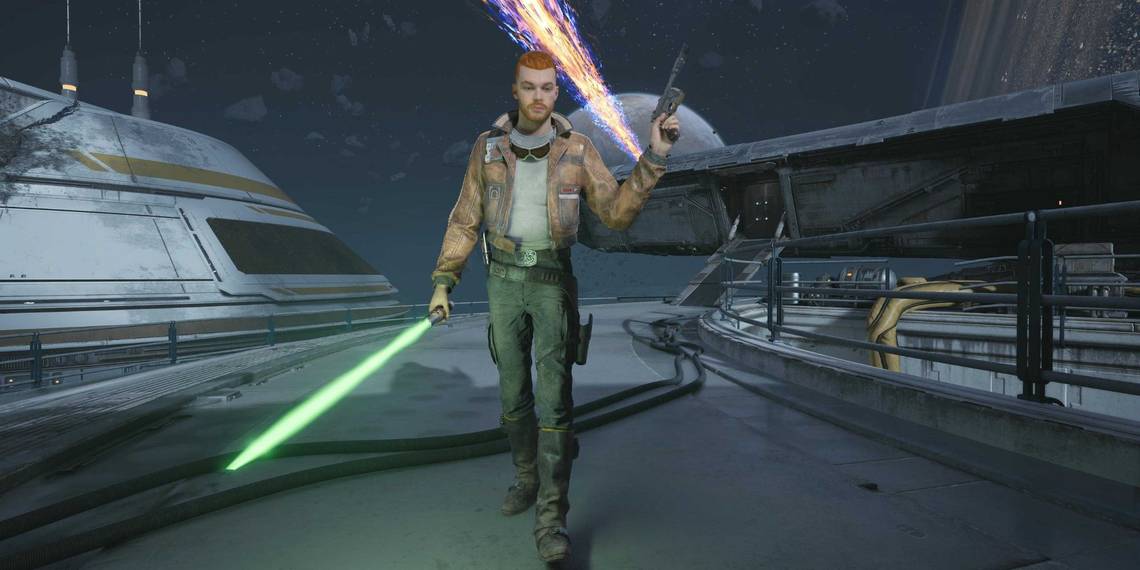
How To Use The Blaster Stance

As the name implies, the Blaster stance is all about giving Cal more ranged options. Now, by pressing Y or Triangle, Cal will shoot out a quick shot from his blaster that deals a decent amount of damage to both health and guard. It's perfect for interrupting unblockable attacks without needing to get in too close to the enemy. The blaster shot can also be charged by holding the shoot button, which will make the shot deal more damage, at the cost of more ammo and having to give it the necessary time to charge.
You can't just shoot whenever you like, though. The blaster has a limited amount of ammo that can be recharged by hitting enemies with your lightsaber, meaning that you can't just stay out of combat and shoot to your heart's content. The best way to utilise the stance is to dive in and out of combat and use the bullets sparingly.
The Blaster stance is perfect for dispatching weaker one-shot enemies like the B1 Battle Droids. It also turns previously-tough long-range enemies like the jetpack Stormtroopers into a bit of a joke, as you can just shoot them without spending any of your Force meter.
Although the blaster attacks are obviously the focus of this stance, it also changes the way that Cal wields his lightsaber. Instead of his normal swinging style, the Blaster stance makes Cal swing like he's fencing, with quick jabs and wider sweeps than the regular single saber stance. Outside of the Dual Wield, the Blaster stance is one of the faster ways to attack in the game, and is perfect for dodging in and out of combat.