Quick Links
One of the most important and common activities in Stardew Valley is mining. Cracking rocks, collecting ore, battling enemies, hunting down gems, and all the other tasks you'll find yourself doing in the mines will all be crucial to life in the valley and building up your farm.
In this guide, we'll outline everything you need to know about mining — from where you can do it to the perks you'll earn as you level up the associated skills. Here's what you need to know!
Updated July 13, 2022 by Jacqueline Zalace: There is a lot to know about mining in Stardew Valley, so we've updated the format of this guide to help you become a master in no time.
Mining Basics

Mining is one of the main activities in Stardew Valley, and will probably take up much of your time, especially in the earlier years. The game counts "mining" as any time you're cracking rocks, whether it be with a pickaxe or a bomb. Your pickaxe will be your main mining tool, but you'll need a weapon as well, as there are monsters in the various mines.
The most basic way to mine is to hit rocks with your pickaxe. Early on, it'll take quite a few smacks to crack many rocks open and it'll expend a lot of your energy, but you'll be able to upgrade your tools and skills with experience, which will make mining much faster.
The earliest and most common point to mining is to collect ore, which is then used to craft and create metal bars, which are also used to craft things and upgrade your tools.
But, when mining, there are many other things to do and find, as well.
|
What To Do/Find In The Mines |
Description |
|---|---|
|
Gems |
Valuable items that can be sold, donated, used as gifts, and much more. |
|
Coal |
Used to power furnaces and other machines for smelting metal bars, it can be an ingredient in crafting, and more. |
|
Geodes |
They come in four varieties, and will contain other items when broken open at the Blacksmith. |
|
Basic Resources |
Can be found in the terrain (in the ground and in rocks, weeds, and other natural features) or in crates, boxes, barrels, and other containers. |
|
Combat |
Specifically against monsters that infest the various mines in the game.
|
You'll be able to head to The Mines for the first time on Spring 5 in your first year. Before this, a boulder will be in the way.
The Luck Stat

How successful you are in any of the various mines is heavily influenced by your Luck stat, which is determined by a few things:
- Your daily Luck, which you can check by selecting the Fortune Teller channel on your TV each day.
- The Special Charm, which you can obtain once you unlock Secret Notes.
- Buffs to the Luck stat from certain foods and beverages.
- A rare item called the Lucky Ring.
In the context of mining, Luck will increase your chances of finding coal from rocks, breakable crates, gem nodes, and mystic stones. It'll also increase your chances of finding the ladder on each floor, as well as how much you lose when you die inside the different mines.
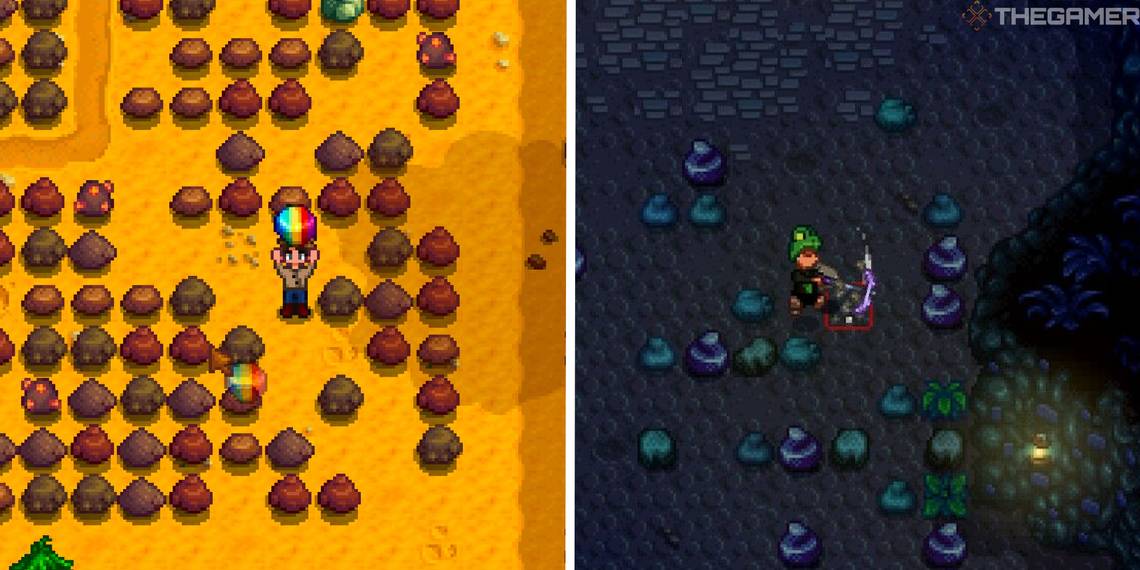
The Mines

For the first bit of the game, the only place you'll be able to really go mining is The Mines in town. But, as your game goes on, you'll unlock new areas to explore that contain different items, enemies, and more.
The regular mines, just called "The Mines," are located on the Mountain north of town, just northeast of Robin's Carpenter Shop.
Access to The Mines is available on Spring 5 in Year 1. Until then, a boulder blocks the way.
There are 120 floors; On each level, you'll need to find the ladder that leads down to the next floor. This ladder is often hidden under a random rock, but can also appear when slaying an enemy. At first, you can only enter via the ladder to the first floor, but you may have noticed an elevator in the "lobby."
This elevator goes to all of the floors ending in a 0 or a 5 once you've visited them. For example, once you make it to Floor 5, you can return there with the elevator pretty much any time you want. The elevator can also be used to exit whichever floor you're on and return you to the surface.
As you descend levels in The Mines, you'll find better ores and items, but you'll also face stronger enemies.
|
Floors |
Appearance |
Contents |
|---|---|---|
|
Floors 1 to 39 |
Brown and Earthy |
Copper Ore |
|
Floors 40 to 79 |
Blue, White, and Icy |
Iron Ore |
|
Floors 80 to 119 |
Lava |
Gold Ore |
|
Floors that end in 0 (10, 20, and so on) |
Small room with a single chest |
|
|
Infested Floors |
Green haze will denote if you are on an Infested Floor |
|
|
Mushroom Floors |
Green and Blue lights |
This floor has an abundance of Red and Purple Mushrooms.
|
Skull Cavern

The second major mine that you'll access is Skull Cavern. You can only open this dangerous mine with the Skull Key, which you can find on Floor 120 of The Mines.
You'll also need access to the bus to get to Skull Cavern, as it's in the Calico Desert. The bus is unlocked when you complete the Vault bundles in the Community Center or purchase its repair from Joja.
Unlike the regular Mines, Skull Cavern has no bottom floor. It will just go on, and on, and on. Every time you enter, the floors are randomized. If you leave and come back, it will randomize them again. There is no elevator here. Every time, you must start on the first floor again.
Much of it works the same. You smack rocks, fight off enemies, and look for the ladder to the next floor. However, there is much that makes Skull Cavern different, which you can learn below.
|
Skull Cavern is a dangerous place, but the things you can find are much better. Basically, it's high risk, but also high reward. A major quest the game will task you with reaching the 100th floor, and it's no easy feat.
The Volcano

The third major mine in the game is the Volcano Dungeon, which is located on Ginger Island. You'll be able to access this entire area and the Volcano in the post-game, after you complete the Community Center or Joja Form.
The Volcano Dungeon is like "level three" of the mines. It's harder than Skull Cavern and has much better rewards and items to find. Below, you can learn some details about Skull Cavern.
|
The Quarry

Once you've finished the Crafts Room bundles in the Community Center (or purchased the Bridge from the Joja Community Development Form), you'll be able to enter the Quarry, just east of The Mines.
This area is very simple. Rocks and trees will spawn here over time, giving you a bit of extra space to mine and chop for wood. The Quarry will contain any of the ores and gems that can be found in the game — including iridium and Prismatic Shards. However, those are super rare. There's also a minecart here for fast-traveling.
This is not relevant on a list about mining, per sé, but it's worth noting that many people use the Quarry for machines. It's basically a large square where you can place Crystalariums, Kegs, or what have you, giving you a bit of extra space.
The Quarry Mine
In the northwest corner of the Quarry is a small cave. Inside, you'll find an assortment of monsters and rocks. There is only one level of this "mine" and it just a long path.
At the end of it, you'll find a Grim Reaper statue holding a Golden Scythe, which you can take for yourself. The Golden Scythe does more damage, has a larger swing radius than the regular scythe, and has a higher chance of producing hay when it cuts grass (75%, compared to 50% with the regular scythe).
Your Farm

Each farm layout can spawn stones, which can, of course, be broken with a pickaxe or bomb. They'll drop stone and (sometimes) Coal.
Two of the farm maps have more possibilities for mining, though.
- The Cliff-Top Farm has an entire focus on mining, with a large quarry in the southwest corner that can spawn ores and geodes, scaling with your Mining level.
- The Four-Corners farm has a bit of each of the main farm maps, so it also contains a mining area. In the southeast corner, there's a small patch of mining area, like a small quarry. Like the Cliff-Top farm, what spawns here is scaled with your Mining skill level
On the Island Farm, there will be strange rocks on the beach. These are mussel nodes, and when cracked open, they'll drop mussels. You can also obtain five Golden Walnuts (total) randomly when cracking these rocks. They respawn every day.
Dig Site

On Ginger Island, you can head west from the main area of Island North (through the northern entrance from the beach where you arrive initially) to find a broken bridge. If you pay the parrots ten Golden Walnuts to repair it, you'll have access to the Dig Site.
Here, you can find regular rocks, special nodes that drop clay, and bone-filled rocks that drop bone fragments when broken open.
You can also find and free Professor Snail, who will task you with finding special fossils. Some of these fossils can be found when mining in the Volcano.
Cindersap Forest and the Railroad
Lastly, we have the Cindersap Forest and Railroad area. Both of these places will spawn regular rocks that can be mined for stone and coal. You can access the Railroad once an earthquake removes the rock blocking the way in. This happens on Summer 3 in your first year.
Energy and Health

You need to keep a close eye on two bars when mining: your health and your energy. Food can be used to restore both of these, with their description in-game showing you how much they'll recover.
Energy
Swinging your tools (except for the scythe and your weapon) depletes your energy. Once your energy reaches zero, you become exhausted, which gives you a debuff. You move slower, and you can no longer cast your fishing rod. If you keep using other tools, your energy will move into negative numbers. When it reaches -15, you pass out and the day ends.
If you're outside of your home, you'll lose 10% of your gold, up to a maximum of 1,000g. You'll know when your energy is running low because the bar will shake. When you're exhausted, even if you increase your energy bar, you'll only restore 50% of your energy that night. You can remove this debuff by consuming Muscle Remedy or kissing your spouse (if you have one).
If you go to bed (not exhausted) before midnight, you'll recover all of your energy by the next morning. If you go to bed after midnight, the amount of energy you recover for the next day will continue to decrease until you do go to bed or 2 a.m. hits and you pass out.
Health

Health is reduced when you take damage from monsters, when you stand near bomb explosions, and when you stand in front of a train at the Railroad.
When your health reaches zero, you'll pass out and wake up somewhere safe. In the regular Mines, this can be in your house, the top floor of The Mines, or Harvey's Clinic. Passing out in Skull Cavern will always teleport you to Harvey's.
When you pass out from health loss, you'll lose gold (up to 5,000g) and some of your items. The amount of money and the number of items you lose is determined by your Luck stat.
Luckily, you can recover one of the items you lose by visiting Marlon at the Adventurer's Guild and paying for his Item Recovery Service (items that you can't sell are free to recover). You can only choose one item, though, and the rest will be permanently lost. He'll send you the item the next day in the mail.
Like the energy bar, your health bar will shake when it starts to get low.
Mining Skill

Mining is one of the five skills in Stardew Valley. You can level up your Mining skill to increase your proficiency with a pickaxe, unlock crafting recipes, and specialize in certain Professions for cool bonuses.
Experience Points
(Almost) any time that you break a rock, whether you do it with a pickaxe or bomb, you'll gain experience points for your Mining skill. Enemies sometimes break rocks, and this will give you experience, too, but it's not very common.
Different types of rocks give you different amounts of experience; you can expand the table below to see the experience gained for every minable object.
For each level, you'll need a bit more XP. The amount of XP needed for each skill is the same, and it is as follows:
|
Level |
Required XP |
|---|---|
|
Lvl 1 |
+100XP |
|
Lvl 2 |
+280XP |
|
Lvl 3 |
+390XP |
|
Lvl 4 |
+530XP |
|
Lvl 5 |
+850XP |
|
Lvl 6 |
+1,150XP |
|
Lvl 7 |
+1,500XP |
|
Lvl 8 |
+2,100XP |
|
Lvl 9 |
+3,100XP |
|
Lvl 10 |
+5,000XP |
Skill Level Rewards

At each level, you'll gain +1 proficiency for your pickaxe. This means that it will consume less energy each time you use it.
Every time you successfully use your pickaxe at Mining Level 0, it'll cost two energy points. With each proficiency level, it will take 0.1 fewer energy points, meaning at Mining Level 10, your pickaxe will cost one energy point for each successful swing.
At each Mining level, you'll also gain new crafting recipes, save for Level 5 and Level 10, when you'll get to choose a new Profession instead. These Professions will grant you some cool bonuses. They're outlined further down on this page!
Here's everything you'll get at each Mining level.
Professions

Like every other skill in the game, you'll be able to pick Professions as your Mining skill levels up. At Level 5, you'll be given a choice between two Professions. Then, at Level 10, you'll be given a choice between two, with the options determined by what you chose at Level 5.
Level 5 - Miner or Geologist
At Level 5, you'll be given a choice between becoming a Miner or a Geologist. Here's a breakdown:
|
Bonuses |
Choices at Level 10 |
|
|---|---|---|
|
Miner |
|
Blacksmith or Prospector |
|
Geologist |
|
Excavator or Gemologist |
Level 10 - Blacksmith, Prospector, Excavator, or Gemologist
Your choice at Level 5 will determine which options you're given at Level 10. Remember, you can always switch Professions at the Statue of Uncertainty in the Sewers.
|
Level 5 Choice |
Choices at Level 10 |
Bonuses |
|---|---|---|
Miner |
||
|
↳ |
Blacksmith |
|
|
↳ |
Prospector |
|
Geologist |
||
|
↳ |
Excavator |
|
|
↳ |
Gemologist |
|
Crafting Items for Mining

There are some items you can craft that will help you in any of the mines, as well as others that you can use to process or improve your mining spoils. Staircases are the most useful, arguably, but there are others, as well.
Rings are not included here. Check out our list of the best Rings for more info on which ones you should take mining.
Below, you can find the crafting items are directly related to mining.
It's worth noting that some of these items can be obtained in other ways, as well. Notable examples include Staircases, which can be purchased at the Desert Trader on Sundays for one Jade each; and all three levels of bombs, which can be purchased from the Dwarf in The Mines or the Dwarf in the Volcano Dungeon.
Mining Buffs

Also like other skills, you can buff your Mining skill with the use of some cooked dishes (and one other special item — the Magic Rock Candy, which is covered further down). These buffs basically add a level to your Mining skill.
For example, a Maple Bar gives a +1 bonus to Mining. If your Mining skill is Level 4, and you eat a Maple Bar, you'll be Mining Level 5 for 16 minutes and 47 seconds. With food buffs, you can also go over the Level 10 cap. If you're Mining Level 10, and you consume a Maple Bar, you'll temporarily be Mining Level 11.
Here's every dish that buffs Mining, as well as how much energy and health it restores:
There is another dish that can improve your Mining skill temporarily, but it works a little differently. This is the Magic Rock Candy, and while the game considers it a cooked meal, it can't be cooked.
Rather, you must trade three Prismatic Shards for one Magic Rock Candy at the Desert Trader, who only stocks it on Thursdays. Occasionally, if you're super lucky, Haunted Skulls can drop Magic Rock Candy. Additionally, you're guaranteed one after donating 90 items to the Museum, as a reward.
|
Dish |
Buffs |
Duration |
Health Restored |
Energy Restored |
|---|---|---|---|---|
|
Magic Rock Candy |
• +2 Mining • +5 Luck • +5 Defense • +5 Attack • +1 Speed |
8 minutes, 24 seconds |
225 |
500 |
Upgrading Your Pickaxe

Though it might seem that way, upgrading your pickaxe will not increase your proficiency. What upgrading your pickaxe does is make it stronger, allowing you to crack rocks and nodes with fewer hits. However, in a way, this is reducing the energy cost of using the pickaxe. By needing fewer hits to break a rock, you are expending less energy overall.Your pickaxe can also do a bit of damage to enemies, but it's not recommended that you use it as a weapon over an actual weapon (or even your scythe, really).To upgrade your pickaxe, take it to Clint the blacksmith with some money and materials. You can find each upgrade below.
|
Level |
Materials |
Price |
Notes |
|---|---|---|---|
|
Starter Pickaxe |
N/A |
N/A |
|
|
Copper Pickaxe |
5x Copper Bar |
2,000g |
|
|
Steel Pickaxe |
5x Iron Bar |
5,000g |
|
|
Gold Pickaxe |
5x Gold Bar |
10,000g |
|
|
Iridium Pickaxe |
5x Iridium Bar |
25,000g |

In addition to these more basic upgrades, you can also enchant your pickaxe at the Forge, which is on the tenth level of the Volcano on Ginger Island. Enchanting a weapon costs a Prismatic Shard and 20 Cinder Shards, and the enchantment you get is random. You can keep enchanting it to reroll which one you get, but it's random and you can't choose. However, the game remembers the last two enchantments you had, so they aren't chosen again so quickly.
There are three possible enchantments for the pickaxe, and they are shown in the table below.
|
Enchantment |
Effect |
|---|---|
|
Efficient |
Using your pickaxe does not consume energy |
|
Powerful |
Adds a power level, letting you crack rocks in fewer hits |
|
Swift |
Using your pickaxe is 33% faster |
Combat and Magnetism

There are two other stats worth noting when you delve into the various mines around Stardew Valley: Combat and Magnetism. We won't go too deep into these stats here, but they do play a role in your mining adventures.
Combat
The Mines, Skull Cavern, and the Volcano Dungeon are all filled with enemies of many different varieties. Having a good weapon is paramount, as is keeping track of your health and restoring it when necessary. Check out some of our combat guides for some more information:
Magnetism
How "magnetic" you are determines your ability to collect items from a distance. The higher your Magnetism, the further away an item can be and your character will "attract" it, adding it to your inventory. There are some Rings that influence how magnetic you are, as well as some meals.
|
Ring |
|
|---|---|
|
Meal |
|