Quick Links
Just because it's the first chapter in Sunday Gold doesn't mean that the Hogan Industries heist is easy. The crew will have to solve some devious puzzles and fight off dangerous security drones to get in and out alive. Luckily, the company's headquarters are a huge building with plenty of useful gear to liberate, if you know where to look.
This complete walkthrough will help you survive Hogan's devilish traps and get out with as much loot as possible. It also includes strategies for the chapter's toughest battles, so you'll be able to take everything the company throws at you!
This guide contains spoilers.
How To Disable The Cameras
The crew starts in the Hogan Industries car park. The lift into the building is watched closely by security cameras, so the first order of business is to turn off the video feed. This is the first time in the game where you'll be controlling multiple characters, so it's best to hover over everything first to get a sense of whose AP should be spent where.
Have a character attempt to enter the lift, which will cause the crew to discover the security cameras. This needs to be done before you can enter the Maintenance Office on the left side of the screen. Before you do, however, you can search the estate car on the right to find some Painkillers. There's another dose in the rubbish bin by the Maintenance door.
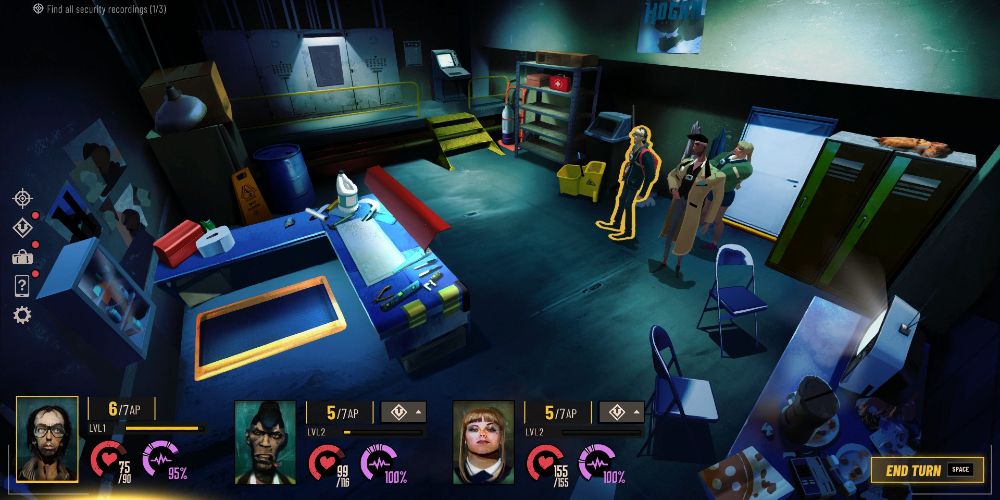
With both healing items in hand, enter the Maintenance Door to fight the security guards inside. Like most of the guards in the building they're weak against slashing damage, so Frank's Butterfly Knife will be your main source of offense. Have Gavin provide supporting attacks with his Baseball Bat while Sally uses Patch Up to keep everyone's HP full. You'll be glad to have the extra health in later battles.
Searching the Maintenance Office provides several useful items:
- The coats by the door contain a dose each of Stimulants and Tranquilizers.
- The lockers on the right-hand side contain two Stimulants, Body Armour, and a bottle of Birmingham's Finest.
- The medicine cabinet in the bottom-left corner has two doses of Painkillers, one Stimulant, and one Adrenaline.
- The red first aid kit on the shelves near the stairs contains a dose each of Adrenaline and Tranquilizers, as well as the First Aid Kit itself which Sally can equip to increase her healing ability.
Frank or Gavin are the best characters to equip the Body Armour, as they don't have nearly as many hit points as Sally.
Gather all the consumables, then have Gavin hack the security terminal at the top of the stairs. Once the hack is complete, access the terminal and use the path Security > Surveillance > Disable Cameras to clear the way to the lift. Take it to the nineteenth floor, where Gavin's old office is located.
How To Access Gavin's Computer
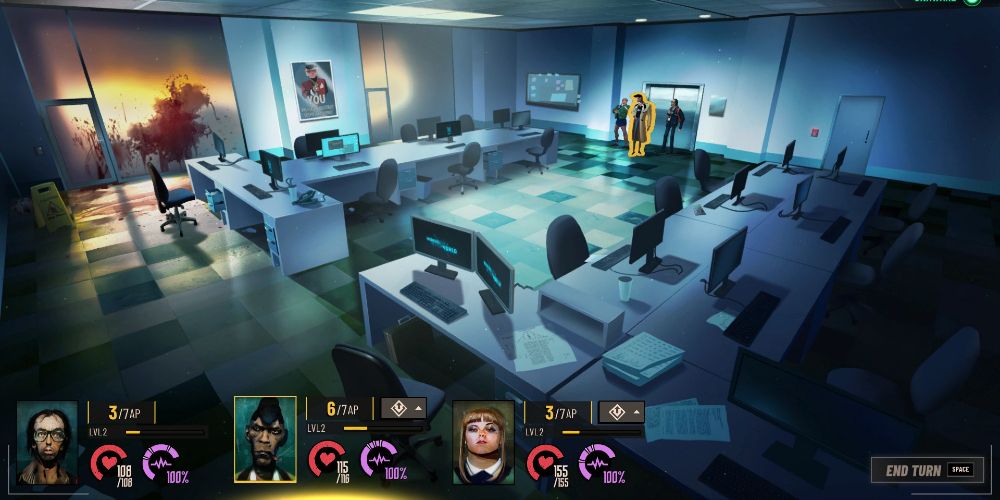
When you reach the nineteenth floor, the crew discovers blood splattered all over the walls. This will cause the entire team to lose Composure, and it's a good idea to have Gavin recover with a swig of Birmingham's Finest before continuing since he is the most susceptible to Composure loss. There's a bottle in the briefcase in the foreground, along with some Painkillers. There are also two drawers in the desks to the left; one contains Painkillers, the other Tranquilizers.
The computers can be hacked by Gavin, or you can do some snooping to find the passwords. The computer on the right has its password - BossWalker - written down on a note under the keyboard.
The computer on the left takes a bit more sleuthing. The voicemail on the desk's phone reveals that the occupant turned forty on Friday. The bulletin board by the door reveals that the only office birthday on a Friday this month is the seventeenth. Since the year is 2070, the password is 171030 - the occupant's birthday, 17 October 2030.
The emails on both computers contain relevant information for later, so give them a read. With that done, have Gavin use the keypad near the door on the right side of the room. His passcode has been changed since his firing, so he'll need to hack the panel.
Once you're in the IT office, you'll need to find the new password used by Gavin's replacement. The locker against the far wall.can be moved by Sally. Do so and you'll reveal Steve's secret stash. Rooting through the stash will get you some key items for later, as well as a 9mm Pistol which Gavin or Sally can equip.
The stash contains a poster of activist e-fluencer Lady Shell, including her hashtag Fight4Eva. The hashtag is the password for Steve's computer, so type it in with Gavin to access the system. The emails don't have any useful information but might provide a laugh; the real prize is the server date. Use path Server > Download Data to proceed.
How To Access The Server Room
As it turns out, the company's server isn't responding, so Gavin can't get the sensitive data. You need to find Chief Security Officer Barry Brixton's keycard in order to access the server room, as well as two other keycards to use once you're inside.
Before leaving the IT Office, search the filing cabinet on the right side of the screen to find Gavin's toolkit. Once you have it, leave the room and you'll be attacked by three Security Guards. The guard on the left with the shotgun can potentially do the most damage, so eliminate him first. Beyond that, use the same strategy as the previous fight and you'll be fine.
Return to the car park and attempt to open the gate to the left of the lift. It hasn't got any power, so head to the Maintenance Office. Use Sally's brute strength to tear open the electrical panel next to the security terminal from earlier. Search the insides of the electrical box to find a burnt breaker. Give both the breaker and the toolkit to Gavin and have him use the workbench on the left side of the room to repair the component. Once it's fixed, Gavin can install the repaired breaker at the electrical box to power the gate.
Before opening the gate, check the compact car and the 4x4 in the car park if you haven't already. The 4x4 has a security tape you can view once you reach the server room, and you'll need the car battery in the bonnet of the compact car in the next area.
Waste Disposal Area
With both items in hand, open the gate to find the waste disposal area. As you may have read on Emma's computer upstairs, Barry's car keys are in the drain. You can see them if you look down the drain, but it's too deep for anyone to reach. You need to refill it from the sewage tanker so that the keys float to the top.
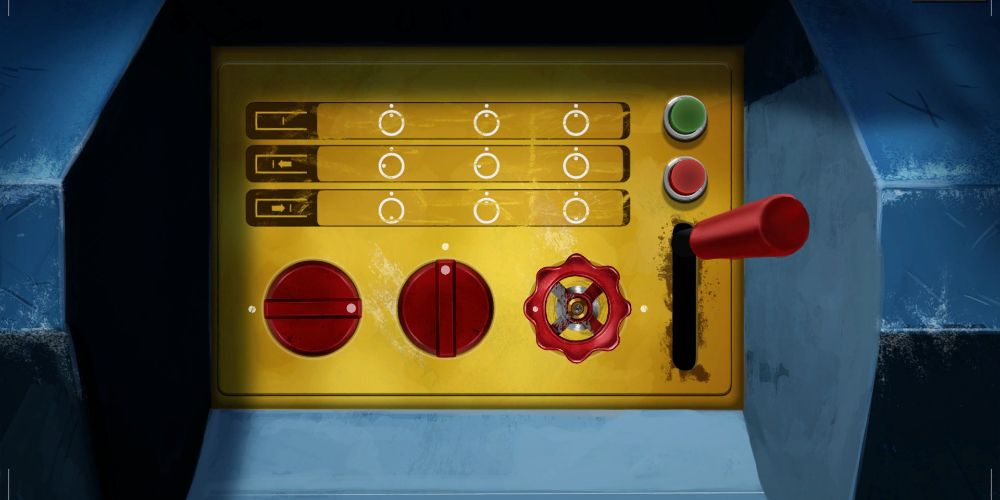
The sewage tanker has a dead battery, so install the battery from the compact car to get it working again. Inspect the panel on the side of the truck, and you'll discover that a valve is missing. Click on the area where the missing handle should be, then return to the Maintenance Office. The gas cylinder next to the stairs has a valve you can use; have Sally rip it off and bring it to the tanker panel.
Sally (or whoever ends up holding the valve) can repair the handle then get to work. Start by aligning the dots on each dial, then pull the lever to start the pump. Next, rotate the first and third valves twice each, so that their dots are on the opposite sides. Pull the lever again to fill the drain, then recover the keys.
There's one more thing you need here. Have Frank pick the lock on the fence in the background to investigate the blood trail. The gate remains stuck, so after the lock comes of have Sally force it open. Look in the dumpster to find Barry Brixton's body. His server room keycard is in his coat pocket on your left (the hip pocket, not the breast pocket). The investigating character will lose Composure with each pocket you search, so it's best to get the card in one try.
Return to the car park and use Barry's car keys to search the sports car in the foreground - unlike most items, Gavin receives the keys by default when you pick them up. Inside the car is Barry's company ID, which you can use to take the lift to the security floor, where the server room is located. Do so, but be ready for a fight!
Barry's car also has two EMP Grenades inside. Be sure to give them to Frank or Sally before going to the server room - it will make you life much easier!
How To Solve The Server Room Puzzle
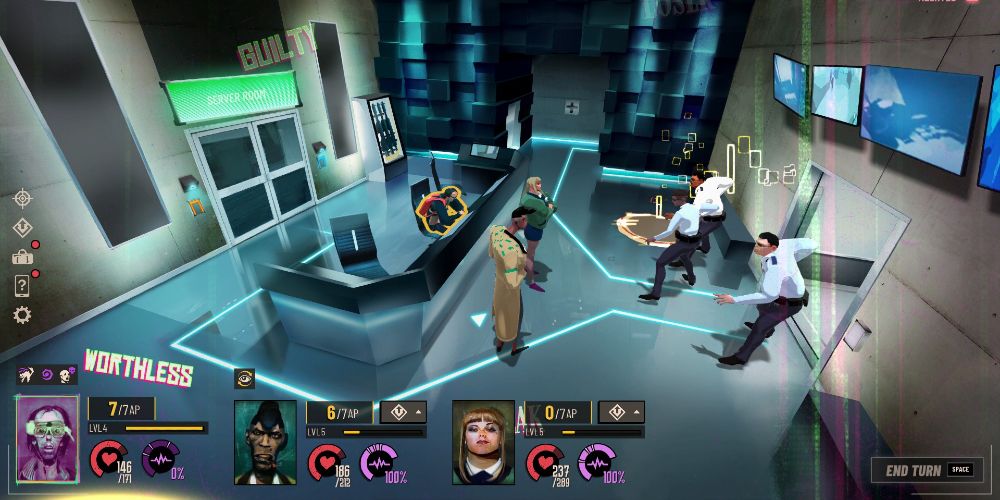
As soon as you enter the security floor you'll be attacked by a guard and two drones. Gavin recommends using the EMP Grenades to disable the drones, but it's much better to save them for later. Instead, focus your attacks on a single drone to stun it, then move onto the other one. Repeat the process until both are beaten, at which point the guard should be easy pickings.
Gavin and Sally both use blunt weapons, which deal increased damage to the drones. Have Frank use his gun on the drones and his knife on the guard. Once the enemies are beaten, it's time to have a look around. The medicine cabinet against the far wall has a dose each of Adrenaline and Stimulants, as well as a torch. Equip the torch to Frank as his melee weapon for the upcoming battle.
The armoury locker can't be accessed yet, so have a seat at the desk. Pick up the documents immediately to the left of the keyboard to find a keycard underneath. You don't need to access the security computer itself just yet, but you should open the drawer and have Frank pick the lockbox inside. You'll get a set of Iron Knuckles for Sally; equip them immediately.
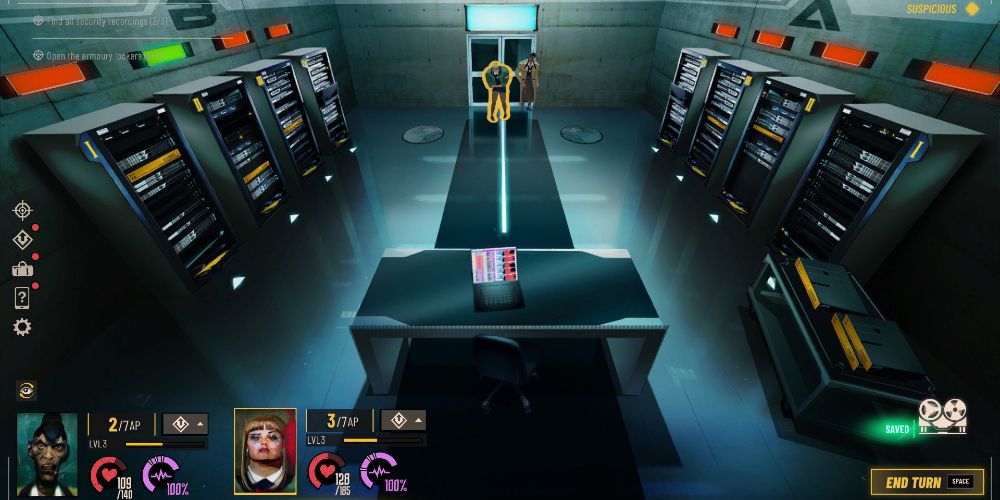
To enter the server room itself, make sure one character has the orange keycard and another has the blue one. Have both characters swipe their keycards at the terminal with the matching color within ten seconds of one another.
The Norse Gods Servers
The eight servers here need to be placed in the correct banks. Each is named after a figure from Norse mythology, and the computer on the desk contains an email chain with a set of clues for how to place them:
- Odin once stood in front of Mimir and sacrificed one of his eyes in exchange for a drink from his well.
- At Ragnarök, as Odin and Heimdall stood side-by-side, both Loki and Heimdall faced one another and died at each other's hand.
- Baldr, son of Odin, stands between his parents.
- Freya does not look into Thor's eyes.
- Server Thor goes in Rack B2.
From this, it's possible with a little trial-and-error to deduce the correct order of the servers. The light above each server rack turns green if the correct server is installed. Each character can carry multiple servers, so it might be simplest to have one character do all the work. The correct order, presented in the same configuration as the racks appear onscreen, is as follows:
|
B |
A |
|
|---|---|---|
|
4 |
Loki |
Heimdall |
|
3 |
Mimir |
Odin |
|
2 |
Thor |
Baldr |
|
1 |
Ullr |
Freya |
Odin's wife is generally referred to as Frigg, with Freya portrayed as a different goddess altogether. Freya's husband was named Od, so it's possible that Odin and Od, as well as Freya and Frigg, are derived from the same figures but became distinct characters over time.
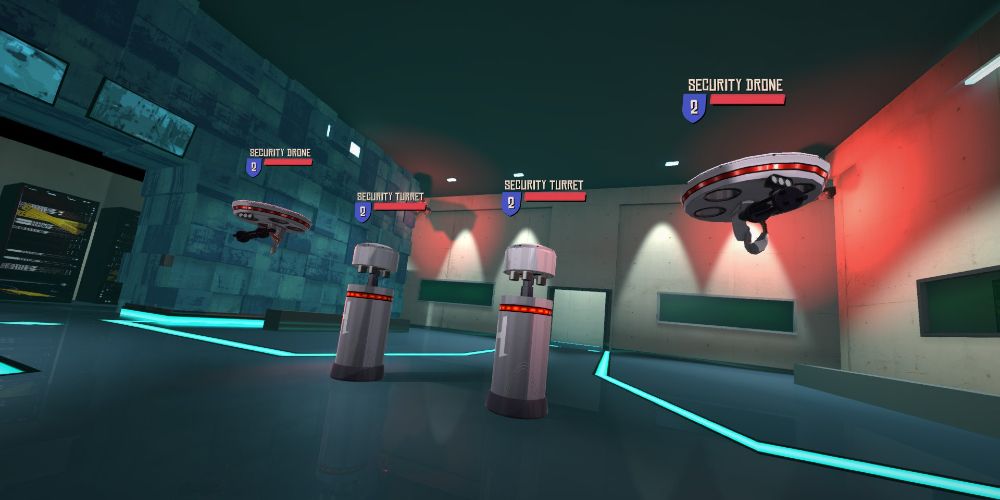
When all eight servers are installed correctly, you'll be attacked by a swarm of security drones. This is arguably the toughest fight in the chapter, even more so than the boss at the end, so make sure Frank and Sally are healed up before installing the final server.
How To Beat The Security Drones And Turrets
Start the fight by using an EMP Grenade to stun as many of the drones as you can. Focus on destroying the smaller drones first, since they won't take as long. Frank should use Evasive Strike to keep his Avoidance high, while Sally attacks with her fists and uses Patch Up whenever either character's HP drops below half. As long as you have the weapons from the security room equipped, you should be able to destroy most of the drones before they can do too much damage as a group.
There's a good chance you'll need to use Painkillers during or after the fight, so don't hesitate to do so! They restore a comparable amount of HP to Patch Up and don't cost AP.
How To Reach The Penthouse Office
Before you leave the security room, log into the computer to view the security tapes you've found so far. The computer's user icon may look familiar - if you refer to the sign-in sheet to the left of the screen, you'll see that user Sec0127 is Annchi Chang, whose emails to Emma you read earlier. Annchi's password is her favorite King's League fighter; type BigBomber to log in.
Use path Video Player > Set Input04 - Media to activate the screen to the left, then watch the security tapes. They'll show Kenny Hogan interacting with various items in his office to open a secret passage.
A character can only play a tape if they're carrying it, so give both tapes to whichever character you use to sit at the desk before logging in.
Once you've viewed the tapes, return to the nineteenth floor and use Barry's ID card at the reader on the far left to enter his office. Inside, start by picking up the framed photo on his keyboard and logging into the computer. It's not password-protected, so you can hop right on. Read the email with the subject Housekeeping - Nosy Janitor and Gavin will warn his former coworker about an incoming hit squad.
Frank can pick the lock on the safe under the desk. Once it's open, search it to find a crystal and a second 9mm pistol. Along with the one from Steve's stash in the IT office, both Gavin and Sally can now both have ranged weapons!
Once you've investigated everything in the room, have Sally lift the overturned bookcase. Pick up the Card Reader underneath and plug it into the computer. Whoever has Barry's ID card can then plug it into the card reader and access the computer. Use path Card Reader > Update ID Card Clearance to rewrite the card so that it grants access to the penthouse office.
Before you leave, search the rubbish bin to the right of the desk to find a dose of Painkillers.
How To Open Kenny Hogan's Secret Lair
Take the elevator to the penthouse floor, where you'll find the office you saw in the security footage. Search Kenny's desk to find some potential evidence, then have a look at the painting on the right side ofT the room. Interact with the book Kimiko Aux Enfers on the bottom-left bookshelf, and the digital painting will change. Repeat the process with Le Chatiment De Promethie, just to the left of the frame, then La Boue two shelves beneath the painting.
Frank's Observe skill can be used to easily identify the books, if you don't mind the high AP cost of doing so.
When the books have been pulled in the correct order, a secret stash will appear in the bookcase. Search it to find a torn letter and a third security tape. If you want to return to the security office to view the tape you can do so, but it's not necessary at this time.
To open the trap door, interact with the objects around the room in the same order as Kenny did on the surveillance footage:
- The skull to the left of the desk.
- The piano to the right of the desk.
- The unicorn statue.
- The trophy immediately to the left of the unicorn statue.
- The bust on the desk.
If you interact with the items in the right order, the trapdoor will open, leading to Kenny Hogan's secret lair.
How To Solve The Laser And Crystal Puzzles
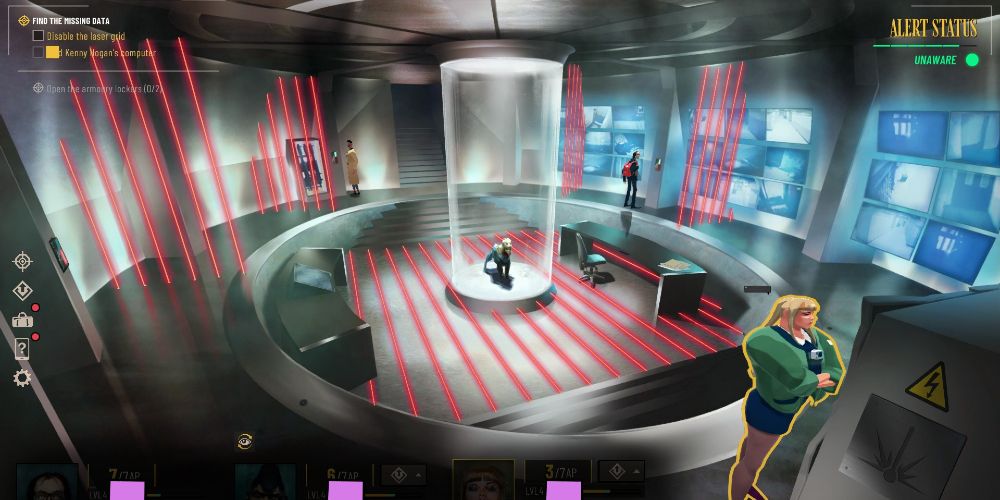
The hidden room is filled with dangerous lasers protecting Hogan's most sensitive documents. Start by flipping the switch on the wall to the left of the entrance. This will allow you to reach a second switch to the right, near the wall of monitors. This will trap the character who flips the second switch in that spot for a moment. Have one of the remaining two flip the first switch again, disabling all the lasers on the near half of the room.
Have Sally flip the third switch, on the far left side of the screen. It has to be Sally, since you'll need her strength when you reach the other side. Once the switch is pressed, Frank and Gavin will be trapped near the entrance while Sally can reach the fuse box in the lower-right corner of the screen. Have her smash it to disable the laser system entirely.
With the team able to move through the room at will, search the loose files on the right-hand desk. You'll find the other half of the letter from the bookcase and the keys to the armoury lockers. Before continuing, it's a good idea to retrieve the weapons in this room as well as the ones in the security office. You can also view the third tape while you're down there.
When you've raided both armoury lockers, you'll have all the gear you need for the rest of the mission's fights.
Equip everyone with Body Armour to give them extra protection.
Frank can equip his brand-new shotgun, but should switch back to his knife if you haven't already after defeating the Security Turrets.
Have Sally equip the SMG and Shredder Ammo, and you'll be ready for the chapter's finale!
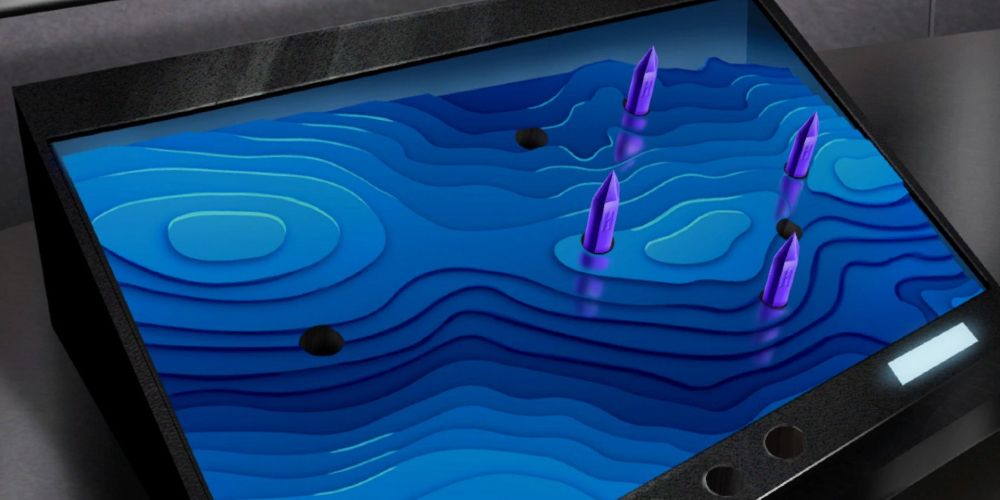
Once you're ready, examine the topographic map on the left desk in Hogan's lair. It contains a purple crystal like the other three you've found. If you need to go back for any, their locations are:
- Steve's hidden stash behind the lockers in the IT office.
- Annchi's lockbox in the desk drawer of the security office.
- The safe under Barry's desk.
Give all three crystals to one character and have them plug the stones into the slots at the bottom of the map. The map will illuminate, and you may notice that the lines match the torn letter. The crystals need to be placed in slots corresponding to the turrets placed around Hogan's private cabin in the woods. Place the crystals on the map to match the image above; one crystal will be in the center of the map, with others in the topmost, rightmost, and bottommost positions.
When the crystals are placed, the cybernetic dog in the middle of the room will open its mouth, revealing a big red button. Heal up and restore your AP if you need to, then press the button to reveal Hogan's personal computer. Accessing the computer will trigger a cutscene, after which the building's security will be on full alert regardless of its previous status.
How To Escape Hogan Industries
The elevator is locked down, but you can still use it to reach the security office. When you leave the secret lair, though, you'll be confronted by four security guards. These grunts are vulnerable to all the same tactics as before, but you'll need to be careful with Gavin. His Composure will have dropped to zero, ensuring that he panics every turn. You'll have a limited amount of time on Gavin's turn to choose an action, otherwise he'll act randomly.
Plan Gavin's turns ahead of time, and don't be afraid to just Guard for lack of a better idea. By now he should have his Crude Grenade skill, which is excellent against groups like this one.
After defeating the guards, take the lift to the security office and have Gavin hack the computer. Use path Security System > Override Level 3 Security Measures to get started.
You'll need to complete the hacking minigame while symbols and colors are changing due to Gavin's panic attack. You'll also get fewer attempts than normal, so take it slow and work methodically to come up with the right answer. Our Sunday Gold Hacking Guide can help if you're stuck.
You'll have to fight a wave of guards and drones after each successful hack. When each fight is down to one opponent, Guard with everyone to top up your AP for the next fight, and heal as needed.
Once all three waves are defeated, restore your HP, AP, and in Gavin's case Composure before getting on the lift. Spend any extra skill points you have, as well. When you reach the car park, you'll be immediately thrust into the chapter's boss fight.
How To Defeat Ruth Combs
Hogan's new head of security is none other than Sally and Frank's former partner-in-crime, Ruth Combs. She's got a serious grudge against the two and is out for blood. Defeat the two security guards accompanying her before trying to bring down Ruth - she has a lot of HP, so you're in for a long fight.
Have Frank use Evasive Strike every other turn to keep his Avoidance rate up. Sally will have to split her focus between damage dealing and Patch Up, while Gavin inflicts debuffs with Crude Grenade and Limb Strike.
When Ruth targets a teammate for Target Acquired, have them Guard no matter what. Otherwise, they'll take a lot of damage. Ruth always follows Target Acquired with an attack that deals heavy damage to your whole team and inflicts Bleeding. If you can manage it, setting up a Counter with Sally between the two attacks will get you a free shot on Ruth for decent damage.
Ruth has a counter of her own, called Not Gonna Happen, so take the opportunity to recover when she enters her defensive stance.
Ruth is weak against slashing damage, just like the guards, so heavy use of Shredder Ammo and Frank's knife are recommended. This also gives plenty of opportunities to inflict Bleeding on the boss, helping defeat her more quickly.
Once you've settled into the tempo of the fight, Sally and Gavin can both use Adrenaline Rush to get a stacking damage bonus with each consecutive hit they land. Combined with Frank's Focus, which makes Ruth easier to hit and more susceptible to damage, you can use this bonus rack up some big hits after breaking through her defenses.
Once Ruth is beaten, it's back to the pub, where you'll buy Gavin a drink and plan your next moves. If you warned Gary Marshall about the hit squad coming for him, you can also talk to him at the pub and earn the Making Friends Achievement.

