Quick Links
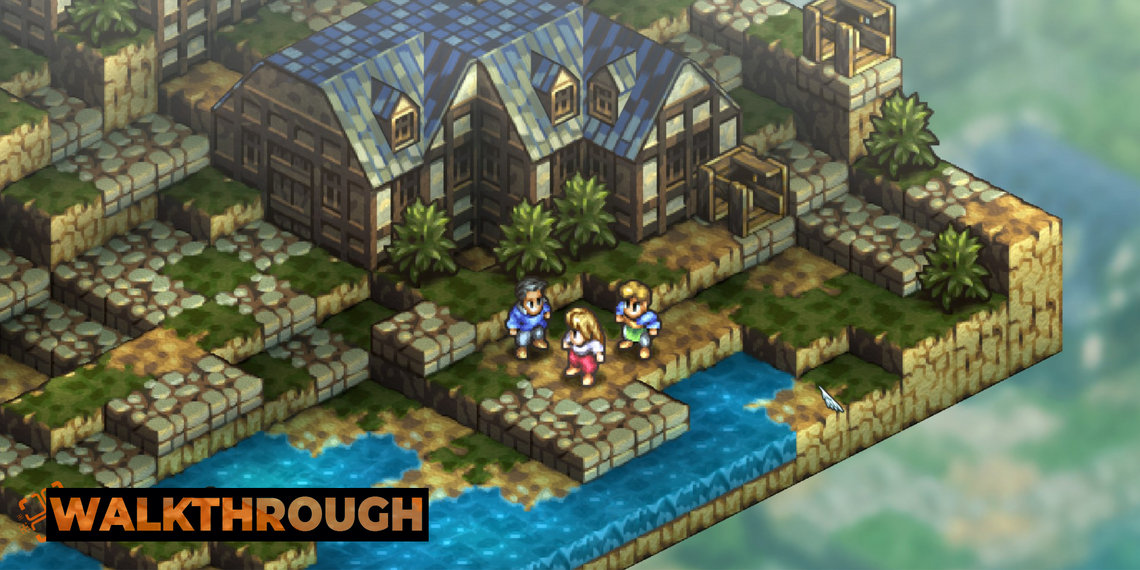
Tactics Ogre: Reborn doesn't wait before it thrusts you into the fray. Opening with a battle and introducing you to a whole host of characters right off the bat, you're in the deep end with this game. Luckily, the difficulty isn't too rough for the first few hours of the game - there's plenty of leeway for experimentation.
That said, there are some tricky parts to the chapter. Along with some nasty traps that may prevent you from recruiting important characters later on, a certain necromancer hides out in an optional battle ready to ruin your entire week.
Story Battle: Golyat

After taking a short quiz that will determine Denam's starting stats and his innate element, you'll be quickly thrust into a fight. This is a very quick tutorial battle on movement and will end very shortly, so don't worry about being outnumbered. Just move Denam to any space when prompted and wait for the battle to end.
After the fight, you'll be treated to more scenes that inform you more about the story. After this, you'll be introduced to the world map. You can take this time to examine your new acquaintances in the Party menu. Everyone apart from Denam is a Guest, which means they behave independently in battle.
Your only option is to head to Almorica Castle, so do that - it's time to save Duke Ronwey.
Story Battle: Almorica Castle
This is your introduction to Stronghold battles, which are consecutive battles that you cannot take breaks from. This is not dangerous at the moment, as this is still the tutorial section of the game, but in later parts, you'll want to save before and between every battle just to be safe.
Stronghold Battle: The Gates Of Almorica

|
Enemies |
Leader: Bapal (Berserker) |
|---|---|
|
3x Warrior, 2x Archer, 1x Wizard |
|
|
Guests |
Catiua, Vyce, Lanselot, Warren, Canopus, Gildas, Mirdyn |
|
Victory Condition |
Defeat Bapal |
|
Difficulty |
☆☆☆☆☆ (0/5) |
As the first rounds go by, you'll get inundated with advice from your new compatriots, who all seem to have something useful to say. Don't worry if you feel a bit overwhelmed by all the mechanics thrown at you - you can go over all the ins and outs of the battle system using the Warren Report from the world map.
As you only control Denam in this fight, use this time to get used to the battle system and its controls.
Something you might learn early on in this fight is that some tiles on each battlefield will have items on them. You cannot see them before ending a turn on them, but they can be nice surprises. In this fight, if you move Denam three steps toward the gate on his first turn, you'll get a Magic Leaf. This is a restorative item that recovers MP. On his second turn, move him four steps further in the same direction to get a spool of Hempen Thread. This is a crafting ingredient that you can use later in the game.
This battle (and the majority of story battles in the game) will be over once you defeat the leader. In this case, the leader is a Berserker named Bapal. He isn't that threatening, but this is a good time to think about your philosophy for finishing battles in Tactics Ogre: Reborn.
While it's quicker and quite efficient to make a beeline for the leader and kill them quickly to end the battle, killing the other units on the field is very good for collecting equipment. Selling equipment is the best way to make money in this game, and money can be quite short when your army starts getting larger - consider only going for leaders in particularly difficult battles or after you've whittled the enemy horde down enough.
Enemy drops are picked up automatically at the end of the fight, you don't have to pick them up yourself.
Stronghold Battle: Almorica Passageway

|
Enemies |
Leader: Agares (Knight) |
|---|---|
|
3x Warrior, 2x Archer, 1x Enchantress |
|
|
Guests |
Catiua, Vyce, Lanselot, Warren, Canopus, Gildas, Mirdyn |
|
Victory Condition |
Defeat Agares |
|
Difficulty |
☆☆☆☆☆ (0/5) |
This battle is functionally identical to the previous one. The enemy makeup is pretty much the same, except there's a Knight as the leader instead of a Berserker.
Your strategy should remain the same - move Denam towards your opponents and attack them. The rest of your squad will do the heavy lifting. Now is a good time to look out for specific techniques they use.
- If equipped with one, units can knock foes back with their shields to put them in worse positions or avoid counterattacks.
- Bows can be used to surmount height differences if you're close enough.
- Linear attacks (crossbows and missile spells) can thread through units easily with the right positioning.
The enemy units should fall quickly, especially if you can help out by targeting the squishier Archers or Wizard.
Gearing Up Your Army

Once you come out victorious, you'll be treated to more cutscenes and developments. Most of your guests will leave, leaving only Denam, Catiua, and Vyce - but Duke Ronwey is nice enough to give you a boon of 30,000 Goth and a few soldiers before you go off to do his bidding.
You will be able to recruit a Warrior, an Archer, a Wizard/Enchantress, a Cleric, and a Rune Fencer/Valkyrie. Their genders and elements are randomized.
You can now change classes. To do this, you need Classmarks - you will have picked up three Berserker Marks and three Knight Marks from the previous battles, and Classmarks for the Warrior, Archer, Wizard, Cleric, and Rune Fencer classes can be purchased at any shop. You cannot buy Berserker and Knight Marks yet, so use them wisely.
Take some time to get set up with your units. You can change up your weapon and spell choices if you want, and it would be a good idea to get a healthy supply of Mend Leaves and Blessing Stones. If you change up your equipment choices, make sure your units' skills match their new loadout.
Be wary of giving Blessing Stones to your AI-controlled Guests - they will use these as soon as they can in battle, which may be a strategic mistake.
Make sure your offensive spellcasters are equipped with spells that match their element - these will do more damage. In addition, purchase a Spiritsurge spell to give to Catiua, who can make great use of it when she's not healing.
Now that you're given more access to the game, you can use the Train option to fight skirmishes. This can only be used in certain locations, such as Almorica Castle, and will let you fight with no risks - units who die don't die permanently. You can only raise a unit's level to your current Union Level, which is Lv. 5 at the moment. It's not a bad idea this early in the game, where your strategic options are limited.
Once you're ready, save your game and head to your first proper battle as a new army.
Story Battle: Tynemouth Hill

|
Enemies |
Leader: Orba (Wizard) |
|
|---|---|---|
|
3x Warrior, 2x Archer |
||
|
Deployment |
6 Units |
|
|
Guests |
Catiua, Vyce, Canopus |
|
|
Victory Condition |
Defeat Orba |
|
|
Bonus Objectives |
Win with a Cleric in the party |
EXP +200 |
|
Use magic to heal |
Water Charm x1 |
|
|
Difficulty |
★☆☆☆☆ (1/5) |
|
This is the first story battle in which you will set up your formation before heading into the fight. You can place your units anywhere, but you can't add more than the unit limit, which is six at the moment. You can use every unit that the Duke gave you, so do so - Guests don't count. It's also the first battle with Bonus Objectives. Completing these will get you neat rewards at the end of the fight, but they aren't crucial to success.
- Just as the battle begins, Canopus will join you as a Guest. He's a great unit, but you can't control him just yet - his contribution is likely to be great, though.
- Orba can cast Paralytic Wave, which is annoying if it sticks to multiple units, but not the end of the world.
- This battle is very simple. Just move your units closer to your foes and try to focus down the Warriors one by one. The quicker you can remove an enemy from the battle, the quicker you can gain momentum. After the Warriors, go for the Archers and then finish off Orba.
At the end of the battle, Canopus will join your army permanently, meaning you can control him and change his class.
Canopus is a Vartan, a powerful class with physical and magical might. He starts off with a focus in Axes and Bows, but he's actually a fantastic candidate for Crossbows thanks to his ability to fly - he can get to tricky locations easily and use the Crossbow's greater power easier than a land-based Archer can. Losing melee attacks isn't a big deal for Canopus. Also, give him the Deadshot spell - some enemies will take far more damage from magic than physical attacks.
Story Battle: Krysaro

|
Enemies |
Leader: Moldova (Necromancer) |
||
|---|---|---|---|
|
2x Warrior, 2x Warrior (Skeleton), 2x Archer, 2x Wizard (Ghost) |
|||
|
Deployment |
7 Units |
||
|
Guests |
Catiua, Vyce, Donnalto |
||
|
Victory Condition |
Defeat Moldova |
||
|
Bonus Objectives |
Use magic to heal |
EXP +200 |
|
|
Obtain a buff card |
Light Charm x1 |
||
|
Difficulty |
★★★☆☆ (3/5) |
||
If you want to recruit Donnalto, keep him alive.
This battle pits you against undead enemies for the first time. When defeated, undead enemies will get stilled (read: knocked out) and have a timer over their heads, just like your downed units. When the timer reaches zero, undead units come back to life with half of their HP remaining. There are three ways to deal with this:
- The Exorcism spell can be used to remove a downed undead from the battle instantly. Donnalto has this spell.
- The Grimoire Exorcisme item can be used to do the same as the Exorcism spell. These can already be bought.
- Necromancers have an ability that can freeze a stilled undead's timer. You won't have access to this class for many hours.
Dealing with the undead is the key to this battle. Prepare by buying some Grimoire Exorcismes and keep Donnalto healthy so he can cast Exorcism on any stilled enemies.
- Send your ranged units to the left, near Donnalto's starting location, and use them to mop up the Skeleton and the Ghost here. They can use this heightened vantage point to rain death on the rest of your foes.
- Moldova's spells can hurt a ton - don't approach her with weak units and be ready to focus her down with strong melee attacks when you're ready. You might want to consider ignoring the Archers if they're still near her when you decide to go for the kill.
At the end of the battle, if he is alive, Donnalto will join your army. If he is dead, Felicia the Cleric will join instead. Either way, you will gain a new, powerful Cleric and two other characters, Sara and Voltare, who are an Archer and a Knight, respectively.
Your Union Level also raises to Lv. 8. It is possible to take on the fight at Qadriga Fortress right now, but it's better saved for later. Instead, return to Almorica Castle for a few scenes in which you'll get your new objective. Leonar will join as a Guest for the next few battles.
After the events at Almorica Castle, the shops will update with new equipment! Highlights include the Gladius, the Xyston, the Mage Staff, and the Stonebow.
Story Battle: The Golborza Plain

|
Enemies |
Leader: Brezen (Berserker) |
||||
|---|---|---|---|---|---|
|
2x Warrior, 2x Rune Fencer, 2x Wizard, 2x Archer, 1x Cleric |
|||||
|
Deployment |
8 Units |
||||
|
Guests |
Catiua, Vyce, Leonar |
||||
|
Victory Condition |
Defeat Brezen |
||||
|
Bonus Objectives |
Win with an Archer in the battle party |
EXP +200 |
|||
|
Win with a Knight in the battle party |
Air Charm x1 |
||||
|
Difficulty |
★★☆☆☆ (2/5) |
||||
This battle isn't too tough, especially now that you have Leonar. A little while into this fight, you'll unlock AI Control - this is a great feature for automating the easier battles once they get close to victory, and it's particularly useful for ranged units and healers, who become very efficient under the computer's control.
- There aren't many threats in this battle - the Wizard and Archer can be annoying as they get you from afar over the river, but they're easily dispatched.
- This is the first battle where you're up against enemy Clerics. They are very high-value targets, as their healing is always just effective enough to be very annoying. Try to take her down with ranged attacks asap.
- Try to avoid getting surrounded by enemies once you get close to Brezen - he has Pincer Attack, which will ruin the day for anyone caught in it.
All in all, this shouldn't provide too much difficulty. Continue on to Rhime.
Story Battle: The Arkhaiopolis Of Rhime

|
Enemies |
Leader: Bolis (Knight) |
|||||
|---|---|---|---|---|---|---|
|
1x Berserker, 1x Beast Tamer, 1x Valkyrie, 1x Archer, 1x Wizard, 1x Archer (Winged), 1x Earth Dragon |
||||||
|
Deployment |
8 Units |
|||||
|
Guests |
Catiua, Vyce, Leonar, Cistina |
|||||
|
Victory Condition |
Defeat Bolis |
|||||
|
Bonus Objectives |
Win with an Enchantress or Wizard in the battle party |
EXP +200 |
||||
|
Perform an action to debuff an enemy |
Copper Oberyth x30 |
|||||
|
Difficulty |
★★★☆☆ (3/5) |
|||||
If you wish to recruit Cistina later in the game, make sure she survives this fight!
This is another battle of firsts - you're up against Beast Tamers and a Dragon for the first time.
- Dragons are great sacks of health that pack a decent punch, though it's generally their area of effect breath attacks that you should be on the lookout for. The Dragon in this fight has no breath attack, luckily.
- Cistina begins the fight being attacked by the Valkyrie and the Earth Dragon - she's pretty good at holding them off herself, but she may need healing pretty quickly. Have a healer and Canopus equipped with healing items starting the fight on the right side of the formation menu - this places them closest to Cistina's starting position.
- Bolis has the annoying Rampart Aura, which will stop units in their tracks if they enter the tiles next to him. This can be very annoying, but is something you'll have to learn to deal with lots in this game. Battles with lots of Rampart Aura users are good places to bring more ranged attackers.
The stress of this fight comes from having to save Cistina very quickly. Once you've whittled down the threats and ensured Cistina's survival, the difficulty decreases drastically.
With that done, head up to Phidoch Castle and then back down to Almorica, watching the scenes that play out. Leonar will leave your party, but Ravness joins in his stead (again, as a Guest).
Shops will also update here. Things are getting expensive, so only buy the best upgrades. These will be the Longbow and the Heavy Axe. Better healing items are also available now; consider getting a few Mending Seeds but hold off on Mending Salves - your HP isn't high enough to warrant those yet.
Your Union Level will increase to Lv. 11. This is when you should try to take on Qadriga Fortress's optional battle. It's one of the hardest in the game, let alone the chapter, so consider training up a little. You'll be up against undead, so bring along some means of exorcism.
Optional Battle: Qadriga Fortress

|
Enemies |
Leader: Nybeth (Necromancer) |
|||
|---|---|---|---|---|
|
3x Archer (Skeleton), 2x Warrior (Undead/Skeleton), 2x Wizard (Ghost), 1x Valkyrie (Undead) |
||||
|
Deployment |
8 Units |
|||
|
Guests |
Catiua, Vyce |
|||
|
Victory Condition |
Defeat Nybeth |
|||
|
Bonus Objectives |
Use magic to heal |
EXP +200 |
||
|
Perform an action to exorcise an undead enemy |
Air Charm x1 |
|||
|
Difficulty |
★★★★★ (5/5) |
|||
This is one of the hardest fights in the entire game, let alone the chapter. You're up against an entirely undead army, and you start at a severe height disadvantage. Preparation and strategy are key here - there is a very good chance that you'll end up having characters knocked out - as long as you can complete the battle before their overhead timers run out, though, they won't die for good.
- Crossbows beat Bows in this fight - their linear trajectories make it easier to aim at enemies up on the battlements.
- The Skeletons, the Undead Warrior, and Valkyrie are heavily armored - they won't take much damage from your units. This, paired with their ability to resurrect unless Exorcised, means it's not a bad idea to ignore them completely in favor of rushing Nybeth.
- The Ghost Wizards, on the other hand, will fall quickly to repeated attacks. Try to take them out if you can, as their spells deal a ton of damage.
- Consider giving your mages Bucklers to improve their Piercing resistance. This will make the Archers less annoying, as they love to snipe your squishier units.
- Nybeth is a huge threat - you may want to have some higher-tier healing items on hand to deal with his incredibly powerful spells.
- Nybeth is very resistant to Bludgeoning damage and weakest against Piercing damage. Crossbows and Spears are the way to go here.
It's very important not to be tempted to turtle up and take this battle slowly. It will be extremely difficult to manage your resources between healing and Exorcising your enemies, and Nybeth has a skill that summons more enemies from the darkness anyway. Rushing Nybeth is definitely the best way to go.
With that out of the way, we can return to the story battles.
Story Battle: Lake Bordu

|
Enemies |
Leader: Grion (Knight) |
|||
|---|---|---|---|---|
|
2x Berserker, 2x Warrior, 4x Archer (one Winged), 2x Wizard |
||||
|
Deployment |
9 Units |
|||
|
Guests |
Catiua, Vyce, Ravness |
|||
|
Victory Condition |
Defeat Grion |
|||
|
Bonus Objectives |
Perform an attack with 100% accuracy |
EXP +200 |
||
|
Use a recruit skill |
Earth Charm x1 |
|||
|
Difficulty |
★☆☆☆☆ (1/5) |
|||
The enemies here are all human, including the winged ones - to recruit a human, you need the Recruit skill, which is learned by Clerics, Rune Fencers, and Knights.
This battle is a nice breather.
- The only real threat here is the possibility of getting surrounded by melee units - they all have Pincer Attack in this fight, and the damage can rack up fast if you're caught in a bad position.
- Take the battle slowly and you should have no issues - between Catiua, Ravness, and any healers you bring along yourself, you should be set.
- This is a fantastic opportunity to recruit the enemy Winged - as you've probably noticed with Canopus, being able to fly is an amazing advantage to have in a fight. They make for fantastic Archers and Rune Fencers.
Victory should be swift, and it'll be time to move on to the next fight.
Story Battle: Xeod Moor

|
Enemies |
Leader: Ganpp (Beast Tamer) Obda, Berda (Gryphons) |
|||
|---|---|---|---|---|
|
2x Warrior, 2x Archer, 2x Wizard, 1x Cleric, 1x Beast Tamer |
||||
|
Deployment |
9 Units |
|||
|
Guests |
Catiua, Vyce, Ravness |
|||
|
Victory Condition |
Defeat Ganpp, Obda, or Berda |
|||
|
Bonus Objectives |
Perform an action to debuff an enemy |
EXP +200 |
||
|
Perform an attack that strikes multiple tiles |
Fire Charm x1 |
|||
|
Obtain a buff card |
Iceblast II x2 |
|||
|
Difficulty |
★★☆☆☆ (2/5) |
|||
This is your first of multiple encounters with Ganpp, a very rough Beast Tamer with a love for his Gryphon pets, Obda and Berda.
- While the game will tell you that you only need to defeat Ganpp to win this fight, defeating either of the Gryphons will also end the battle. Be wary of this if you intend to defeat or recruit the generics or take advantage of it if you find yourself threatened.
- Gryphons are very powerful at this point in the game - their Numbing Hook ability is a high-damage ranged attack that may stun targets. They can also fly, and will get behind your lines to threaten your squishier units.
- You can recruit the Lizardmen here with Coax, which the Wizard class learns. Lizardmen are great physical fighters and have access to some exclusive classes that you'll be able to acquire Classmarks for later in the game.
- Definitely try to get a buff card to fulfill the bonus objective - Iceblast II is a good spell to have this early.
Once you've finished this battle, prepare yourself for the final stretch of the first chapter.
Story Battle: Balmamusa

|
Enemies |
||||
|---|---|---|---|---|
|
4x Warrior, 4x Archer |
||||
|
Deployment |
9 Units |
|||
|
Guests |
Catiua, Vyce, Ravness |
|||
|
Victory Condition |
Defeat all enemies |
|||
|
Bonus Objectives |
Perform an attack with 100% accuracy |
EXP +200 |
||
|
Obtain a buff card |
Lightning Charm x1 |
|||
|
Difficulty |
★☆☆☆☆ (1/5) |
|||
This battle is barely a nuisance. You outnumber the enemy greatly, and you start at a fantastic height advantage. Really, this battle serves to push you over the line onto the difficult choice of the chapter - the one that decides the route you'll take through the majority of the game.
The one thing to be wary of is the Archers - they all have Crossbows, so their height disadvantage isn't as apparent as it might seem. Don't leave your squishiest units out in the open for them to snipe.
Route Split: Should You Follow Orders Or Disobey The Duke?

After the first battle in Balmamusa, you will see a few cutscenes that end with you being forced to make a choice. Either you comply with the Duke's orders and massacre the residents at Balmamusa, or you disobey, taking your fate in your own hands. Your choice here will dictate which version of Chapter 2 you'll play.
- Taking part in the massacre will set you on the Law path. Many prefer this path because it features some of the strongest recruitable characters.
- Disobeying will set you on the Chaos path. There are still great characters to recruit on this path, and it's also the only way to get onto the third path - the Neutral path.
No matter which path you take, you'll be able to experience the other through the World system, which unlocks once you've beaten the game. This allows you to go back in time and make different choices.
When Leonar asks you a question, your response dictates the path you'll end up on:
|
Response |
Path |
|---|---|
|
I understand. |
Law |
|
Stop this lunacy! |
Chaos |
Depending on which path you choose, there will be one final battle in this chapter.
Story Battle: Balmamusa (Law Path)

|
Enemies |
||||
|---|---|---|---|---|
|
Ravness, 2x Warrior, 2x Archer, 2x Rune Fencer, 1x Wizard, 1x Berserker |
||||
|
Deployment |
10 Units |
|||
|
Guests |
Catiua |
|||
|
Victory Condition |
Defeat all enemies |
|||
|
Bonus Objectives |
Perform an attack with 100% accuracy |
EXP +200 |
||
|
Perform an action to debuff an enemy |
Ice Charm x1 |
|||
|
Difficulty |
★★★★☆ (4/5) |
|||
If you want to recruit Ravness later, do not kill her in this battle.
Ravness turning on you isn't the best development and certainly adds to the difficulty of this fight - especially if you want to recruit her later on.
- Bringing two dedicated healers isn't a bad shout for this battle. Ravness can put the hurt on your teammates throughout the entire fight and if you're avoiding her death, there's no great way to stop her from doing so.
- The other enemies aren't as tricky to deal with in comparison, but you'll want to make certain units your priorities - the Knight has the annoying Rampart Aura and the Heal spell to make things more drawn out, and the Wizard won't hesitate to destroy you from afar.
- If Ravness gets a bit too low on health, heal her. You'll win the battle once every other enemy is defeated, so don't worry about having to bring her to critical or anything.
No matter how you deal with Ravness, ending this battle means you're in Chapter 2 proper. I hope you're happy with yourself.
Story Battle: Balmamusa (Chaos Path)

|
Enemies |
||||
|---|---|---|---|---|
|
2x Warrior, 2x Rune Fencer, 2x Archer, 1x Knight, 1x Berserker, 1x Enchantress |
||||
|
Deployment |
10 Units |
|||
|
Guests |
Catiua |
|||
|
Victory Condition |
Defeat all enemies |
|||
|
Bonus Objectives |
Perform an attack with 100% accuracy |
EXP +200 |
||
|
Obtain a buff card |
Air Charm x1 |
|||
|
Difficulty |
★★☆☆☆ (2/5) |
|||
This is an easier battle than the Law path's alternative. It's basically a more complicated version of the first battle in Balmamusa, with more threatening enemies.
- Threatening units include the Enchantress and the Archers, and this is mostly because they are able to pelt your team with attacks from afar and are likely to be difficult to reach.
- The Knight is also a huge annoyance thanks to Rampart Aura and her Heal spell - try to take her down quickly to make the rest of the battle easier on you. It's worth the effort, despite her high HP.
- Bludgeoning weapons aren't very useful in this fight thanks to the abundance of armor at this level that provides Bludgeoning defense. Consider leaving the Hammers behind.
All in all, this shouldn't be too rough, and you'll be off to a flying start on Chapter 2 sooner than you think!