Quick Links
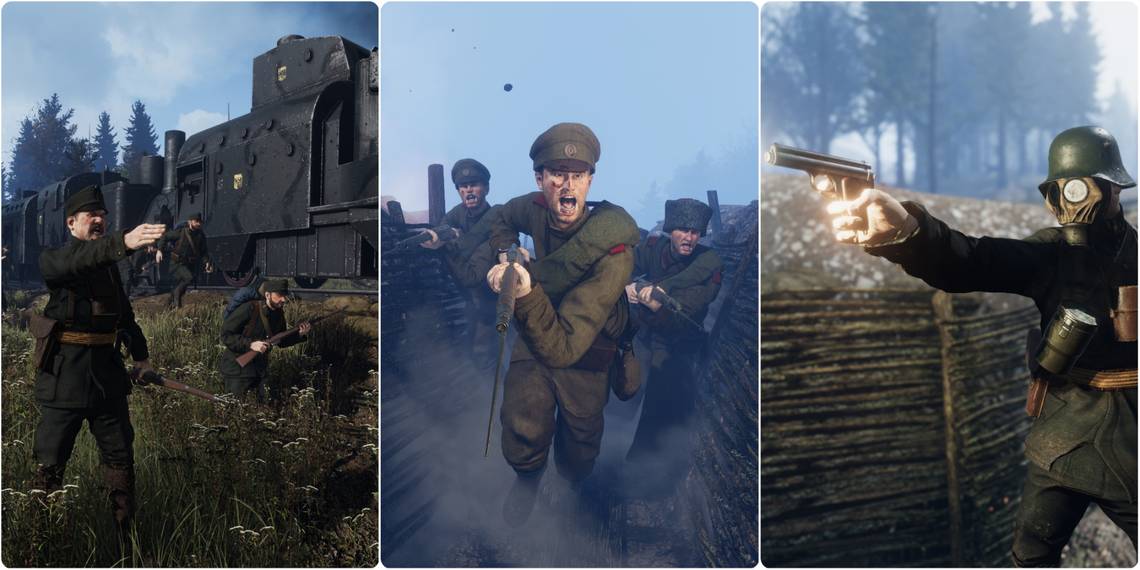
Tannenberg does not mess around. One match you’ll have gas flooding into your trench, with artillery sending bodies flying everywhere, as shots whizz out overhead. In another game, the squad leader blows a whistle, everyone charges, and you round the hill, to see the enemy counterattacking during your attack, as rushed shots and a manic melee break out in no-man’s-land.
However, there’s nothing better in-game than outflanking your opponents, going on a mad trench dash, and winning the day. It’s a great experience, but often an unrelenting and vicious one. So, we’ll share some of our top tips for rookies and veterans alike to help turn the tide of battle in your favour.
Stick With Your Squad

Love or loathe them, your squad could be the difference between shooting fish in a barrel and being the fish in the barrel.
Everyone in the squad plays a role, all squad members have unique abilities, weapon loadouts, and skills, but many abilities have a limited range, not every class carries grenades, and points are captured faster with more teammates on them. Keep them close to solve problems you can’t fix alone, and if the worst happens, it will be better to have four guns than one.
Also, so long as your squad mates are safe, you can spawn on them and get right back to the action, instead of running from the nearest captured spawn. This is perfect for when you just must push an attack, or when every soldier is needed on defence.
At the end of the day, teamwork makes the dream work. Look after the folks who are most likely to have your back, and they might just return the favour.
But Don’t Group Up

This seems very hypocritical after the first tip, but running into battle whilst hugging your nearest ally is a dangerous move. Machine guns, artillery, grenades, and gas make getting multi-kills on bunched-up foes easy. Plus, a crowd of tightly-soldiers running towards the enemy line is a sniper’s dream.
Stay close enough so you can help and be helped by your squad, but avoid trying to make a rugby scrum.
Avoid Zigzagging, Go Cover To Cover

Going in a straight line to capture a point in Tannenberg is at best, a death sentence, and at worst, impossible. Even if you find a route, you’ll still have to trundle through barbed wire, in the middle of no-mans-land, bobbing around like a rubber duck.
In the previous game, Verdun zigzagging was often the only method of survival over the parapet. However, Tannenberg is full of buildings, forests, hedgerows, and hillocks to bob and weave over, under, and through.
So unless you’re at point-blank range, moving and shooting between cover will be slower, but gives you much better survival odds over trying to become a World War One Neo from The Matrix.
Know Your Weapon

We’ve all been there, you rounded a corner, spotted an enemy, lined them up, and only then realised your empty gun is now an over-engineered pointing stick. Look in the bottom-right corner and check that your gun is loaded, how much ammo is there, and whether a rushed reload has misplaced the bolt.
Also, there are lots of weapons to choose from in Tannenberg. Each squad and squad role has access to different load-outs, some of them use clips that can’t be loaded halfway through, others fire single shots, and books can be read faster than some of the firearms used.
Fire and reload a full clip and half a clip from your rifle somewhere safe, then try one of the mounted machine guns at HQ to see how it works. You can pick up ammo from your gunner afterwards, and you’ll be thankful to know how your weapon works before getting into a bloody scrap.
Find What Works For You

Not everything will click for you, we all have our preferences. So make sure to try everything and see what works for you. You’ll earn career points to unlock new load-outs pretty quickly and all the squads are available to pick from the get-go, so fill a squad with friends or join a random squad to see what you like.
Do you like being in the thick of it with a bayonet? Or are you a marksman in the making? Or something else? Is being adaptable best? Or maybe you just want to try something new.
Once you’ve picked a playstyle, pick a loadout to suit it: a pistol makes a world of difference in close quarters, while a grenade can make taking trenches much easier. Maybe you prefer single-shot rifles over en-bloc style clips, or perhaps you want to give the command a try.
Watch The Flanks

Flanking the enemy from multiple angles is your best bet at attacking. Brute forcing your way onto an objective is tough. Even if your whole team is on board, the odds are fairly even after accounting for defenders’ advantage, killing zones, gas, artillery, and the other team.
If the west side of an enemy ammo dump is remodelling your squad into colanders, try pushing from the north. Even better, coordinate your push with another crew to spread out their forces, or even capture the point next door to threaten their flanks.
Also, don’t forget about your flanks either. Most trenches lead into capture points, if you’re defending a sector, watch out for opponents sneaking in and taking everyone out quietly with their bayonet. Similarly, if you find a gap in their defences, exploit it, run amok in their lines, and cause as much havoc as possible.
Fight With Purpose

Whilst being behind cover with your head down is safe, it’s not particularly useful in an objective game. If you’re holding off a push then keep up the fine work, but if not, go looking for trouble. Set yourself the goal of getting to the next trench, join an ongoing push, or find somewhere safe for your dead squad to spawn on you.
With 64-player maps and lots of objectives to take, there’s always something to do to help the team. Even if it leads to your untimely demise. Speaking of which…
Always Go Out Fighting

In the maneuver game mode, the points at the top of the screen aren’t tickets like in Battlefield. These ‘command points’ go down based on who holds the most valuable territory. Dying doesn’t directly affect the score, so if your situation gets dire, make sure you go out in a blaze of glory or die trying!
Is the enemy team pushing your fortifications? Get on a machine gun emplacement and don’t stop firing. Did a platoon rush over the parapet with just you around? Shoot and stab until someone stops you. Did the rest of your squad die on the way to a capture point? Find a vantage point and pick off as many enemies as you can in ten seconds, then try retreating to give your squad a safe spawn.