The Legend Of Zelda: Tears Of The Kingdom features countless dungeons to clear, Korok Seeds to scavenge, and difficult bosses to fight. While you may still have some questions after the credits roll, there's no doubt about the challenge that Tears Of The Kingdom's bosses pose.
While you won't need to defeat every boss in Hyrule to finish the game, you'll certainly want to challenge as many foes as possible to claim their valuable rewards. Major bosses like Colgera will allow you to continue using a sage's special abilities when summoned. Optional fights may reward extremely rare weapons or loot, so start searching for them early.
Updated June 10, 2023, By Andrew Scariati: As more of us make our way through the main story and into Tears Of The Kingdom's incredible postgame, the plethora of available TOTK bosses reveal themselves. While most Tears of the Kingdom bosses are simple enough to defeat, there are a number of minibosses and full-fledged boss encounters that will challenge your skills. TOTK bosses range from devious Yiga Clan members to massive dragons called Gleeoks, offering a range of powerful foes to overcome. The hardest boss in TOTK may come as no surprise, but the many obstacles on the journey to that encounter will ensure that you're ready to face anything.
This List Contains Story & Boss Fight Spoilers
12 Flux Construct III

The Flux Construct is a powerful miniboss you'll encounter throughout the Sky Islands. These lumbering giants made of blocks are the guardians of certain shrines and will stand in your way as you toil to return each Sky Crystal.
In order to defeat a Flux Construct, you can't just attempt a brute force approach but instead must hone in on its special glowing green block. Grab the glowing green block with Ultrahand and wiggle it, then attack it relentlessly when it tumbles to the ground.
It sounds easy enough, but you must keep running and dodging while trying to remove the green block, as Constructs will move rapidly to keep pace with your position.
11 Colgera

Colgera is the first major Tears Of The Kingdom boss you'll encounter if you begin your journey in the northwest area of the map. Despite its relative early placement in the game, it still offers a decent challenge for those who haven't practiced with their bow.
During the duration of the fight, Link will be floating around the sky on his glider as Colgera fires ice while entering and exiting portals it creates. If it touches you, you will take damage, so be careful to avoid it at all costs.
Colgera's weak points are large circles, which make for easy targets, but you must manage positioning, timing, and aiming to come out on top.
10 Yunobo

Yunobo should be a relatively short fight compared to other TOTK bosses but can spiral out of control if you don't prioritize avoiding his rolling attack. You must wait for Yunobo to charge up his spinning attack, then prepare to jump to either side as he unleashes; be quick, the attack is incredibly fast.
As long as you can dodge damage, you should find that hitting his weak point (the mask) with arrows isn't too hard. It's imperative to keep moving around here, as in many of the most difficult boss fights, so as long as you aim carefully and evade in time, Yunobo should be free from his spell in no time.
9 Moragia & Marbled Gohma

The Moragia and Marbled Gohma fights are essentially parts one and two of the same encounter. However, despite being phase one, the Moragia section of the fight might pose a greater challenge to you, depending on your Zonai piloting skills.
Moragia requires you to fly a fan-powered glider as you fly around Death Mountain avoiding molten rocks that it fires at you. In turn, you must fire boulders back while flying to progress to the Marbled Gohma phase.
This portion will require constant movement as you avoid earth-shaking attacks. You'll need a rock-crushing weapon to do real damage, but otherwise, the fight is relatively straightforward.
8 Phantom Ganon

This fight transpires in two parts, though both offer plenty of challenges to overcome relative to the points in the game you will face them. The first phase with the Scourge of the Deku Tree is a challenging encounter given Ganon's sword range and decently-paced attacks.
However, this was only a fraction of his power once you get to phase two. Once you reach the second fight later in the game, Ganon will split himself into multiple copies, dashing toward Link and attacking him periodically.
With so many enemies running around the arena, you need to keep your head on a swivel during this encounter. Stun him with arrows when possible and exploit the subsequent openings.
7 Mucktorok

The Scourge of the Water Temple is as ugly as it is tricky to deal with, changing forms during your encounter. For the most part, the Mucktorok will swim underneath the arena floor, avoiding damage, much like Elden Ring's Elden Beast, and once it emerges, you have very brief windows to deal damage while avoiding attacks.
There are two major attacks to worry about, a wave of darkness that spreads gunk across the floor, and a beam the Mucktorok fires from its mouth. Both of these will deal major damage if you don't jump and use Sidon's aid to help avoid damage.
It's worth using an Opal Rod here to clear the dirty floor in phase two. You must keep moving and be patient when looking for windows to attack.
6 Seized Construct

The Seized Construct stands head and shoulders above other Construct bosses and is one of TOTK's hardest bosses. While its Temple is fairly straightforward, it may take you a moment to figure this fight out, so don't feel bad if you need to try more than once.
This boss plays out like a boxing match, so you'll need to put up your shield to block a punch from the Seized Construct. Blocking should stun the Construct, allowing you to unleash a devastating counter-attack combo that should launch the Construct into the electrified wires.
Once the Seized Construct is stunned by the electrical wires, inflict some damage with more punches from your own Construct, repeating the process until victory.
5 Queen Gibdo

Queen Gibdo is a surprisingly difficult boss in both her introductory phase and her final fight after you make your way through her Lightning Temple. Using Riju's lightning power, you'll be able to stun Queen Gibdo throughout the fight, making her vulnerable to follow-up attacks.
She is fast, so attach some Keese eyes to your arrows to ensure Riju's lightning bolt hits Gibdo.
Despite her simple gimmick, Queen Gibdo's sheer size is a massive obstacle to your survival. Her charging attacks are very difficult to avoid and her trio of tornadoes is exceptionally hard to navigate while also maintaining distance.
Stun her as quickly as possible and prepare to avoid being hit by her gusts en route to taking down the hardest boss TOTK's temples have to offer.
4 Master Kohga

The powerful leader of the Yiga Clan, Master Kohga has several tricks up his sleeve for this four-part boss fight, so don't let your guard down!
Master Kohga isn't a fan of fair fights, so each phase will allow him to stack the odds in his favor. During this four-phase battle royale, Kohga will employ a tank, a glider, a boat, and lastly, a giant Zonai robot that is even tougher than the Seized Construct.
Each phase is more challenging than the last, though the glider is particularly frustrating. In this segment, you will have to land shots on a moving target, which is much harder when they're dancing through the air.
Be careful when he unveils his robot as well, as its long arms and projectiles can be quite dangerous.
3 Elemental Gleeoks

The three elemental Gleeok bosses are intended to be fought later in the game, as they pack an unbelievable punch, are hard to damage, and require crafty use of your abilities. While you can easily stumble across them on your journey across Hyrule, you should stay far away until you get some powerful gear.
Once you do decide to get up close and personal with these three ferocious foes, then prepare for a serious fight as their elemental attacks can hit extremely hard. You will need to stun each head at least once with an arrow to completely stun a Gleeok, which is when you need to focus on doing as much damage as possible.
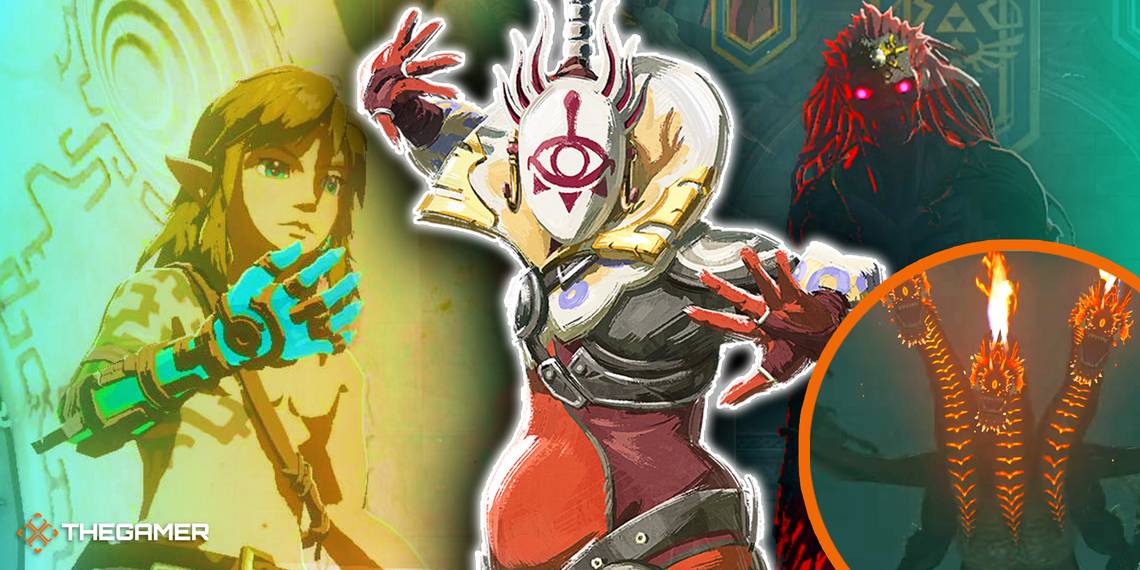
2 King Gleeok

If you thought the three Gleeoks were hard, then imagine fighting all three of them simultaneously; that's the power of King Gleeok. This vicious three-headed dragon touts one head for each elemental damage type, so your resistance to each damage and healing will be paramount to this fight.
Avoid taking a direct hit from any head, particularly the Frost one as it will freeze you in place, forcing you to break out before you can go back on the offensive. Keese Eyes will come in handy for stunning, and you can make good use of a Lynel's Bow here to hit each head, so stay cautious and patient to outlast this daunting foe.
If not for the final boss encounter, this Gleeok might have been the hardest boss TOTK had to offer.
1 The Demon King

All of TOTK's bosses have been preparing you for this encounter.
This final confrontation lives up to its billing in an epic three-part battle that will have you putting all your tricks to good use. Each phase will test your skills, with the first one serving as an introduction to Ganon's power.
Once you enter phase two, things will start to heat up as Ganon turns your moves against you. Ganon will perfectly dodge your attacks, forcing you to wait for his attack before you counter.
Once you master this section, you'll have to take on the Demon Dragon, The Demon King's final form. Hop from weak point to weak point, taking them out on your road to defeating the ultimate threat to Hyrule, and the hardest boss in Tears Of The Kingdom.