It would be safe to say that, generally, Legend of Zelda games are well-designed. Most dungeons are intricately designed, mixing clever puzzles and an unmistakable flow that defined the series for the longest time. Enter the dungeon, find an item, use it to advance and defeat the boss. It’s a refined formula that was ditched with the arrival of Breath of the Wild, but at its core, The Legend of Zelda still relies on the precise balance between holding the player by the hand, and giving the player enough freedom to make one feel smart when solving problems.
There are, however, exceptions to that statement. There are some instances where Nintendo seemingly forgot about its detailed quests, instead featuring frustrating and tedious sections in an otherwise enjoyable game. Be it annoying gameplay mechanics or never-ending trade sequences, every game in the franchise has at least one situation where the difficulty peaks at a surprisingly high level. These quests can still usually be beaten through grinding or with divine-like patience, but they stick out from the rest of their respective game because of how out of place they seem.
We have reunited fifteen of the worst offenders in the following list. These quests are often difficult at first; they can get easier with each subsequent replay, but they never get any more fun.
15 The Lost Pilgrimage (Breath Of The Wild)

Breath of the Wild is a wonderful game with an unprecedented sense of freedom. “The Lost Pilgrimage,” a side quest where you have to follow a Korok trekking through the forest to find a shrine, sticks out like a sore thumb. This sounds simple enough, but several factors make it more frustrating than necessary.
First, the Korok is incredibly small, and can easily be lost in the tall grass. Second, the color palette of the forest makes it so the Korok blends in perfectly with the surroundings. You will therefore often end up closer than intended to the little guy, triggering another failure. Finally, just when you think you’re clear, the Korok turns around suddenly and starts running towards you. Since you will most likely be crouching, it’s nearly impossible to run out of the way, so you lose again. Let's not forget the Korok’s cry for help when he’s faced with wolves, which you should ignore. That’s right. You must risk letting the little guy get mauled, or you fail.
“The Lost Pilgrimage” is out of place in Breath of the Wild because it feels unnecessarily cheap. A few tricks have since been making the rounds, but even those solutions make successful completion seem random.
14 The Temple Of The Ocean King (Phantom Hourglass)

A bad quest can ruin the flow of a game, forcing you to take a break just so that the frustration can wear off. If the quest lasts for too long, it can take what should be a fun game dangerously close to feeling like a chore. Now imagine what happens if a bad quest is a central idea around which a game is based. Phantom Hourglass boldly decided to find out.
Phantom Hourglass is a decent game at its core, one which proves that touch screen controls can work surprisingly well for a Zelda adventure. However, whatever goodwill it gets from its mechanical prowess is wasted with the Temple of the Ocean King. The temple must be visited five times over the course of the game, usually after beating a regular temple. Every time you come back, you must redo the rooms you had already solved in the past before proceeding to the newest floor. By the time you go in for your final showdown with Bellum, you have already seen most of the dungeon, but you must still retrace your steps, solving the same puzzles a fourth or fifth time. It’s a tedious process which makes Phantom Hourglass one of the least replayed games in the entire series.
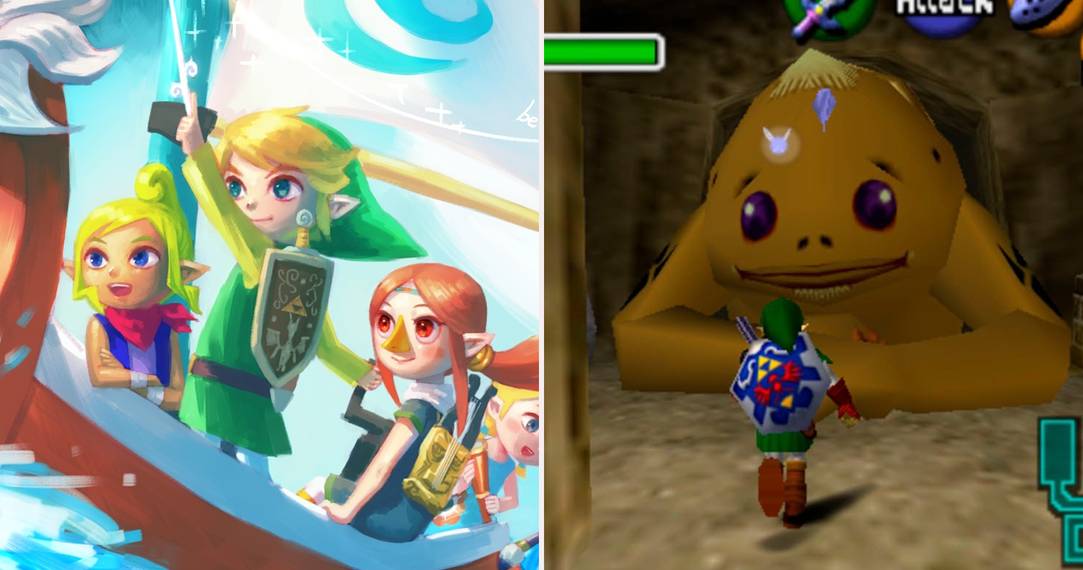
13 The Original Water Temple (Ocarina Of Time)

The Water Temple in Ocarina of Time has acquired an unfortunate reputation, with some lists claiming it is one of the worst dungeons in the series. I would argue that the design of the temple itself is sound, but that the dungeon is ruined by its reliance on the Iron Boots.
In the Nintendo 64 version, the Iron Boots are not a c-item, like the bow or the bombs. Instead, they are a regular piece of equipment, which must manually be equipped from the pause menu. Some sections of the dungeon require putting them on and taking them off a dozen times or so in a short amount of time. Every few seconds, the player must pause the game, switch to the inventory menu, put on the boots, and unpause the game. A few seconds later, pause it again, go back to the menu, take off the boots, and unpause, so on and so forth, and so often, that the “difficulty” of the dungeon becomes a legend.
The 3DS remake realized the problem and made the boots an item instead of a piece of equipment, making the process much more efficient. They also added neon-coloured lines all over the dungeon to guide players towards the right direction, making the Water Temple much more palatable.
12 Collecting The Tadtones (Skyward Sword)

In Skyward Sword, there comes a time where Link must go into the flooded Faron Woods in order to find the Song of the Hero. Because nothing in Zelda is ever simply given to you, you must find all of the Tadtones, little musical notes-shaped tadpoles, before you are bestowed the sacred song. That sounds like a simple fetch quest, which might not be the most fun thing in the world, but it looks straightforward.
Or so you would think! To find the Tadtones, you must swim to the bottom of the flooded woods, all the while fighting against the clunky controls of the Wii Motion Plus. It works well enough when swinging the sword, but it’s not a good control scheme for precise swimming. You must also battle your limited oxygen supply, which can be further depleted if you bump into a poison bubble, most of which masquerade as the Tadtones you must collect. Also, the Tadtones of similar colours must be collected within a few seconds of each other. Otherwise, you must restart their entire sequence. The sequence is easily disrupted by the many enemies swimming, or just floating around, Faron Woods. In the end, a quest which should take no more than ten minutes can easily be transformed into an hour-long marathon from hell.
11 Finding The 8th Dungeon (Legend Of Zelda)

For first-timers, the original Legend of Zelda is a challenging game which offers minimal clues as to what to do next. Even for experienced (but average) players, such as myself, the game remains challenging because of some enemies are so unpredictable. Enemies like the Wizzrobes are tough as nails to deal with. Moreover, some dungeons are so well hidden that, during the five years or so between each occasional playthrough, it's easy to forget their entrance's location. The worst offender is definitely level 8, also known as “The Lion.”
The entrance to level 8 is hidden behind an inconspicuous bush in the middle of a screen. If you encounter it early enough, you don’t have the candle necessary to burn it down, and thus you walk back and promptly forget about it. By the time you need to find the dungeon, there is nothing to tell you where the entrance is supposed to be. Not even the Old Man can be bothered to give you a badly translated clue to let you know where you are supposed to go. For first-timers, it will be a matter of luck regarding how fast they stumble upon the screen which contains the one tree which looks out of place.
And for returning players, you’ll just remember that there’s a bush somewhere that needs to be burned, but your pride won’t allow you to go online to look at a walkthrough. Good luck figuring out which tree in the 128 screens is the right one.
10 Cutting It A Little Close With The Gilded Sword (Majora's Mask)

The strongest sword in Majora’s Mask takes a lot of effort to obtain. While most of the steps needed are fairly easy on their own, it’s the fact that they all must be accomplished in a single three-day cycle which makes it complicated. Furthermore, some of those steps take an entire day, severely limiting your margin of error.
The sequence of events unfolds like this: Beat the Snowhead Dungeon in its entirety, then go back in time. Go straight to the smithy and upgrade your sword a first time, then waste an entire day waiting for them to finish the job. Claim your sword, beat the boss of Snowhead again, and then go to the Goron racetrack and win the race. This step is the most difficult because it’s easy to get knocked off the track by the other Gorons, which forces you to restart. Assuming you managed to beat the race with more than a day left, you can take your reward (the gold dust) back to the smithy, leave them your sword for another full day, then pick it back up before the moon falls. Interrupting that sequence at any time to warp back to the first day will reset the whole thing. It’s a nightmare of time management and repetitiveness.
9 Protecting The Carriage (Twilight Princess)

When a Zora boy is found injured in Castle Town, the owner of the local bar decides that there’s only one thing to do: get the kid to Kakariko Village, where he might be able to receive proper treatment. In Hyrule, that kind of job is problematic for two reasons: ambulances do not exist, so it must be done via horse-drawn carriage. Also, most of Hyrule has been taken over by dangerous creatures that love nothing more than wrecking travelers. And thus was born one of the most frustrating escort missions in Zelda history.
The carriage must arrive in Kakariko Village in one piece, which is easier said than done. Bad guys will try to set fire to the cart, in which case you have a split second to target it with the Gale Boomerang and put it out. Second, demonic birds drop bombs on your party, sending the carriage off course. Your main means of defense is the bow, which must be used while you are riding your horse. This is already a difficult proposition when playing with a controller, but the Wii version relies on motion controls for aiming. The controls are particularly twitchy when it comes to precision shooting. Thankfully, you get unlimited tries, but your patience’s limit will most likely be exceeded before you reach the end.
8 Collecting The Triforce Shards (Wind Waker)

The original quest to find the Triforce shards was not complicated. However, it was ridiculously stretched out and felt uncharacteristically empty. Every shard can be found using a corresponding chart, and the tasks necessary to find these charts are varied, both in objective and difficulty. You might have to solve a simple sliding puzzle, or you might need to go down the first 30 floors of a 50 floors dungeon filled with enemies and with limited life refills. Once the charts are in your possession, you must then bring them to Tingle, who will charge you an astonishing 3184 rupees for the job. If you are short on cash, this means tacking a rupee grinding quest on top of your Triforce responsibilities. Finally, you must travel to wherever the charts send you so you can fish the shards out of the water like any other regular treasure.
The sequence of events is an exhausting one, and the HD remake eases the pain a little bit by replacing most of the charts with shards at the end of the various tasks you must accomplish. Only three charts need to be deciphered, greatly reducing the time necessary to complete the Triforce (and your interactions with Tingle).
7 Finding And Fusing Kinstones (The Minish Cap)

Minish Cap introduces Kinstones to the series, small circular stones that are split in half, which you can collect and then attempt to find the owner of the other half for a reward. It sounds like a fun idea, but the game does the concept wrong. It would have been fine if the fusions were only used to give smaller rewards, such as rupees or mysterious shells, but some fusions are necessary to advance the game or to get items like bottles or heart pieces. In an example of the snake eating its own tail, fusing Kinstones will sometimes reward you with a different Kinstone. To make matters more complicated, the location, or even the person who has the other half of your Kinstone, is often randomized. As for the treasure chests that are sometimes revealed after a successful fusion, they are not always in the immediate vicinity. Even using a walkthrough, you will need luck to complete the quest.
Should you be patient enough to accomplish all 100 Kinstones fusions available, your only reward will be the Tingle Trophy, which does absolutely nothing at all. You can’t sell it, and you can’t use it. The ending of the quest is as misguided and disappointing as its entire execution.
6 The Last Two Heart Pieces (A Link To The Past)

The Heart Pieces in A Link to the Past are mostly cleverly hidden at the end of a short puzzle. Some pieces are visible from the overworld, taunting you, and yet they are inaccessible until much later in your quest, when you acquire the needed tools. Two of the heart pieces, however, can only be found through pure luck, and it makes completists and speedrunners alike go crazy.
The first one is found in a chest game in the Dark World. The game has 16 chests, and for 30 rupees, you may open two. The Heart Piece changes location randomly, so it could be a dozen tries or so before you succeed. The second piece is in the Treasure Field, another minigame where for 80 rupees, you can dig as many holes as possible in 30 seconds. Digging up the heart is also a matter of chance, as it changes location every time, and no spot on the map is more likely to have it. Of course, it is possible to finish the game with just 19 hearts, but most Zelda players are familiar with that nagging feeling that makes you feel incomplete should you leave even one collectible behind.
5 Biggoron’s Sword (Ocarina Of Time)

For those who think that the Master Sword is not cool enough, Ocarina of Time offers Biggoron’s Sword: an optional weapon which can only be wielded with two hands, making your shield unavailable in the process. It’s a great sword for those who privilege attack over defense, but the hoops you must jump through to acquire it will make you think twice about how useful it really is.
Biggoron’s Sword is the reward at the end of a long, drawn-out trading sequence, in which several steps have a time limit. Failure will force you to restart the current step. However, failure in any of the last two parts of the trading sequence will require you to go back several steps and try again. The last portion, where you must deliver eye drops to the top of Death Mountain, necessitates the use of Epona and requires you to dodge falling boulders. You must also take out skulltulas with your bow before attempting to climb the final wall, or the charging spiders will send you all the way back to the bottom. Your margin of error is approximately ten seconds, on a four-minutes time limit. Even with the knowledge of what's coming up, it is a stressful experience which will make you test just how long you can really hold your breath.
4 The Silent Realms (Skyward Sword)

The Silent Realms are a recurring part of Skyward Sword which tasks the player with finding fifteen glowing tears in a shadowy version of the area which they represent. During these trials, Link cannot use his items, and should he be spotted by a Watcher, he will be pursued by the Guardians until he finds another tear. Getting touched by a Guardian means instant failure.
The big problem with the Silent Realms is how unforgiving they are. The Guardians are extremely fast, and Link’s stamina is limited. Should you be spotted, the music changes to an anxiety-inducing beat to send you in a panic. Collecting the tears only stops the Guardians for 90 seconds, and the areas are vast. Therefore, a player will probably need a few tries before he or she can plot an efficient path through the Realm, avoiding obstacles and Guardians along the way.
One Silent Realm would have been a stressful but interesting distraction from the main quest, but there’s four of them. They are a dreaded element which artificially lengthens the second part of the game.
3 Reuniting Anju And Kafei (Majora's Mask)

Majora’s Mask is filled with timely side quests which require the player to be present in a certain spot at a precise time. Reuniting Anju and Kafei requires an intricate understanding of every non-playable character’s schedule, as well as how they interact with each other. Solving this puzzle will take an entire cycle, and failure in any of its steps will require you to restart the complicated sequence of event. It’s the kind of quest which is hard to finish without a walkthrough.
Describing every single step would require an entire article by itself. The short version is that Anju and Kafei are to be married, but can’t do it anymore because Kafei has disappeared after having been turned into a child by the Skull Kid. It’s up to you to get them back together, and doing so requires completing the thirteen required steps perfectly. It’s long, and it’s boring: You will have to deliver letters, talk to people, and the only remotely exciting thing you will do is infiltrate a thief’s house to steal back a mask.
Your reward for this complicated sequence? The Couple’s Mask, and a chance to reunite Anju and Kafei an hour before the end of the world, after which they will die, the whole thing will reset by itself, and they’ll be unhappy and alone again. What a treat.
2 Getting The Master Sword (Twilight Princess)

This is one instance where Nintendo mistook “longer” for "epic," kinda like The Hobbit movies. Acquiring the Master Sword usually involves solving a few dungeons, going into the woods and pulling it out of its base. Twilight Princess takes it a step further, by making a quest out of simply accessing the Master Sword’s resting place.
While being stuck in his Wolf form, Link must navigate the sewers of Hyrule to meet with Zelda, who sends him to the Woods. Up next, in the Sacred Grove, Link has to play Hide and Seek with a Skull Kid, while dodging the annoying puppets which act as enemies. Those puppets respawn endlessly, so killing them only brings a few seconds of respite. After following the nearly invisible Skull Kid for what feels like hours, you finally get to fight him and his endless supply of henchmen. Up next, there’s a puzzle where two giant statues must be moved to the proper spot on a grid. Their moves mirror your own, but the grid is uneven, which makes planning movements and their aftermath a maddening exercise. Only after solving this puzzle will you be able to touch the Master Sword. The solution looks simple with a guide, but going in blind will rob you of your sanity.
1 Find The Korok Seeds (Breath Of The Wild)

Most Zelda games have one or two collectibles which can be exchanged for upgrades along the way. The Maiamais from A Link Between World are a good example, as are the Golden Skulltulas of Ocarina of Time. In Breath of the Wild, it’s Korok seeds. The Koroks are usually hidden on top of trees or under rocks, or might require simple puzzles to be solved. Their seeds can be exchanged for inventory upgrades, allowing you to carry more weapons or shields.
There were 100 Golden Skulltulas and 100 Maiamais to collect. However, Breath of the Wild’s map is gigantic, so how many Korok seeds are there? 200? 500, maybe?
There are 900 Korok seeds hidden throughout Hyrule. That sound you just heard is all those people aiming for a 100% game file fainting at the same time.
It might look impossible, but several people have already managed to collect all 900 seeds. Surely, the reward must be impressive for such a colossal achievement… or so you would think. Instead, Hestu honors you with poop. Golden poop, to be precise. The game identifies the item as “Hestu’s Gift,” but the description (“It smells pretty bad”) and the shape is unmistakable.
Collect 900 Korok Seeds, get poop. Hope that was worth it.