Quick Links
In Chapter Five of The Lord Of The Rings: Gollum, years of planning come to fruition as Smeagol finally makes his attempt to escape from Barad-Dur. This is another long chapter, and also one of the hardest in the game due to tricky puzzles and abundant enemies. Luckily, the checkpoints are fairly frequent, so you won't have far to go back if and when things go wrong.
If you're looking to make a hassle-free getaway, follow this guide. You'll find yourself safely on the far side of the gate in no time at all!
How To Steal The Bird Tower Keys

When the chapter opens, Gollum and Smeagol will discuss their escape plan. At the end of the conversation, you'll find yourself at the entrance to the Tower. Go upstairs to the office - the door is open and Balrat doesn't suspect anything yet - and speak to the Candle Man by the birdcage.
When the Candle Man dismisses you, go back to the balcony outside the main office doors and speak to the Witch there. While Zanah and the Candle Man are speaking, use the vent above the door to sneak back into the office. The two are facing the wall map, so stay low and quiet as you make your way back to the birdcage and open it.
Follow the bird out the window on the opposite side of the room and drop down to hang from the ledge. Jump to the right onto a rooftop and across to the metal structure. There, climb to the right along the outer wall and up the other side.
Continue up the tower's exterior until you reach the bird, who will fly off again; at the end of the rooftop, hang from the edge to find a climbable surface down the side. Work your way counterclockwise and downward to the bird's new position. From there, you'll have a clear view of the Candle Man's key ring.
Enter Companion Mode and direct the bird to retrieve the keys. Once you have them, use the narrow ledges on the outside of the tower to quickly get back down, then climb up the wall on the far side of the roof. Jump across the buttresses; note that each one is closer than the last, so you'll need to jump shorter distances each time to avoid overshooting.
At the end of the buttresses, climb along the wall in front of you; the ledge is hard to see, but easily reached. At the left end, drop down to the window and re-enter the Candle Man's study. Sneak out of the room and use the bookshelves on the left side of the office to reach the rafters and leave via the vent.
How To Reach The Top Of The Bird Tower

Go downstairs and take a left in the entrance hallway to reach the aviary. Use the swing bar at the far side of the room to start your climb; on the second swing bar, turn around to leap toward the climbing wall.
At the top, take a left and follow the corridor to the abandoned rooms at the back. Make your way counterclockwise and upward, using wall run to cross the largest gaps. At the top, walk along the beams and jump across to the outer wall to continue climbing.
In the top-left corner of the climbing wall, you'll be able to pull yourself up through a small hole to the platform above. A brief cutscene will trigger, and the cage that you could have used to climb across will fall. Climb back down through the hole and drop to the platform below; from there, you can jump across to a rafter above the beams you were on earlier.
Go to the spot where the beams intersect and climb the narrow wall there. At the top, there's another climbable wall to the left, followed by a series of ledges that will let you cross the gap. At the far side, climb up to the main rafter and go across it; this will take most of your stamina, so don't stop!
Use the climbing wall to continue to the left, then jump backwards to a narrow set of rafters. On the far end is a tall, thick beam; there's no indication that you can interact with it, but pushing against it will cause it to fall over, creating a bridge. Use it to cross to the other side of the room, where you'll be able to climb to the rafters above and continue.
At the very top of the tower, take a running jump toward the exit, illuminated with blue light. On the other side, you'll automatically enter the Execution Chamber. Drop through the gap at the end of the tunnel and wait for the red light to go out before continuing.
How To Get Through The Execution Chamber

Climb across the narrow ledge above you; again, this climb will eat up most of your stamina. At the far end, drop down and hide behind the barrier to avoid getting hit by the light. As long as you stay at ground level, the walls should protect you.
Continue along the path until you're prompted to survey the room; you'll see an overview of the route that you need to take. When the light finishes cycling, climb along the ledge above to begin.
Drop down to the lower area by hanging from the ledge at the end of the corridor, then wall run to the platform across the way. There's a small stone that you can hide behind while you wait for the next blast of light; as long as you're in the shadows, you'll be fine.
When the light is gone, wall run twice and up the far corner to a safe chamber. From there, use the swing bars to cross the next part of the chasm. At the far end, when you're hanging below a barred window, drop down to the climbable wall below and immediately jump backward to another set of swing bars.
This next part is tricky; the second swing bar is actually too far to reach. Instead, move slightly to the left and jump as far as you can, releasing the bar when Gollum's feet are all the way up. You'll just barely catch the climbing wall on the opposite wall, slowing your fall enough to survive. Climb through the hole at the top of the wall across from the red light and drop down to avoid getting zapped.
Unless your timing is absolutely perfect, you may take some damage from the red light just as you climb through the hole. Once you're safe, heal up before continuing.
Hang from the bars on the rotating gear in front of you, and jump to the middle of the wheel on the other side. From there, you can leap to the small platform in the corner. Use the ledge to get under the grate blocking your path, then drop down onto the rotating platform below.
Hold on to the edge of the wheel to automatically pass under the grates as it turns; you'll need to use both the upper and lower ledges. After the second grate, climb back on top of the wheel and jump to the next one. Ride it halfway around, and jump to the climbing wall that you see there.
Climb down and to the left, and hide behind the stone barrier to wait out the next burst of red light. Once it's gone, climb up the wall to the right until you reach the rafters at the top left. Gollum will see the cart driver's gondola.
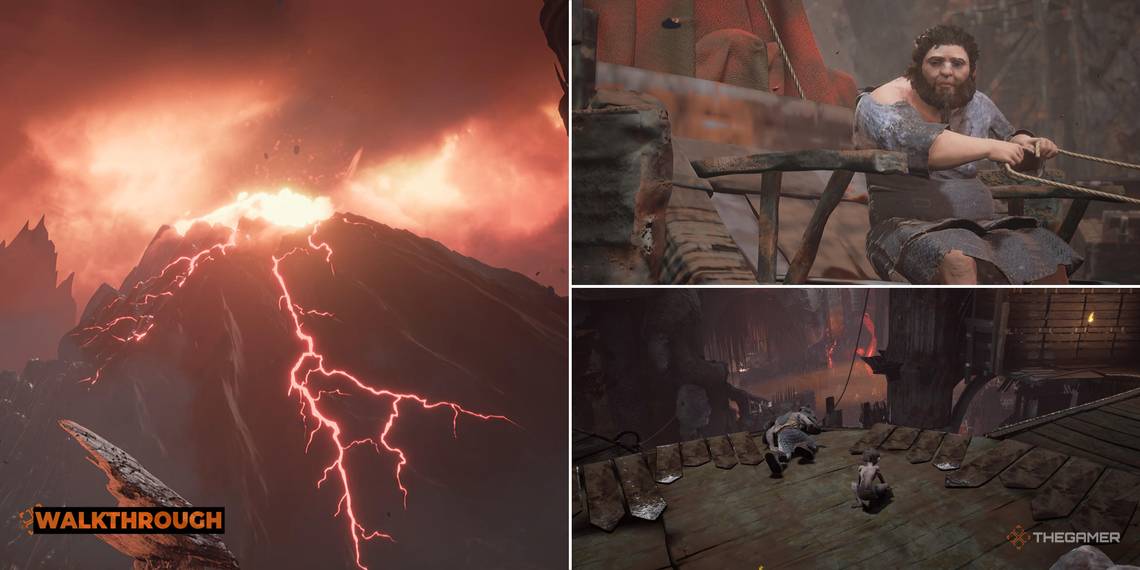
Crawl along the narrow beam to reach the gondola and free the driver; when the gondola docks, jump onto its roof and pull the lever on the roof, dropping it and you into the sewers below.
How To Escape The Sewers

When gameplay resumes, go forward and to the right and climb down the ladder there. Jump off the platform below and into the water, and climb out near the ladder to the left.
Wall run across the platform at the top of the ladder to the lever on the right, then pull it to raise the water level. This will create a bridge; tell the cart driver to cross it using Companion Mode, then direct him to the lever at the top of the ladder near his new position.
When the water level rises again, swim to the left, where you can climb out onto a newly-accessible area. Pull the lever against the wall to lower a bridge for the cart driver, then tell him to pull the lever on the ladder behind you.
Gollum could pull the lever himself, but doing so will drown the cart driver, resulting in a game over.
Once the cart driver is safely on the upper platform, pull the lever yourself to drain the water. Go to the second lever and pull it to drain the water further, then stand on the floating bridge and tell the driver to pull his lever at the top. Ride the bridge as the water rises, and you'll be able to reach a new lever near the top of the chamber.
Next, swim to the barrels floating in the water. Move all three so that they're grouped around the chain holding up the chandelier near the lever that you just pulled, then swim to the chain of the opposite chandelier. Have the cart driver lower the water level; if everything is positioned correctly, you'll end up on top of a chandelier, while the barrels weigh down the other one, raising you within jumping distance of the second lever!
Once both levers are pulled, the entire chamber will drain. Jump into the water to easily float down to the bottom; otherwise you'll have to climb down. Meet the cart driver by the exit - it will take him a short while to get there, so just be patient.
When the cart driver opens the door, climb the ladder beyond it. At the top, he'll wait by the corridor entrance while you go ahead to eliminate the orc guards patrolling the area. Start by hopping onto the crate suspended over the cart, then using it to jump to the loft on the right. Wait for the orc below to pass the ladder, then quietly climb down and ambush him. You can then easily get the drop on the other orc by lying in wait underneath the cart.
When both orcs are dead, hide in the cart and wait for the cutscene to finish. Afterward, you'll find yourself in the laboratories below the tower.
How To Get Through The Spider Tunnels

Kill the orc at the table and examine the experiment he was working on, pull the lever on the right to take a lift further down.
At the bottom, follow the tunnels to another lever and use it to open the gate. Behind it, crawl through the small lit passageway to the right and into the spider tunnels.
Directly ahead, where you see the shadow of a spider crawl past, you can pick up a worm to replenish your food supply. If you don't need it, just climb up the left-hand wall to enter another passage.
The tunnel is long, and will require you to drop down at a few points. Just keep going until you see spider egg sacs; carefully make your way across the room, avoiding the spiderlings. Getting caught by the spiders isn't an instant death like it is with the orcs, but they deal enough damage and attack quickly enough that it may as well be.
Make your way to the lit candle and the tunnel beyond it. Grab the Spider Eyes on the left side of the room if you can do so without being detected, then start climbing the wall. You can use the shadowy areas under the rock outcroppings to hide from the spiders on the wall; they're much faster climbers than you, so if you're spotted they're certain to catch you.
At the top of the wall, climb to the left along the ledge under the ceiling and make your way down to the tunnels. If you're seen by a spider, just keep moving. Sprint down the tunnels to shake off any pursuing bugs; there's some food on the left when you come out the other side to recover any health you lose along the way.
Once you've escaped the spiders, climb up the wall to the left and move clockwise along the cavern wall. Jump at the end of the wall run to reach the ledge above and continue forward. At the edge of the drop, look for a swing bar to the left, between two stalactites, and use it to progress.
After swinging from the two bars, jump backwards at the top of the climbing wall to reach a ledge on a stalactite. Climb on top and use a running jump to reach the next platform over. From there, you can drop down via the ledges on the far side.
At the bottom, jump to the platform against the far wall and go left. Use the swing bar to reach the shadowy platform across the lava, then another to hit the climbing wall across and to the left.
Jump across the platforms to find a new tunnel on your right, with two tasty bugs to recover your health if needed. At the far end of the tunnel, take a running jump across the lava, then fully recover your stamina before continuing. As you proceed, you'll be pursued by hatching spiderlings; you can't sneak past or fight them, so just move forward.
Avoid sprinting, as you'll need to conserve your stamina for wall runs as you make your escape.
After the second wall run, move to the right to avoid the spider coming down the left-hand wall; just past it, the tunnel will take a sharp left turn that leads out of the catacombs.
How To Get Past The Gate

After the cutscene, climb up the wall in front of you and take a clockwise route around the walls of the shaft. When the path splits, take the left ledge to collect a piece of boroc tooth, then double back and take the right-hand path to continue upward.
At the top, you'll be able to see the gate, but this isn't the way forward; instead, turn around and hang from the ledge over the center of the main room to continue clockwise toward the exit. When you reach it, you'll trigger a cutscene; Gollum and Smeagol will argue over whether to kill the orc below or just wait for him to leave.
Either way, there are a lot more orcs in the room beyond; hide under the cart near the entrance and wait for your opportunity to move to the left. A safe route is to take the long way, going counterclockwise by staying under the carts as much as possible.
Don't try to kill any orcs here; you're all but guaranteed to get caught by one or more of the other guards.
When you find yourself behind a pair of crates with an armored orc in front of it, throw a stone at the steel globe to the left. He'll leave his post to check it out, giving you an opportunity to get under the cart he was watching. From there, take the path to the left, turning off the lantern as you go to keep things nice and dark.
Move forward until you're behind the two orcs guarding the gate, and climb across the ledge to the right. When the cart drive calls out to you, crawl under his cart and hide there until he finishes speaking, then take the ramp leading up behind the cart and to the right.
At the top, you'll see a barrier that will keep you hidden from the two armored orcs ahead. To the right of it is a climbable wall; use it to reach the narrow platforms above the orcs, which will allow you to get past them. In the next room, pull the lever to lower a bridge and start your climb toward the bat-cave.
Take the left-hand path and hide in the troll helmet until the orc watching the bridge turns his back, then eliminate him. His patrol route is long, so you may need to be patient, but it's worth being able to traverse the area without risk.

Climb the wall on the left side of the bridge and walk to the edge of the long scaffolding to pick up a collectible, then go back. Instead of dropping down, hop onto the thick ropes spanning the gap and crawl to the platform across the way. From there, you can jump to the right and climb to another set of ropes.
Follow the path to the left and pull the lever on the platforms against the wall. Climb out onto the end of the crane above you, then drop down onto the platform below. Jump to the ledge on the cliff face, then up to the diamond-shaped climbing wall, then finally left to another ledge, which will allow you to drop onto the platform leading into the bat-cave.
Use either the stone platforms in front of you or the climbing wall to your left to reach the stalactite in the middle of the chamber, then jump to the exit tunnel. Outside, take a running jump to the right and climb down the wall. When you come to a hanging ledge, go to the right and jump to the next wall.
Use the swing bars to the right to cross the gap, then keep going until you can drop to a climbing wall below. This will take you all the way to the ground level. Get under the first cart that you see to avoid detection, then make your way to the ladder to the right of the gate.
At the top of the gate, you can get down the other side using the ladder to the left. Stay in the grass until you can reach the ramp near the center of the yard, then use it to make a break for the next ladder. For some reason, you can't kill the orc at the top even though he isn't wearing a helmet, so just ignore him and crawl up to the next level.
Use the swing bars to get over the boroc pens, then climb along the ledges to get to the other side of the barrier.
How To Survive The Cart Ride

Wait on the platform over the gate for a cart to pass below, and jump onto it. The best way to do this is to hang over the edge and let go instead of trying to jump from a standing position.
As the cart moves along the bridge, hang from the side and jump as needed to avoid being knocked off by the obstacles that you pass. For the first part of the trip, hang from the right side, climbing up only to jump the second obstacle. This will get you past the first set of guards with little trouble.
Immediately after the guards, duck in the middle of the cart roof to get under the upcoming barrier. You'll then have to jump on a platform and sprint across to catch up with the cart on the other side. If you miss it, simply hang from the edge and wait for the next cart.
Hang from the left side of the cart to avoid the next barrier and set of guards, then run over another platform. On the other side, hang from the left side to avoid the first barrier, then quickly move to the right to evade the second.
Jump the next two obstacles, then leap to the climbing wall just as the cart passes under it. At the top, run up the wall and jump back to catch the ledge behind you; use the rafters to climb along the ledge to the left, around the side of the tunnel. There, you can climb to the top.
On the roof, collect the Dead Beetle to the left, then climb the ladder on the right. Take a running jump from the end of the scaffolding to reach the climbing wall on the cliffside opposite. When you reach the top, Gollum will escape Barad-Dur, ending the chapter.