Quick Links
Trials are ways to level up your character and advance in the story of The Outlast Trials. Different Programs contain different trials to be experienced. The very first Program available to players is Program 1, the Police Station. The Police Station's main menace is Leland Coyle, an enemy who walks around with an electric bat, ready to shock any Reagents he bumps into.
Within a single Program are more challenging versions of the same trial as well as unique MK-Challenges, which contain new objectives and maps. This guide will detail how to complete the Kill The Snitch objective in Program 1 as well as the MK-Challenges.
Reach The Police Station And Security Room

As soon as you exit the shuttle and enter the harsh world, you will have to find the Police Station. There are two entrances to the station from the starting point of this trial. To the left will be a room with a locked cabinet on the wall and potential loot around the room.
At the very end of the street will be a regular door or a doorway with wooden planks that you can bash through. This is one way into the station. Just after the spawn location, you can jump over the cars to your right and enter the station through the back of a truck cabin.
Once you get inside, your next objective will be to reach the security room. There are a bunch of side rooms with potential loot, but to reach the security room, you must continue deep into the station.
Sometimes it is hard to tell if a door has a trap on the other side or not. To avoid getting hit with a trap door, open doors slowly.
If you open every door slowly, you will never get hit by a trap.
Be warned that if you close the trap door again, it is re-rigged and can trap you still if you are not careful.
As soon as you enter and walk through the police station, you will notice a wall that says "Quick access security room". This is a co-op door where you can send one of your teammates to the other side, accessing the security room quicker. You can also go down the hall to the right.
Continue down the halls to find the security room entrance.
The security room will be easy to spot because it is the only area within the light and requires you to enter through shuttle doors.
The security room acts as a safe zone. No enemy can enter it.
When in the security room, you must watch Leyland Coyle kill someone through a window, and then you can proceed back out the way you came.
Your next objective will be to push the snitch. From the security room, the double doors to the left will now be open. Follow the tracks on the floor to find the snitch.
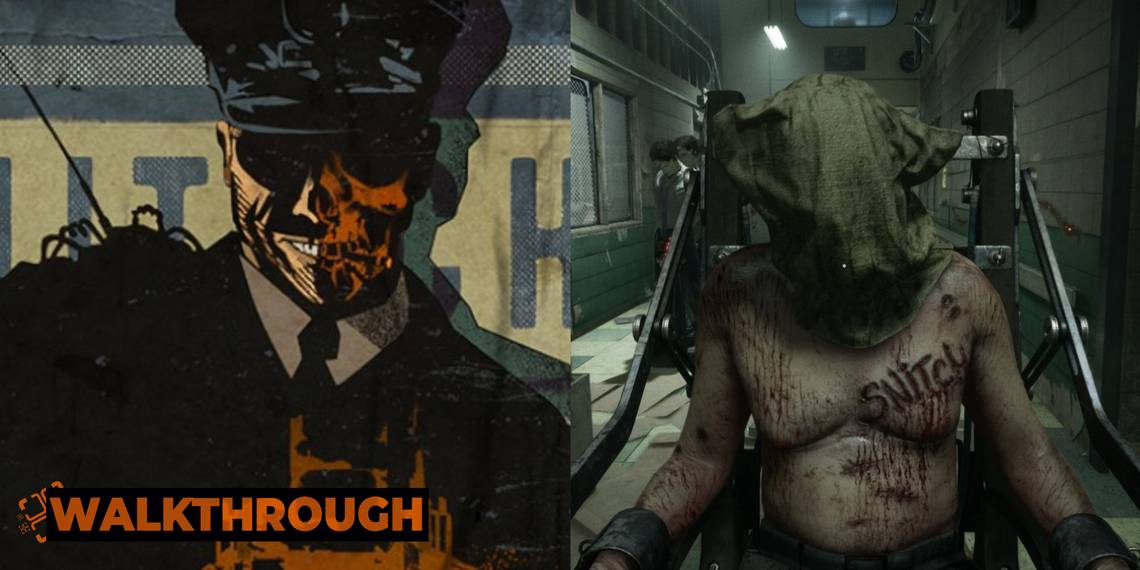
The snitch will be tucked away in a cell on a chair. Once you start pushing him, the power will turn off, and an enemy will spawn.
Start The Generators In The Basement

To access the basement, you need to go back to where you originally found the snitch. Continue down the main hall and turn left, where you will find double doors that say "Underground parking" above them.

Head to your right, down the road. There will be a garage door that you must interact with to open. The garage door will only stay open briefly unless another player continues to hold it. This entire section of the map will be in darkness, so you will want to have your goggles battery filled up at all times.
In this area, there will be plenty of glass and Screamers to alert nearby enemies.
There will be two generators you must find. They need to be refueled and then tinkered with. There will be more than two fuel canisters in the garage basement. The generator locations are randomized each time you play this trial.
Keep in mind that lugging a fuel canister around will make you slower since it is a heavy item requiring two hands.
If you are playing with others, you may want someone else to distract the enemy while you carry a fuel canister to the generators.

After fueling a generator, you will have to interact with either side of it to start it up. This is a sort of mini-game where you must make all of the switches green.
Some switches will light up others.
Click them slowly to let them light the others up instead of sporadically clicking them all.
After fueling up a generator and pressing the buttons on both sides, you must crank it to turn it on. Once both generators are complete, head back the way you came, to the garage door. You will now have to continue pushing the snitch down the track.
Find The Matching Keys

This is arguably one of the more challenging tasks of Kill The Snitch. The snitch will stop in the tracks once again because your way will be blocked off. You will need a key to unlock the gate in your way.
This first key will be right beside you and the snitch. The door to your left will have blood smeared on it spelling out "Key". You will have to interact with the body in the room to dig the key out from him. This is basically a tutorial of what you will have to do for this next stretch of gameplay.
After opening that gate, you will have to repeat the same thing three more times. There will be multiple bodies around the map that you must search for the correct key. Each gate will have televisions around it indicating what type of key is needed. The keys randomize each time you play this trial. It can be a Bunny key, a Crown key, and so on.
You can loop around a blocked gate by using backway passages in order to find the other gates and other bodies.
You can analyze a body before searching it by simply hovering the cursor over the body. This will reveal what type of key is inside, and you can determine if you need it or not. The body locations will be randomized every time you play this trial.
Once you have found all the keys you need, you will need to unlock each designated gate so that you can push the snitch through.
Execute The Snitch

This is the hardest part of the game, especially if you have aggroed every enemy around. Now that the snitch is where he should be, all you have to do is hold down one of the four levers long enough to electrocute him to death. Simple enough, right?
Wrong. It takes too long to stand there and electrocute him. With the enemies running around, you will have to take turns holding down the lever with your friends, if you are playing with a group.
If you are playing with friends, have other people distract the enemies and lure them far away from the electrocution chair while someone else holds down the levers.
If you are playing alone, lure the enemies somewhere else and close every door behind you to slow them down and lose aggro. Then return to the levers. Rinse and repeat as necessary.
Luckily, there are two doors connecting this area. You can run through them and close the doors behind you to slow down the enemy as you return to the lever for a brief moment.
- Trial Rewards: 1,500 XP, 500 Coins, and a Cosmetic.
- Additional 1,000 Coins for a Grade A rating.
There are two harder versions of this trial that can be selected at the bottom of the Program 1 page. They can be completed for extra rewards.
MK-Challenges

MK-Challenges occur in the same theme or universe with the same Prime Asset enemy, which in this case is Leland Coyle. These are extra challenges you can complete to increase rewards and player progress.
There is an overall grade you can achieve for each Program, which will only be determined after completing every challenging trial in the Program. If you want to ace Program 1 Police Station, you will want to complete the two MK-Challenges as well as the two harder versions of the main trial, Kill The Snitch.
Cancel The Autopsy
This challenge brings you to a new map where you must find matching keys, similar to in Kill The Snitch. When you enter the main floor, there will be three gates, each with its own television sets. These televisions will tell you what symbol you need to look for on dead bodies, to find the correct key.
Bodies will be spread out across the map along with more enemies than usual. Remember to analyze a body by hovering your cursor over it, to determine if it will have the key you need.
Insert the keys into each box and the hanging body in the center of the room will lower into the meat grinder. After inserting each key, you can escape the trial.
- Trial Rewards: 750 XP, 250 Coins, and a Cosmetic.
- Additional 500 Coins for Grade A.
Sabotage The Lockdown
This challenge may be confusing at first, but it is as simple as getting out of there as fast as you can. This is a small map. There is no complex objective or set tasks to complete. At the start of the game, there will be a fuel canister. All you must do is bring the canister all the way to the end to succeed.
There will be a map of the place next to the fuel canister. Visualize where you are and where the exit is. Focus on going in that direction only.
Avoid traps and enemies and take the fuel canister to the very end of the map where a generator will be. Fuel the generator, tinker with each side, and crank it to restore power. Once power is restored, the garage door next to the generator will open. This is your ticket out.
- Trial Rewards: 750 XP, 250 Coins, and a Cosmetic.
- Additional 500 Coins for Grade A.