Quick Links
It only makes sense that the most challenging boss in all of Tiny Tina's Wonderlands would be none other than Tiny Tina herself. You get your first hint towards the existence of this boss from the Dragon Lord, shortly after visiting him in his new prison in Castle Sparklewithers. The Chaos Chamber he now oversees is home to all of Tiny Tina's worse Bunker Master impulses. At the heart of it, all is the embodiment of Tiny Tina's chaos itself: The Maker.
Getting to The Maker on its own is an incredible feat, as you not only have to find and solve three secret Chaos Chamber puzzles but fight three absurdly challenging bosses before you can throw down with Tina.
Find And Solve The Ancient Sigils

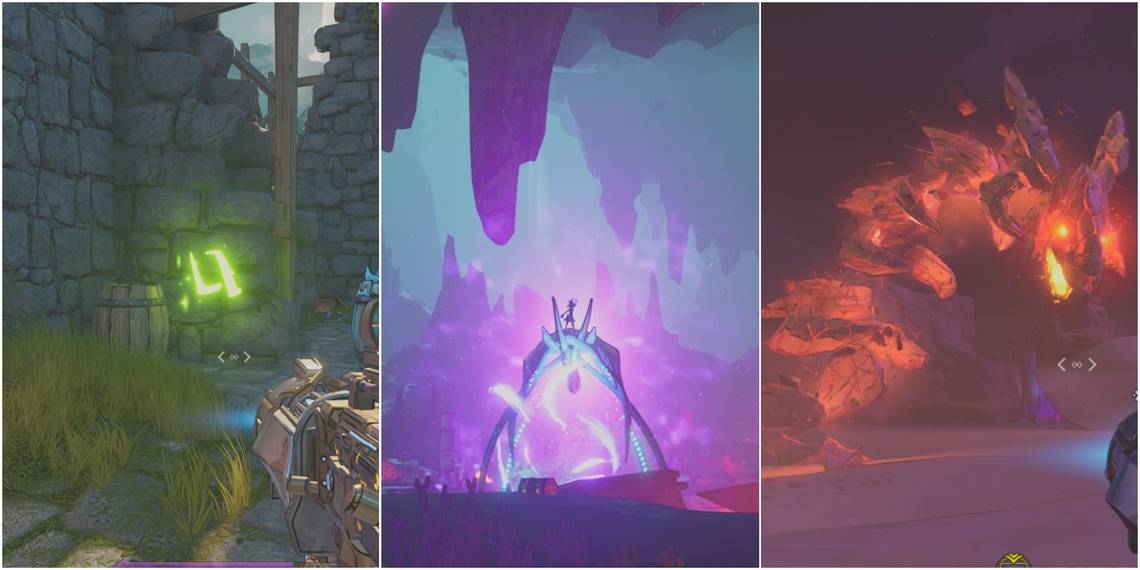
The Maker boss fight is only accessible through the Chaos Chamber, after finding three glowing sigils and solving their puzzles. These sigils appear in Chaos Chamber encounters completely randomly every time. You are not guaranteed to find a sigil in every encounter, but you must find all three in order to unlock the final Maker boss. The order in which you find the sigils will affect the order you fight their corresponding Bosses.
Clear each encounter before combing the area for any sigils. You have limitless time to enter the portal to the next encounter.
Green Sigil Puzzle

After finding and interacting with the Green Sigil in a Chaos Chamber encounter, a green light will shoot off from the sigil. Follow it to where it lands, and a glowing green mushroom sprouts up. You might recognize this mushroom from Weepwild Dankness. Jumping on it bounces you up into the air.
This triggers the puzzle to begin. The mushroom will spew giant fungal spores into the air. Shoot the spores that are glowing purple in order as they appear before they touch the ground. After doing this three times, the puzzle is complete.
Yellow Sigil Puzzle

When you find the yellow sigil in the Chaos Chamber, it will send off a yellow beam of light. When it lands, it transforms into a giant floating rock, glowing yellow. Before shooting this rock, seek cover in the environment if you can, as it will help you get through this puzzle.
Once the rock breaks, it will turn into a giant yellow sigil projecting a beam of light. This beam swings around it in a big circle. If you are looking straight into the beam when it falls on you, you will become blinded and the sigil will disappear. To solve this puzzle, simply shoot at the glowing orb until it breaks, tucking behind cover or turning away before the beam of light hits you in the face. Do this three times to complete the puzzle.
Blue Sigil Puzzle

Once you interact with the blue sigil found in an encounter, a blue light shoots off from it. It will first touch down and generate a puddle of dark blue energy and three small blue orbs. Then a second light shoots off from it, taking off to a separate part of the encounter map before turning into a giant floating liquid orb.
If you stand in the dark puddle for long enough, an effect will trigger and one of the small blue orbs will start to follow you. In order to complete this puzzle, you must lead the small blue orb to the giant liquid orb without it hitting anything in the environment. Unfortunately, this includes you as well.
Once the small orb and big orb are overlapping, shoot the small blue orb. This will cause the giant liquid orb to freeze and explode into blue sigils. You only have three tries at this puzzle until you fail it.
Find the big orb first and practice the best route before triggering the small orb to follow you through the area.
Enter The Red Portal
.jpg?q=50&fit=crop&w=740&dpr=1.5)
With all three of the sigils found and solved, you will continue through your Chaos Chamber run to fight the final boss encounter as normal. At the end of your boss fight, two portals will now appear. The gold portal leads to the Loot of Chaos room and the Barf Bunnies. You want to enter the red portal, which will bring you to the first of the three Secret Raid Bosses you triggered by solving the sigils.
Barkenstein, Keeper Of Nature

Solving the Green Sigil will trigger the boss fight with Barkenstein, otherwise known as the most annoying boss fight in Tiny Tina's Wonderlands. Although the majority of his attacks can be countered with the right timing, his attack speed and radius are just absurd. Missing his weak points when they become visible is incredibly punishing.
|
Types of Attacks |
|
|---|---|
|
Tail Whip (Sigil) |
The purple sigil on Barkenstein's tail glows before lashing his tail in a circle. |
|
Claw Slash (Sigil) |
The purple sigil in Barkstein's claws glows before jumping forward and slashing. |
|
Hedgehog Ball (Sigil) |
Jumps into the air, curls up into a ball, and spins, a small purple sigil appearing on his head. Once wound up, he launches at the player. |
|
Fungal Spores |
Arches his back and hurls Fungal Spores into the air. Shooting them while glowing purple destroys them. Any spores that touch the ground turn into giant poison domes. |
If you can shoot Barkenstein's sigil whenever it appears on his tail, claw, or head, you can stun him out of his next attack and deal a massive chunk of damage. Doing so, however, is often easier said than done.
Shoot the mushroom mobs sparingly. Killing some helps generate extra HP potions and ammo, but keeping some alive can help you Save Your Soul in a pinch.
Bunnidhogg, Keeper Of The Sands

The yellow sigil is connected to Bunnidhogg, one of the more clever boss fights in Tiny Tina's, brimming with big Sauron vibes. Bunnidhogg is an Armored boss, so any decent Poison-damage weapons are king here.
|
Types of Attacks |
|
|---|---|
|
Fire Beam |
Shoots a beam of fire that generates a giant AOE of fire where it strikes. |
|
Stone Spikes |
Small gold glowing spots appear on the floor, and stones spikes rupture the ground. |
|
Leap |
Leaps into the air, diving into the sand and sending out a massive shockwave before reappearing above the sand. Jump to avoid. |
|
Tail Slam |
Slams his tail on the ground, sending out a shockwave. Jump to avoid. |
|
Body Curl (Sigil) |
Curls into a ball and a yellow sigil orb appears above his back. Slowly glows brighter before exploding. If the player is looking straight-on when it explodes, they will take damage and be blinded. Sigil can be shot to deal extra damage. |
|
Sandstorm/All-Seeing Eye (Sigil) |
Generates a sandstorm to partially blind the player. Transforms into a floating yellow sigil with a giant beam of light that moves in a circle around it. Looking at the beam straight-on will damage and blind the player. Sigil can be shot to deal extra damage. |
The attacks in which Bunnidhogg's sigil becomes visible are the most crucial. Unless their numbers become too much, do not bother with the "squishier" skeleton mobs in this fight. They can be killed to generate extra HP potions and ammo or to Save Your Soul if you take too many hits.
Gloopathoth, Keeper Of The Abyss

If you keep in mind the solution for the blue sigil puzzle, this secret boss fight is fairly straightforward. This boss hinges on using the ice orbs that Gloopathoth shoots to freeze him and expose his sigil weakness. Luckily, this encounter also has a lot of loot chests and Coiled enemies that drop ammo and HP.
Frost Damage is the best against Gloopathoth.
|
Types Of Attacks |
|
|---|---|
|
Fire Ball |
Shoots fire beams that explode on contact with the ground and turn into roaming balls of fire. |
|
Frost Orb |
Shoots homing frost orbs that follow the player until shot or make contact. Explode on contact. |
|
Immunity |
Turns into a faster spectral form, immune to all damage. |
|
Frozen Tendrils (Sigil) |
After shooting a frost orb touching a liquid orb, a frost shockwave freezes Gloopathoth, exposing a sigil orb in its tendrils. |
|
Second Phase |
At half health, Gloopathoth raises the level of the lava in the arena. |
|
Meteor Strike |
In Second Phase, Gloopathoth summons slow-moving meteor strikes, marked by a red AOE circle before landing. |
If you are not near any giant liquid orb when Gloopathoth shoots frost orbs at you, do not bother trying to lead them away. Shoot them before they touch you, as they are much faster in this boss fight.
The Maker

After surviving all three of the Secret Raid Bosses in a row, you will have unlocked your final challenge: The Maker. Even with the right preparation, this fight can be brutal. A lot of attacks will get thrown at you all at once, and each one has the potential to knock you into a Save Your Soul easily.
The main mechanic of The Maker fight is Tina's "Void Bunnies". These giant buns bounce around the arena and will do massive damage if you are struck. They are Bone-type enemies, weak to Frost damage especially. Killing them generates a giant purple sigil. If left long enough, the sigil will explode and cause damage. However, if you melee the sigil in The Maker's direction, it will do damage to her. Hitting The Maker with these sigils can even stun The Maker out of an attack.
The other part of this fight involves The Maker rolling a giant dice. The number she rolls determines the severity of the next attack, though not necessarily the type of attack. If The Maker rolls a 20, or a Critical Hit, any combination of the following attacks will spawn at once:
|
Types Of Dice Attacks |
|
|---|---|
|
The Maker Statue |
A stone statue of The Maker appears in the arena, spewing a massive beam of Void energy from its butt and hands. It moves from left to right like a sprinkler. |
|
Meteor Strike |
Summons a giant Meteor that either strikes the center of the arena in a wide circle or several smaller spots in the arena. |
|
Void Treadmill |
Strips of void energy appear on the floor and standing in one will move the player back, potentially throwing them off the arena. |
|
Void Whirlwind |
A homing circle of AOE damage appears on the floor and follows you around the arena before generating a whirlwind of void damage. |
|
Nat 1 |
The Maker rolls a one and does damage to herself. |
At low health, The Maker will enter the Last Phase. This is a do-or-die kind of attack. The Maker will send out Void shockwaves not too unlike those that the Banshee boss generates during her fight. Some will spread out along the ground and need to be jumped to avoid, others will cut through the air and must be crouched to dodge.
However, the longer The Maker lives, the quicker these shockwaves generate. If this goes on too long, they will become virtually impossible to avoid. Focus all your fire on The Maker to end the fight as quickly as possible.
General Tips
.jpg?q=50&fit=crop&w=740&dpr=1.5)
- During your Chaos Chamber run, use all your Crystals on Blessings to buff your stats. Do not bother with Dragon Lord encounters and their Curses. These boss fights are hard enough as is, and the payout of Crystals that The Maker rewards upon defeat will make up for any you spend beforehand.
- Bring a good variety of weapons into your Maker Chaos Chamber run, not only with Elemental Damage effective against each boss, but so you can guarantee you have a variety of ammo at your disposal. In The Maker fight, no extra ammo will drop.
- Having an amazing Frost-damage weapon (or three) is a must. Not only is Frost weapon damage effective against Gloopathoth, but using a Frost weapon to kill Void Bunnies is your best chance of Saving Your Soul in The Maker boss fight.