Quick Links
The first chapter of Tiny Tina's Wonderlands DLC content is here, a perfect slice of chaos for endgame pros and casual noobs alike to enjoy. In this first installment of Wonderland's Season Pass content, you are invited to aid the vexing Vesper in saving an old friend from the depths of his watery cage.
"Chums the Old God" is held captive by the Coiled in a secret dungeon, and can only be freed by killing him, of course. There are four different forms of Chums, each one tougher to beat than the last, plus plenty of puzzles and collectibles to hunt down.
How To Unlock Coiled Captors

If you have already purchased the Season Pass or the Chaotic Great Edition of Tiny Tina's Wonderlands, the Coiled Captors DLC is automatically unlocked. Otherwise, you must purchase the Season Pass or buy this chapter separately.
You must be at least level 13 to enter the Coiled Captors dungeon. The enemy level will continue to scale based on your current level.
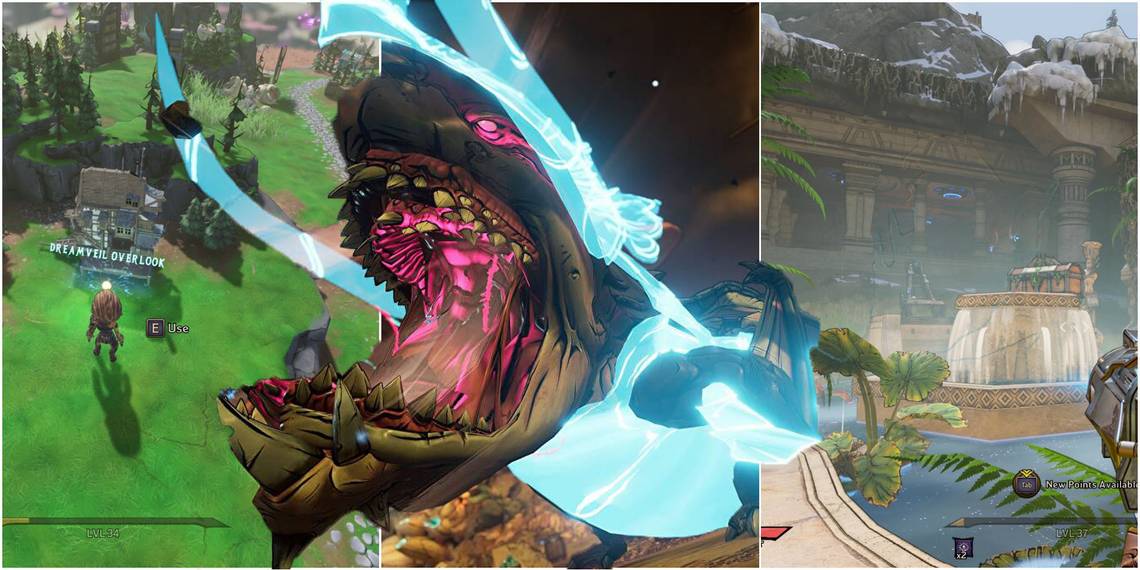
Once the DLC is unlocked, you can find the entrance to a new area called Dreamveil Overlook just down the road from the Queen's Gate entrance in the Overworld, and just to the right of the Shrine of Moolah.
Inside, you will find a mechanic unique to the DLC, called the Wheel of Fate. It functions similarly to the "Barf Bunnies" of the Chaos Dungeon, except spinning this wheel gives you the chance to loot a random rare gear piece, depending on what gear item the wheel lands on. However, if your Loot Luck is not very high to begin with, the odds of getting an Epic or Legendary are pretty slim.
Like the Barf Bunnies, the Wheel of Fate also has its own currency called "Souls", which can only be gained from killing and looting inside Dreamveil Outlook DLC areas.
How To Beat Each Area

There are a total of five areas in the Coiled Captors dungeon you must fight through before you can get to Chums, the final boss fight. These five areas will always be the same, no matter what difficulty of Chums you are currently tackling.
First Area

The first area you enter is a snowy tundra filled with Coiled enemies. To start, you will need to kill all the Temple Guards outside. These are mostly Flesh and Armor-type enemies. Weapons that deal Fire, Poison, or Lightning elemental damage are particularly useful, though some Coiled enemies have a resistance to Poison damage.
Once the Temple Guards are dead, moved to the sealed temple door. There are three statue heads to the left, top, and right of this door, glowing red. Shooting these statues will make them rotate. Shoot the statues until only the shark heads are facing outwards, at which point the statue head will glow gold.
After opening this door and defeating the Badass enemy on the other side, jump into the pit below. Turning the blue-glowing valve raises the water level so that you can climb on top of the wooden crate and mantle into the next area. From here, you simply need to clear the courtyard of enemies to open the portal to the next area.
Second Area

In this second area, you will find three Puzzle Columns with a mechanic identical to the first area's temple door. Shooting the statue heads causes them to rotate, and just like before, you need to shoot the statues until all the shark heads are aligned with the yellow lights and glow gold.
However, these do need to be done in a particular order. The first Puzzle Column is found straight ahead from the area's spawn. The second can be located after moving left from Puzzle Column One, through the indoor underground market area, and into a snowy courtyard. The last Puzzle Column is located inside an elevated stone corridor sandwiched in the middle of the first two columns.
Every time a puzzle column is aligned, the frozen "Nums" surrounding it will unfreeze and become aggressive "Side Pisces". These are Flesh-type enemies, weak to Fire elemental damage especially. Once all the columns are aligned, the next portal appears.
Third Area

The trick to solve the next area is rather simple: turn all four of the valves to fill the water channels in this area. These glow blue and are labeled on your minimap. The catch is that you have to do this while battling continuously spawning Coiled and Crab enemies.
Once all the valves are turned, a Hammerhead enemy will spawn. This is another Flesh enemy, susceptible to Fire elemental damage, though Lightning and Poison damage are also useful.
Fourth Area

The objective of the first half of this area is straightforward and yet troublesome: Survive. A pool of lava is blocking your exit, but conveniently enough a surge of water is also on the rise. You must battle the constant waves of Coiled enemies until Vesper tells you the water is about to rise too high. At this point, you can find two valves right before the exit, glowing blue and labeled on your minimap. Turning them cools the lava to form a bridge to the next portal.
There are quite a few Badass enemies in this area that tend to be weaker to Poison elemental damage. However, the other Coiled enemies are resistant to Poison, so switch between Elemental damage weapons as needed.
Fifth Area

A callback to Area Two, the final level of Coiled Captors has three more Puzzle Columns for you to solve. These can be found on your minimap labeled with blue waypoints. While these do not need to be done in any particular order, the area is swarming with Coiled. Oh yeah, and there's lava on the rise.
As long you stick to the higher platforms, you should be safe, but be especially wary of the Badass enemies that spawn every time a Puzzle Column is solved. Aligning all the columns opens the portal to Chums.
Where To Find The Souls Chests In Each Area

If you want to spin that Wheel of Fate, you need some Souls. While Souls have a chance of dropping from killed enemies, there are also Soul Chests in each area of Coiled Captors with extra Souls inside. There are always two Souls Chests per area, but their location is randomized each run. Here is every location a Souls Chest can spawn in each area.
First Area: Souls Chest One

Move to the right directly after spawning into Area One, and you can find this Souls Chest along the side of the temple.
First Area: Souls Chest Two

Before you continue through the sealed puzzle door, mantle onto the snowy cliffs to the left of the temple entrance. Upon these cliffs is the second Souls Chest.
First Area: Souls Chest Three

After entering the sealed temple puzzle door and killing the Badass enemy inside, to the right, just before you go into the empty water pit, a Souls Chest is sitting along the wall.
First Area: Souls Chest Four

In the temple courtyard where you need to clear all enemies, to the right is an alcove filled with giant Coiled statues. Tucked into a corner you might see Souls Chest Four.
First Area: Souls Chest Five

No matter what Souls Chest you find first, the second will always be located here, in the secret fountain pedestal of the temple courtyard. To access it, pull on the skull head hanging from a chain just in front of the fountain. Doing so raises up the pedestal with the chest and also unleashes some Crab enemies.
Second Area: Souls Chest One

As you walk straight into the second area, you will come across a small ramshackle merchant stall. Sometimes a Souls Chest can be found just inside.
Second Area: Souls Chest Two

After solving the first Puzzle Column, continue past it to mantle onto the platforms to the right. A Souls Chest is tucked into a corner of this platform overlooking the first Puzzle Column.
Second Area: Souls Chest Three

From the first Puzzle Column area, if you continue to the second column through this underground market area, a third Souls Chest can sometimes be found along the wall to the left-hand side.
Second Area: Souls Chest Four

In the same area as Puzzle Column Two, if you head backwards into the alley and mantle onto a vendor stall to climb onto this snowy stone platform, another Souls Chests waits.
Second Area: Souls Chest Five

In the stone temple right above Puzzle Column Two, you can sometimes find a Souls Chest nestled into one of the corners.
Third Area: Souls Chest One

There is a very rare chance that a Souls Chest might spawn in this little alcove of the oasis temple, just to the left of the area you spawn in, behind a fountain.
Third Area: Souls Chest Two

On the left-hand side of this area, a Souls Chest can spawn against this stone cliff just before the circular temple area.
Third Area: Souls Chest Three

Inside the open-air circular temple on the left side of the map, a third Souls Chest can often be found against the wall to the left of an exploding Health Barrel.
Third Area: Souls Chest Four

Just to the left of the flood gate that will later lift to reveal the exit portal, another Souls Chest can spawn, though it is often obscured by clouds of sand.
Third Area: Souls Chest Five

To the right of the flood gate that contains the exit portal, you can walk up a set of stairs that leads to a sandy platform. Tucked into a corner of the temple wall between two palm trees is where another Souls Chest can appear.
Fourth Area: Souls Chest One

Just after you have entered the Fourth Area, if you walk immediately to your left, you can often find the first Souls Chest sitting along the stone railing on the left side of the temple.
Fourth Area: Souls Chest Two

On the left side of this area, there is a chance that a Souls Chest might spawn between two giant pink coral growths sitting right beside the river of lava.
Fourth Area: Souls Chest Three

To the right of the water channel that runs through the center of the area, a Souls Chest can sometimes be found just behind the pillar at the very end, squeezed between some coral growths.
Fourth Area: Souls Chest Four

If you move inside the small stone temple ruins on the right side of the map and continue through the doorway in the back, you can find a little hidden passageway that wraps around the building. Against the wall behind this area, you can often find a Souls Chest.
Fourth Area: Souls Chest Five

In that same temple ruins structure to the right of the area, there is a set of stairs that brings you to the second level of this ruin. Up here, to the left of a blue brazier, a Souls Chest will sometimes appear.
Fifth Area: Souls Chest One

Immediately after you take the purple boost pad from spawn across to the upper platform, a Souls Chest can be found just to the right against the cliff wall between some loot chests.
Fifth Area: Souls Chest Two

It does not appear here very often, but you can sometimes find a Souls Chest directly across from the purple jump pad that leads back to the area's spawn point.
Fifth Area: Souls Chest Three

As you continue along with the first upper platform, if you were to turn left instead of continuing straight ahead, there is a little corner between some temple ruins and stairs that lead to another Puzzle Column. Beneath the glowing orange coral here a Souls Chest has a chance to appear.
Fifth Area: Souls Chest Four

In the archway lit by two braziers where the final portal appears, a Souls Chest can randomly appear. This area is directly across from the Puzzle Column found in the center of Area Five.
Fifth Area: Souls Chest Five

Behind the Puzzle Column found on the right side of the map, in this more enclosed area, a Puzzle Chest can sometimes spawn in this little corner.
How To Beat Each Form Of Chums

There are four different difficulties of the Coiled Captor's final boss, Chums. In order to reach him, you must complete all five areas of the Coiled Captors dungeon each time. Take some time in the "waiting area" right before the Chums fight to restock on ammo and reconsider what weapons you might want for this fight.
First Chums

The first incarnation of Chums is fairly straightforward. He has five total attacks he uses, in addition to the Side Pisces that constantly spawn around the arena. Try not to get cornered, or the Side Pisces might swarm you.
As a general rule, shoot from a distance and try to stay on his tail to avoid frontal attacks. He has a Flesh-type health bar, making him weak to Fire damage especially.
|
Attack Name |
Action |
|---|---|
|
Charge |
Chums charges forward, gnashing his teeth. |
|
Wave Attack |
Chums sends out a massive wave in front of him. Dodge left or right to avoid. |
|
The Big Suck |
Chums breathes in, and anything in front of him gets sucked in. |
|
Shock Wave |
Chums shoots a shock wave out from his body in a circle around him. |
|
Twirl Attack |
Chums twirls around in a circle, lashing out at anything close by. |
Second Chums

This version of Chums had all the same attacks as before but adds some more mobs called Stormlings. These little tornadoes travel aimlessly around the arena, but if you get hit by one, it will lift you up into the air and carry you forward in a straight line. Fortunately, Stormlings have pretty small Armor health bars and are weak to Poison damage. Shoot them down quickly to avoid getting battered around.
Third Chums

Our third Chums is much the same as before, now with an added yellow Armor health bar. Focus shooting him down with Poison elemental damage first before switching to a weapon with Fire or Lightning damage.
Fourth Chums

The most lethal form of Chums yet brings new attacks, a giant unkillable tornado, and a second phase that triggers once his Armor health bar is depleted. When you first enter the arena, a giant purple version of the Stormlings is roaming the area. Once you get Chums down to Flesh, he will float up into the purple tornado to continue his terror from the skies. Shoot at his tail to get more Critical Hits. Poison elemental damage is the best type for this fight.
Open loot chests frequently so that you can walk by them while low health to instantly pick up HP potions.
|
Attack Name |
Action |
|---|---|
|
Waterspout |
Chums summons a small vertical waterspout in his area that cannot be killed. |
|
Lob Attack |
Chums throws out a giant lob attack, larger than his typical melee attack. |
This fight can get hectic, but do your best to cull the hordes of Side Pisces and Stormlings, all while keeping Chums and his purple tornado in the distance.