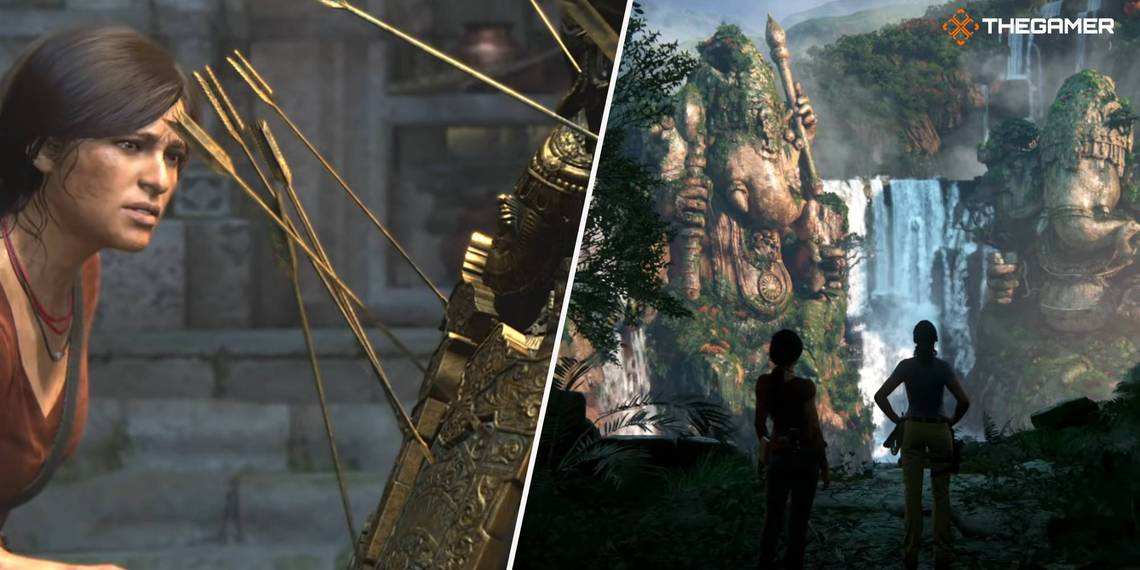
There are 50 trophies in Uncharted: A Lost Legacy. These trophies are similar to Uncharted 4’s trophies, but they are significantly easier to get. Collecting every trophy will take at least one full playthrough and some chapter/encounter select cleanup. That said, if you want to take your time and enjoy the game, it is best to do this trophy guide in two playthroughs. The first playthrough is for the story, and the second is for collectibles and trophies.
Some of these trophies can be tricky to get without instruction. Fortunately, this guide has all the information you need to know to get every trophy in the game. After you collect 49 trophies, you will pop the platinum trophy for A Lost Legacy. Naughty Dog does a fantastic job with their trophy lists, so these trophies will be fun to collect. Let’s get started.
First Playthrough
Before you trophy hunt, play through the story at least once for your enjoyment. After you have played the game once, come back to this guide.
This guide is formatted so you can unlock every trophy as efficiently as possible. For the trophies below, you will want to start a new game. As you play through the story, keep an eye on this guide to pick up trophies as you go along. This first batch of trophies is predominantly collectibles, so familiarize yourself with those trophies before starting the game. The rest of the trophies in this section are smaller trophies that you can unlock as you look for collectibles.
|
Trophies |
Description |
Guide |
|---|---|---|
|
Legacy Found! |
Complete the Game. |
Getting this trophy is easy, all you need to do is beat the game on any difficulty. |
|
Progress Demands Sacrifice |
Complete the Game in Crushing mode. |
This trophy is not so easy, but if you play on crushing, you can use cheats, which helps a lot. Waiting to trophy hunt until you beat the game once is not a terrible choice and lets you enjoy its story. |
|
Casual Treasure Hunter |
Find five treasures. |
If you know anything about Uncharted games, you know they’re famous for their treasure collectibles. Fortunately, we have you covered with this Treasure guide for Uncharted: The Lost Legacy. Also, while you are searching for Treasure, look out for the other in-game collectibles like Lockboxes, Photo Opportunities, and Optional Conversations. |
|
Hardcore Treasure Hunter |
Find 35 treasures. |
|
|
Collector Of Antiques |
Find all the treasures. |
|
|
Five Finger Discount |
Open five lockboxes. |
There are 21 Lockboxes in Uncharted: A Lost Legacy. These Lockboxes are easy to spot but just as easy to miss. Again, we have you covered with a guide to help you locate every Lockbox. |
|
And Picks or It Didn't Happen |
Open every lockbox. |
|
|
#nofilter |
Take a photo at five photo opportunities. |
There are 28 Photo Opportunities throughout the campaign, all of which you can find with our guide on every Photo Opportunity in Uncharted: A Lost Legacy. |
|
And Pics or It Didn't Happen |
Take a photo at all the photo opportunities. |
|
|
Getting to Know You |
Listen to all optional conversations. |
The last major collectible in Uncharted: A Lost Legacy is Optional Conversations. There are 17 optional conversations in the game, which you can find using our guide. |
|
Token For Granted |
Find a Hoysala token. |
Chapter Four features an open-world area for Chloe and Nadine to explore. This area has a bunch of collectibles to find, but some are hiding behind another chapter exclusive collectible. This chapter’s exclusive collectible is the Hoysala Tokens. These coins are scattered all over the map. Fortunately, you can find them all using our Hoysala Token guide. After collecting every token, you can unlock the Queen’s Ruby Bracelet, which helps you find Treasure collectibles. |
|
And Yas Queen |
Find all the Hoysala tokens and obtain the Queen's Ruby. |
|
|
Tarzana |
Perform 5 grapple swings in a row without touching the ground. |
When collecting the Hoysala Tokens, you need to swing over to the Garuda Hoysala Token. When you swing towards this token, do not land on any platforms and swing to all five grapple points. |
|
Fingersmith |
Pick a three-pin lock in under 15 seconds. |
You can likely get this trophy naturally as you play the game, but keep an eye out for Lockboxes. When a three-pin lock appears, try your best to pick it as fast as possible. You can also farm this trophy out by finding the lockbox in Chapter Three and restarting the checkpoint until you pick the lock in under 15 seconds. |
|
On the Grid |
Mark 30 enemies. |
This trophy is also easy to get. All you need to do is form a habit of marking enemies. After a while, you will get the trophy naturally. |
|
Your Prize |
Appreciate the view at the top of the Hoysala Empire. |
Climb to the very top of the tower in the middle of the open-world area in Chapter Four. To do so, climb up the lookout area with the doors and climb out the door right of the wall. Then climb up to the top and perch yourself on top of the stone on the roof. Chloe will talk to herself for a bit. The trophy will pop as she does some yoga. |
|
Flawless Gauntlet |
Get through all three Axe Fort trials without resetting any boards. |
The Axe Fort (Chapter Four) has three different trials where you need to navigate between statues that will attack you if you make the wrong move. These puzzles work like a chessboard, but each space you move causes the statues to move as well. Here is a quick guide to get past all three. Each direction means counts as one tile space.
The trophy will pop after the third puzzle. |
|
Shadow Theater |
Complete the shadow puzzle in ten moves or less. |
In Chapter Five, you will encounter a shadow puzzle. The solution is simple. The first thing is first, situate yourself on the right side of the puzzle. So you are looking directly at the mural with the ax.
The trophy will pop after you pull the last lever. |
|
Marco Po-No |
Play in the water in the dam in Halebidu. |
Right after you solve the shadow puzzle and escape the flooding, you will reach the top of the dam. Jump in the pool at the top of the dam and swim around for a bit. The trophy will pop when you swim around here. |
|
Cannonball! |
Perform an impressive dive from the cliff near the old railroad tracks. |
Near the beginning of Chapter Eight, you will climb into a structure with a waterfall inside. Go up the right side of the falls. Then, go down the mudslide at the top. Grab the climbing ledges to the left before you fall through the waterfall. Climb up to the top of the platform. Then jump from here into the pool at the base of the falls. Doing so will pop the trophy. |
|
Shake For Your Fortune |
Ask Skeleseer a question. |
This trophy is part of the Treasure collectible trophies. Essentially, when you find the Strange Skull Treasure, you will need to inspect it and spin it around to look at the fortune on the bottom of the skull. Doing so will pop the trophy. You will find this specific Treasure towards the end of Chapter Eight. When swinging across a rope towards the bridge, turn around and land at the lower platform. Crawl in there to find the Treasure. For more detailed instructions, look at our Treasure guide. |
Clean-Up
These trophies are easier to unlock after you have found every collectible. Most of these trophy guides use Encounter and Chapter select. They also require using cheats, which are unlocked by finding collectibles. Make sure you have every collectible before moving to this section of trophies.
|
Trophy |
Description |
Guide |
|---|---|---|
|
Si Vis Pacem Para Bellum |
Use every gun in the game. |
You can farm this trophy out in the Helicopter Fight, under Chapter Eight in Encounter Select. This trophy strategy is only possible after you have lots of collectibles in the game because they give you points to unlock weapons in the bonus menu. Unlock the first gun and get one kill with it. Unlock the next gun and get another kill with that gun. Keep doing that for a few guns. Then, reset the checkpoint and continue. Keep doing this process until you unlock and get a kill with every weapon. |
|
Were You Counting? |
Defeat an enemy with the last bullet in your handgun clip. |
This trophy usually unlocks naturally, but you can purposely farm it by deliberately saving the last bullet in your gun for a headshot. |
|
10 Up, 10 Down |
Defeat ten enemies with headshots in a row. |
Go to the Outskirts Ruins encounter in Encounter Select under Chapter Eight and pick the explorer difficulty. Take your time and pick off all the soldiers one by one. |
|
Frazer. Chloe Frazer. |
Defeat five consecutive enemies with the silenced pistol without being detected. |
Again, go to the Outskirts Ruins encounter under Chapter Eight in Encounter Select and choose explorer difficult. Either spawn the Silenced Pistol through the bonus menu or find it in the Lockbox near the back waterfall in the truck. Then take your time, use auto-aim, and take out five enemies while in stealth. |
|
Itchy Trigger Finger |
Defeat 20 enemies firing from-the-hip. |
You can farm this out at any enemy encounter. Hip fire at a few enemies and reset the checkpoint a few times. Do this process until the trophy pops. The best encounter for this task will probably be the Helicopter Fight encounter (Chapter Eight) or Outskirts Ruins encounter (Chapter Three). |
|
Stay and Pray |
Defeat 20 enemies blind-firing from cover. |
Pick the Outskirts Ruins encounter under Chapter Three in the Encounter Select and play it on explorer difficulty. Go to the upper area and hide behind one of the ruined walls. Use auto-aim and blind fire at soldiers. Once you kill everyone near you, reset the checkpoint and repeat this process until the trophy pops. |
|
Tip of the Hat |
Stealth take-down ten armored enemies with melee by first removing their helmets without being detected. |
In Encounter Select, choose the Helicopter Fight encounter in Chapter Eight on explorer difficulty. You will need to stealth kill the armored enemy on the far right (near the lockbox on the truck). Then reset the checkpoint and do it all over again. Repeat this process ten times, and the trophy will pop. |
|
Royal Demolitionist |
Defeat 20 enemies with C4. |
Start the APC Fight Encounter under Chapter Six in Encounter Select. Choose the explorer difficulty options. Destroy the APC, and at the top of the stairs, toss C4 at the truck that pulls up. Detonate the C4 while the truck is still loaded up with soldiers to kill four enemies at once. Then restart the encounter. The first time you do this process, you should unlock the C-Phoria trophy. Keep doing this process until you pop the Royal Demolitionist trophy. |
|
I Was Never Here |
Open a lockbox with enemies nearby. |
You can unlock this in trophy in Chapter Four. Most Lockboxes are near enemy encounters, so choose one and stealth your way to the Lockbox. Then pick the Lockbox as quickly as possible. It is probably best to do this on explorer difficulty. |
|
C-Phoria |
Defeat four enemies with one C4 detonation. |
Look at the Royal Demolitionist trophy (above) for more information. |
|
Just the Wind |
Stealth take-down 15 enemies in a row. |
Farm this trophy out in Chapter Four by going to the Trident Fort and stealth killing every enemy in the Fort. After you clear them out, make your way to the door in the back and solve the puzzle. As you prepare to leave the Trident Fort, more enemies will appear. Take them out in stealth to complete this trophy. If you fail, restart the chapter. |
|
Now You See Me... |
Break stealth and re-enter stealth successfully. |
You can do this at most enemy encounters, and much easier to do on explorer difficulty. Just engage in direct combat and then run away into a stealth area. |
|
Wingwoman |
Perform ten combo partner takedowns. |
Go to the APC Escape encounter under Chapter Five in the Encounter Select menu. It is best to attempt this on explorer difficulty. There will be two enemies in front of you and Nadine. Break stealth by shooting a gun and then start punching these soldiers. These melee attacks should trigger a combo partner takedown. After both enemies are down, reset the checkpoint and repeat until the trophy pops. |
|
The Way of the Warrior |
Make it to the outskirts of Halebidu in Chapter Five without using a firearm or explosive. |
Start a new playthrough on explorer difficult. Play through the game until you reach the gates at the beginning of Chapter Five. Restart the checkpoint if you shoot a gun or throw a grenade. You can melee kill, stealth kill, and kill enemies with your car, but avoid optional combat. This trophy is not hard to get, but it does require some discipline. |
|
The Sampler |
Defeat five enemies, each one taking damage from a handgun, long-gun, and melee. |
Start the Outskirts Ruins encounter under Chapter Three in the Encounter Select menu. Pick explorer difficulty and then run up towards the first couple of enemies. One by one, shoot them in the body with a pistol, then your rifle, and then melee them to death. Keep doing this until the trophy pops. |
|
Make an Entrance |
Defeat enemies with the vehicle, long-gun, melee, and grenade, in that order, in 20 seconds. |
Go to the Outskirts Ruins encounter under Chapter Three in Encounter Select. Choose explorer difficulty. Drive-up the second platform without killing anyone and wait near the ruins to lure four enemies near you. Then run over an enemy, use your AK-47 to kill the next, and melee the third one. Then immediately toss a grenade at the fourth enemy. You may need to restart the encounter a few times to nail it. |
|
Bring in the Big Guns |
Defeat 30 enemies with gold weapons. |
This trophy is not hard to get if you do the Lockbox collectibles because you will get a golden gun every time you open a Lockbox. Keep these golden guns throughout your playthrough and use them to kill as many enemies as possible. The trophy should pop naturally, but you can also farm it out in an Encounter Select. |
|
4x4x4 |
Defeat four enemies with the vehicle in 20 seconds. |
In Encounter Select, go to the Outskirts Ruins encounter in Chapter Three and play it on explorer difficulty. Drive into the two enemies directly in front of you and then drive to the upper area and look for the other two enemies walking near each other at the ruins. Run them over too, and the trophy should pop. If you do not make it in time, reset the encounter. |
|
Drop Me a Line |
Use all the zip-lines to traverse the city. |
There are four ziplines you need to use to get this trophy. Three of them are story path related, so you cannot miss them. The one you will be looking for is the third zipline out of the four, and it appears in the escape sequence immediately after you jump onto the yellow RX sign. Once you climb up to the roof from the sign, stick to the left path and use the zipline. Do not go right. |
|
Best Driver in the Business |
Drive from the Ganesh mountain carving to the top of the waterfall at the Trident Fort and back in under three minutes. |
This trophy is easy to get. Start near the Ganesh Carving in the North-West corner. This area is the spot you need to head to at the end of Chapter Four. From here, drive to the South-East corner of the map (Trident Fort location). The tricky bit will be driving up the muddy roads near the waterfalls, so make sure you are comfortable with that before attempting the whole journey. |
|
Quiet as a Mouse |
After entering the Trident Fort, reach the door without being seen. |
Look at the Just The Wind trophy (above) for more information. |
|
Stunt It! |
Get 30 seconds of total airtime with the vehicle. |
You can farm this trophy in Chapter Four by driving around the map, hitting as many jumps as possible until the trophy pops. |
|
Overkill |
Plant multiple C4 charges on the APC at the same time and destroy it with one massive detonation. |
Start the APC Fight encounter under Chapter Five in Encounter Select and pick explorer difficult. Throw two C4 charges onto the APC patrolling the ruins. Detonate them from a safe distance. The trophy will pop shortly after. |
|
Right Under Your Nose |
Destroy the helicopter without defeating any other enemies. |
Start the Helicopter Fight encounter under Chapter Eight in Encounter Select and choose the explorer difficulty setting. Give yourself an RPG in the bonus menu and infinite ammo. The rest is pretty simple. Focus your fire on the helicopter until it blows up. |
|
Combat Racing |
Ram ten motorcycles. |
You can get this trophy in Chapter Nine. When you command a car, ram into every motorcycle you see. If you cannot get this in one go, restart the checkpoint. |
|
Backseat Driver |
Commandeer six vehicles by jumping on them and kicking out the driver. |
Like Combat Racing, you can get this trophy in Chapter Nine. Just jump from car to car during the driving sequences. After you do this six times, the trophy will pop. If you need more time, reset the checkpoint. |
|
Here, Catch! |
Destroy a vehicle in Chapter 9 with an explosive. |
Start the Train Convoy encounter under Chapter Nine in Encounter Select. Choose explorer difficulty. When the encounter starts, toss a grenade into a vehicle as soon as you can. |
|
Let's Not Get Caught |
Drive over the edge in the Western Ghats. |
Start Chapter Four in the Chapter Select and drive the car off the cliff in front of you. The trophy will pop on the way down. |
Platinum
-Cropped.jpg)
After you find every other trophy, you will unlock the platinum trophy.
|
Trophy |
Description |
Guide |
|---|---|---|
|
Don't Ruin The Moment |
Collect all the Trophies. |
The Don’t Ruin The Moment trophy is the platinum for Uncharted: The Lost Legacy. To unlock this trophy, you must collect every other trophy in the game. This trophy will pop when you collect the second last trophy. |