Quick Links
Lineups are one of the major strategical aspects in Valorant no matter the map you're playing on. Sova, Viper, Killjoy, Brimstone, KAY/O, and others are among the agents that have their own sets of Lineup for every map. Most of these are for the post-plant situation where you can essentially deny the enemy from being able to diffuse the Spike.
As a Sova player, you can make use of lineups even when you're not in a post-plant situation. The recon dart features three charging levels and up to two bounces which can provide you with tons of lineups for every single map. Since Pearl is an entire city, there are a bunch of tricky lineups that can provide you with extremely useful information.
Updated July 15, 2023, by Sean Murray: Looking for Sova Pearl Lineups? We got you covered with this guide, which we've recently refreshed with improved formatting for greater readability.
Lineup From A Main To A Site
This is one of the easiest and the most effective lineup Sova possesses in Pearl. Once you learn it, you'll be able to reveal everyone on A Site, Secret, and maybe even Dugout if lucky. This lineup can clear the right corner that you have to go through as soon as you enter A Site from A Main.
Before trying this, make sure you've completely cleared A Main since that's where you have to throw the recon dart from, and it'd be unfortunate if someone peaked you at the wrong time.
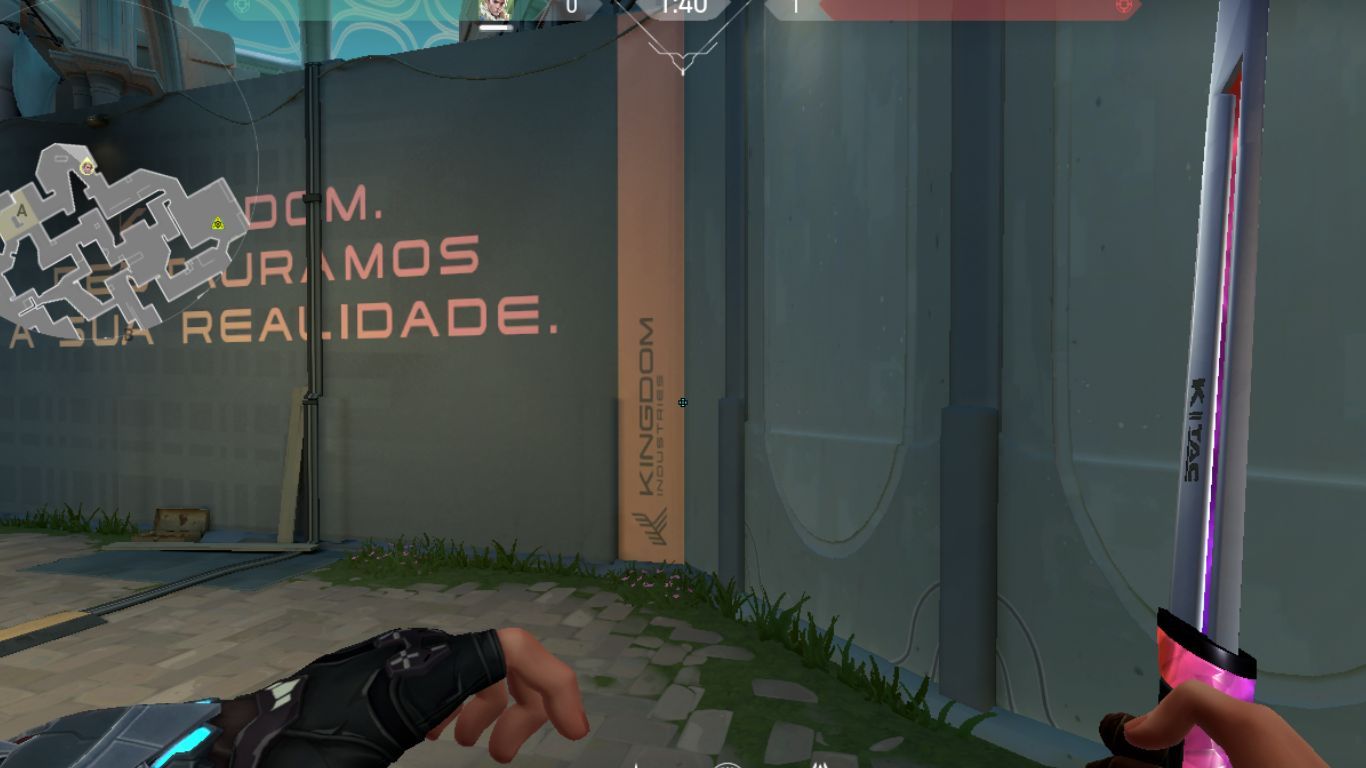
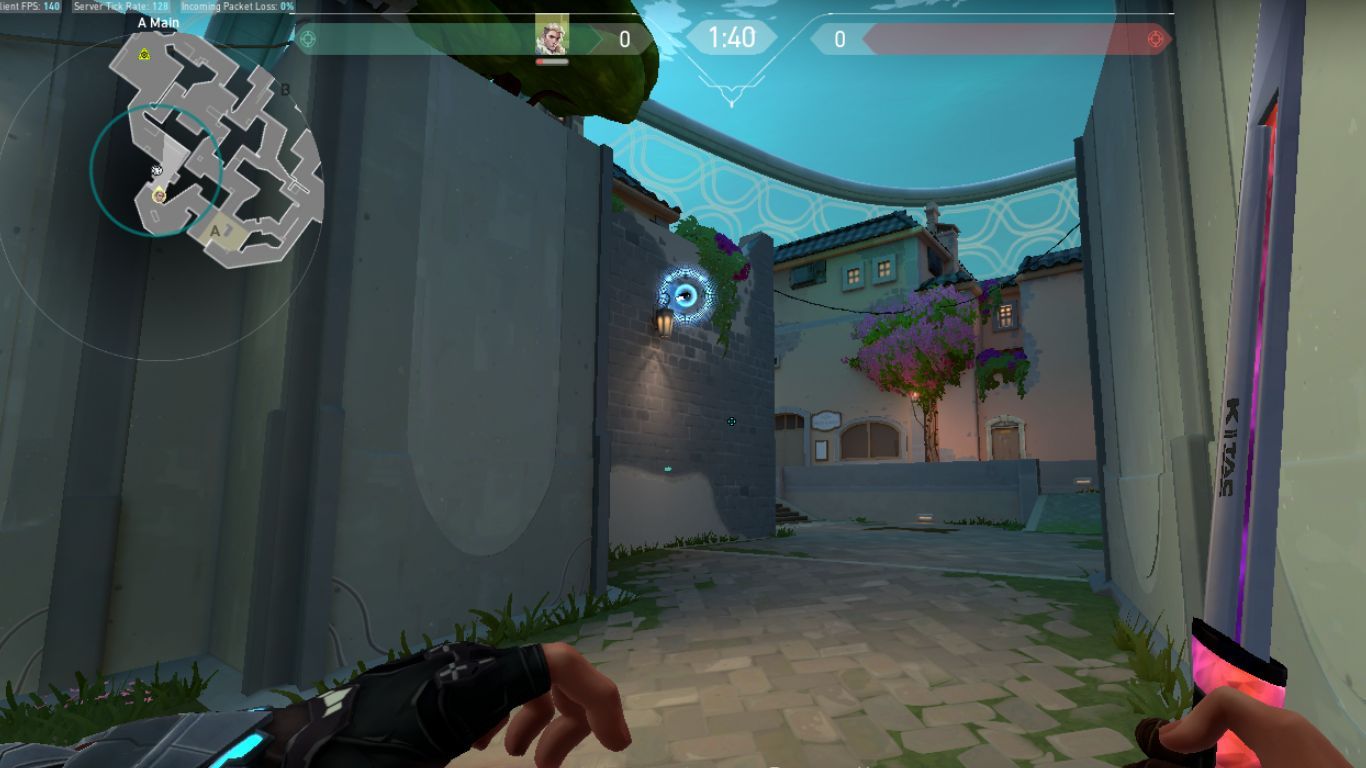
As soon as you enter A Main, you will see three yellow stripes on the wall with "KINGDOM" written on it. Head to the one closest to you (assuming you're coming from A restaurant), and press yourself against the stripe until you can't get any closer to it.
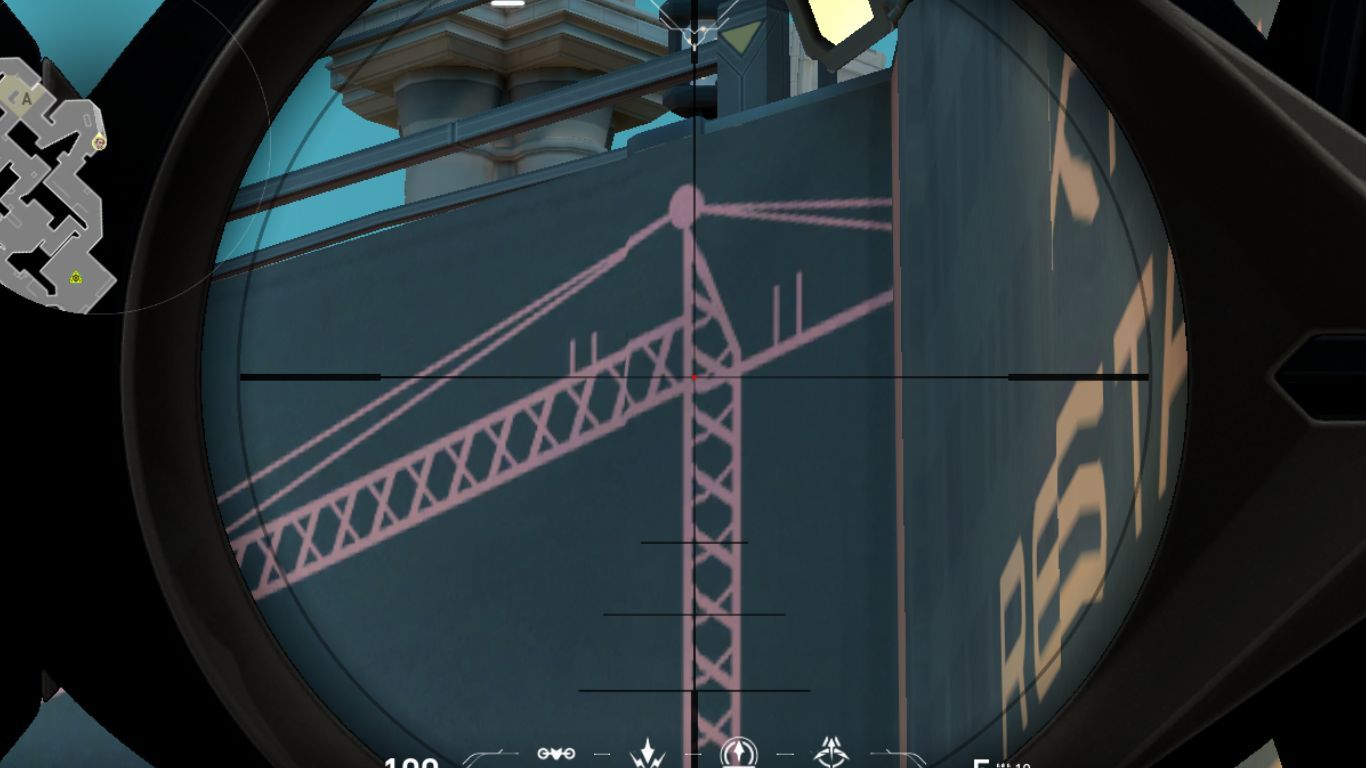
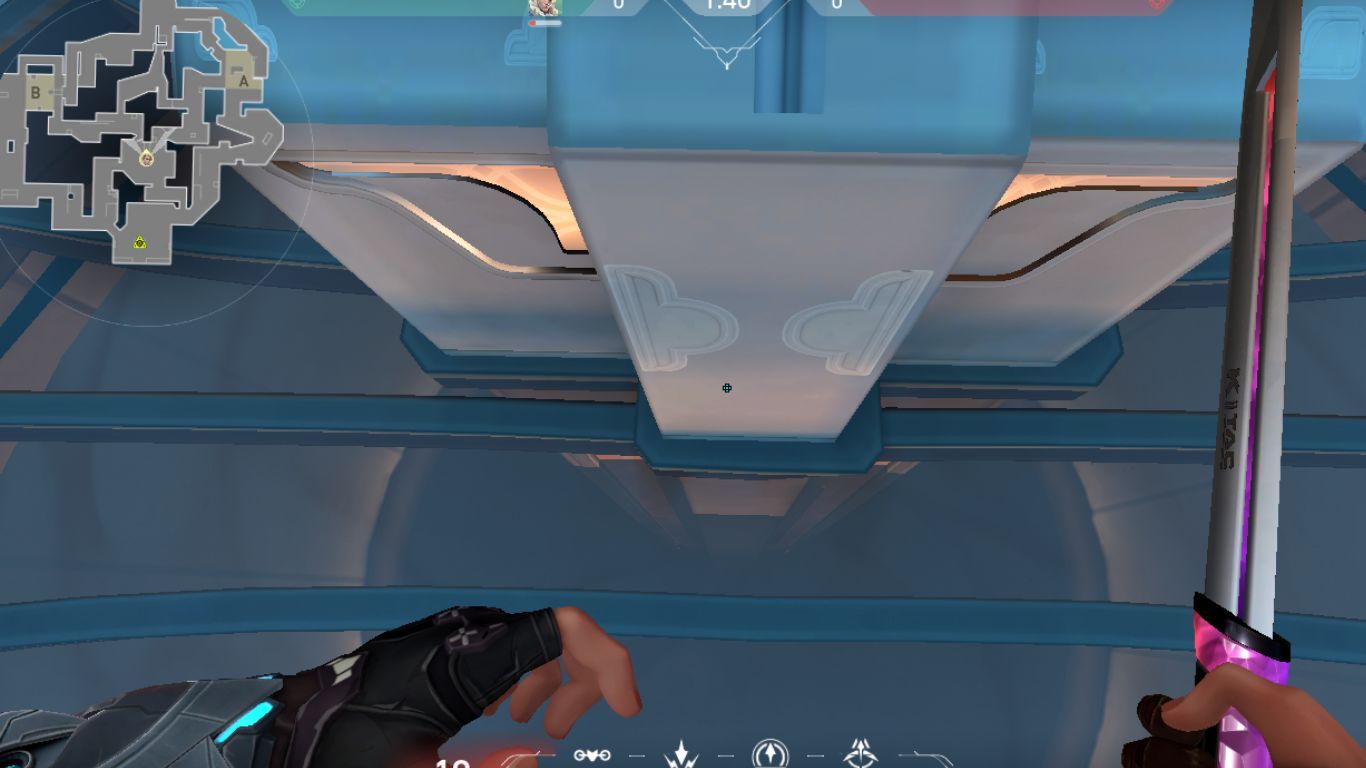
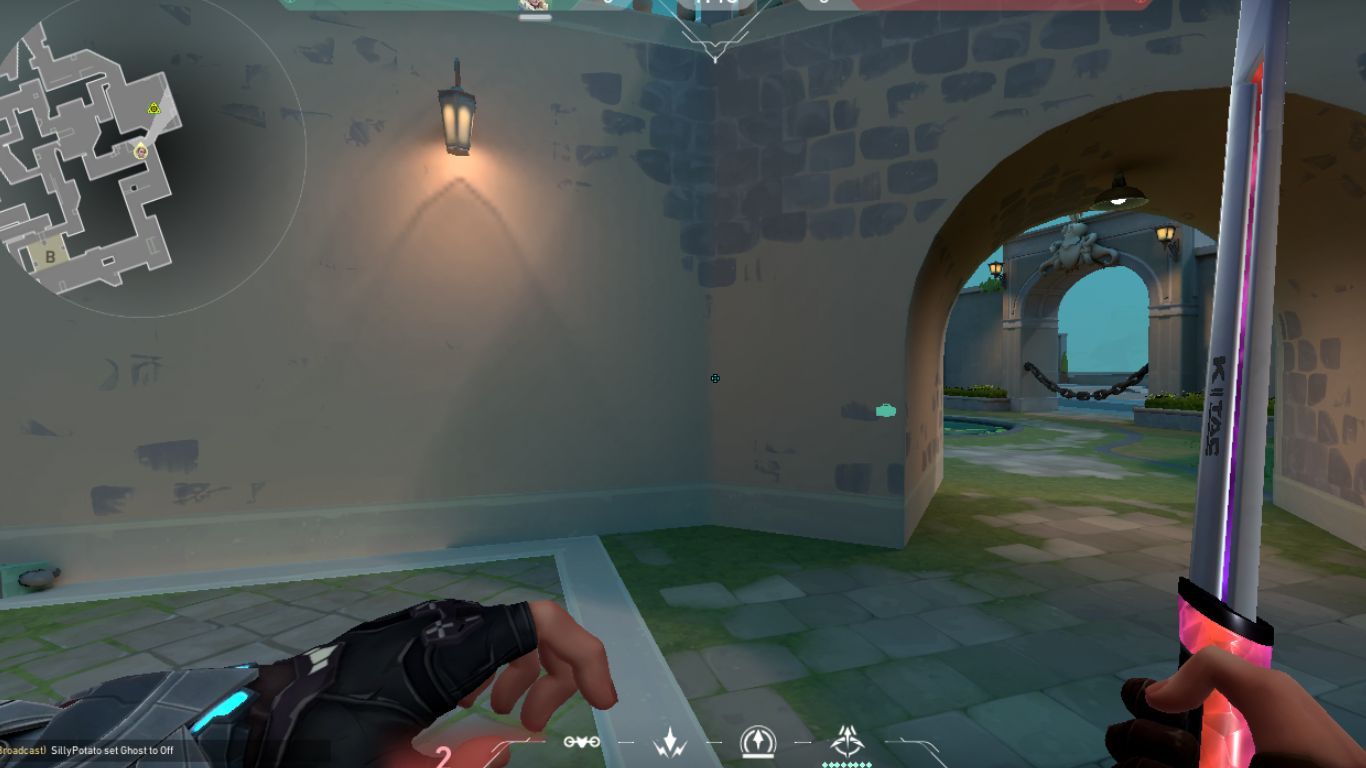
Next, turn around, and you'll see some art made on one of the adjacent walls. It looks like a big crane.
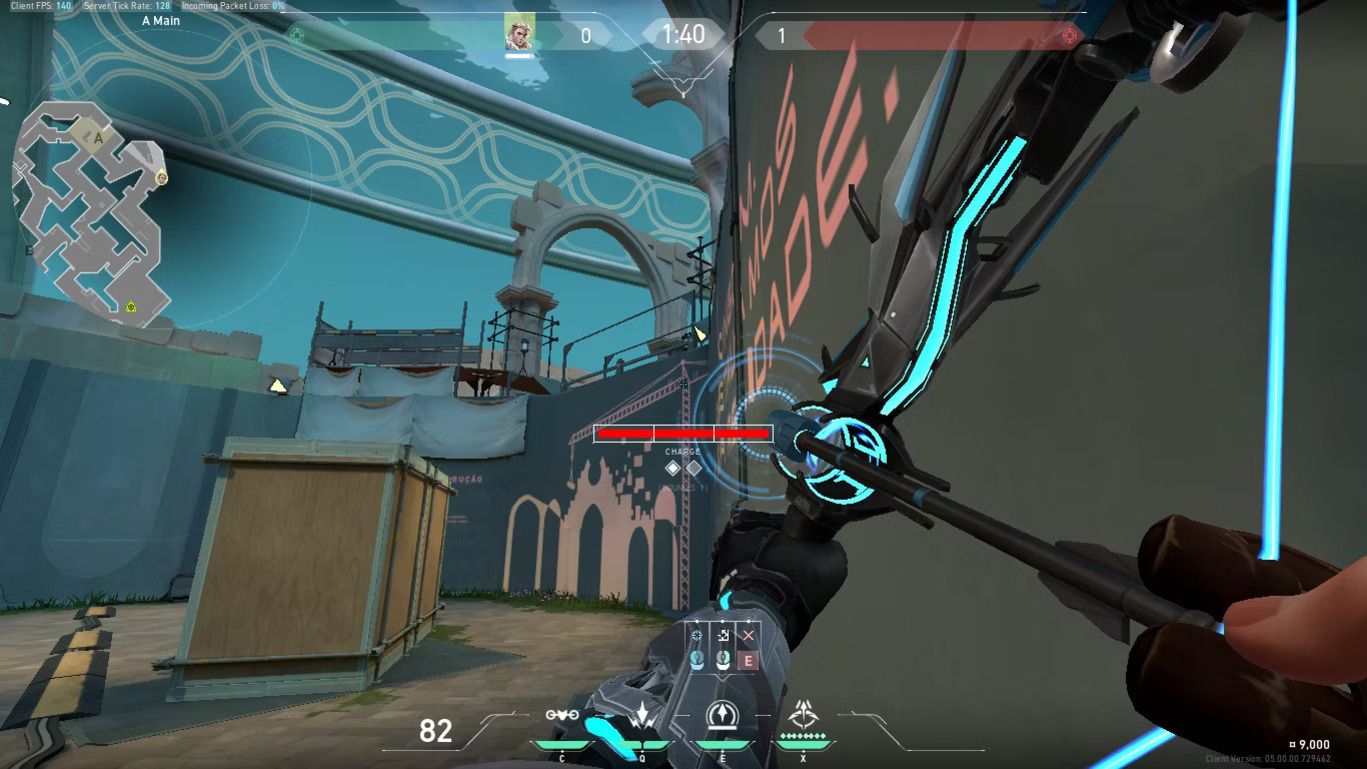
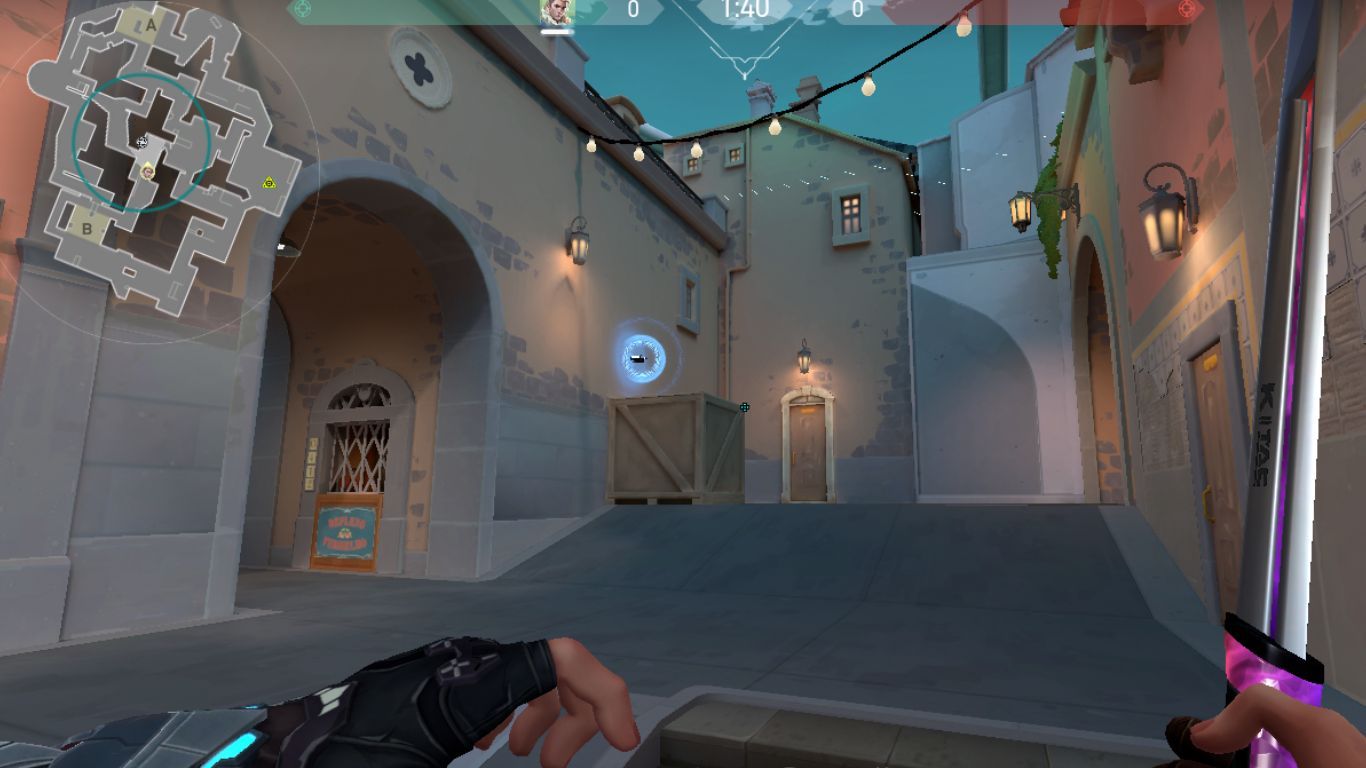
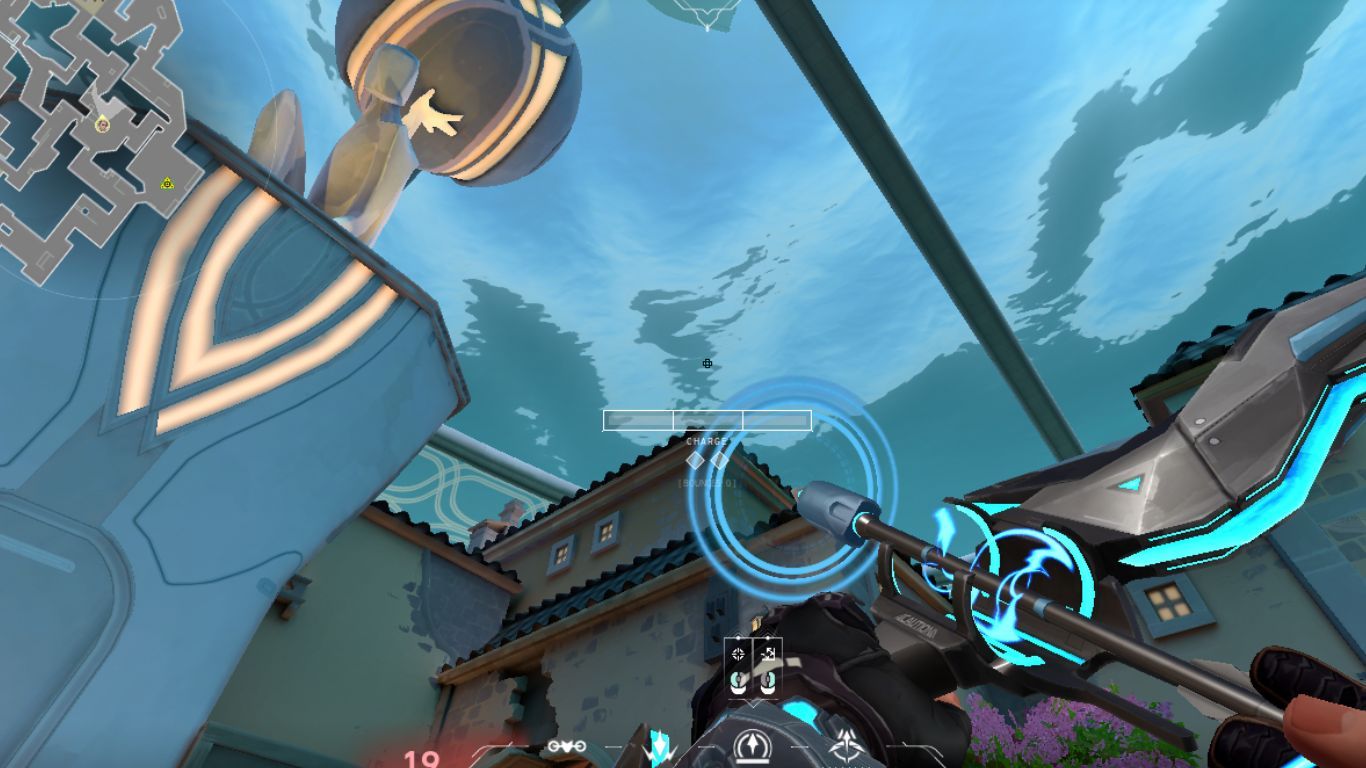
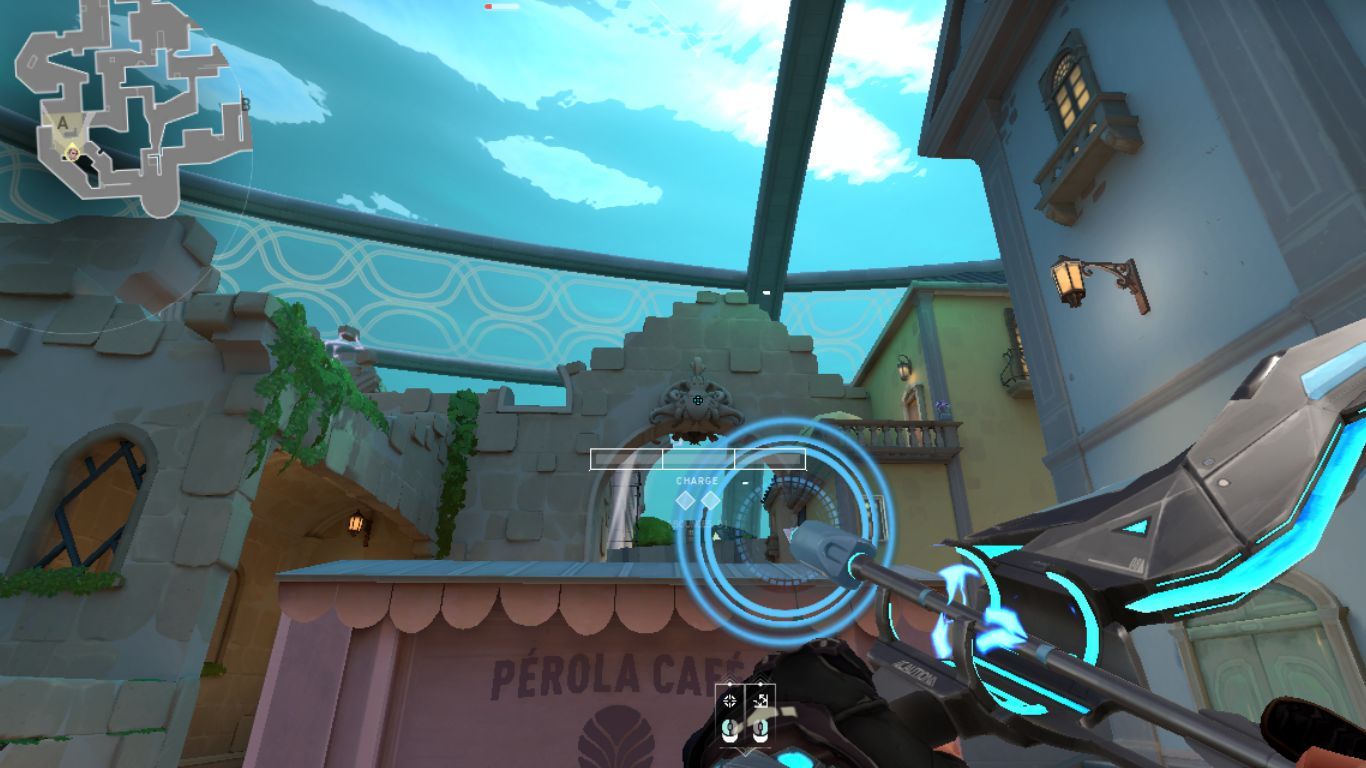
Pull out your Recon dart and aim exactly where the crosshair is in the above picture. Charge the bar fully and make sure you have one bounce activated. You can do this by pressing the Right Click once.
As soon as you fully charge the arrow, shoot it, and it will land on the edge of the building, showing you any enemy that is present on A Site.
To aid you further on where to aim exactly, here's a close-up picture. Aim at the bottom left triangle of the block on the top right of the art. This can be tricky to learn at first since if your aim is even slightly off, the recon dart can be rendered completely useless.
Lineup From A Restaurant To A Site
This lineup will help you clear out both the right corner at the beginning of A Site when you're planning to enter through A Main and A Link, which is on the left side.
It's common for defenders to hold a cross angle in this section where even if you manage to kill the enemy on one side, the other one will instantly peak and kill you. This lineup can completely avoid that.
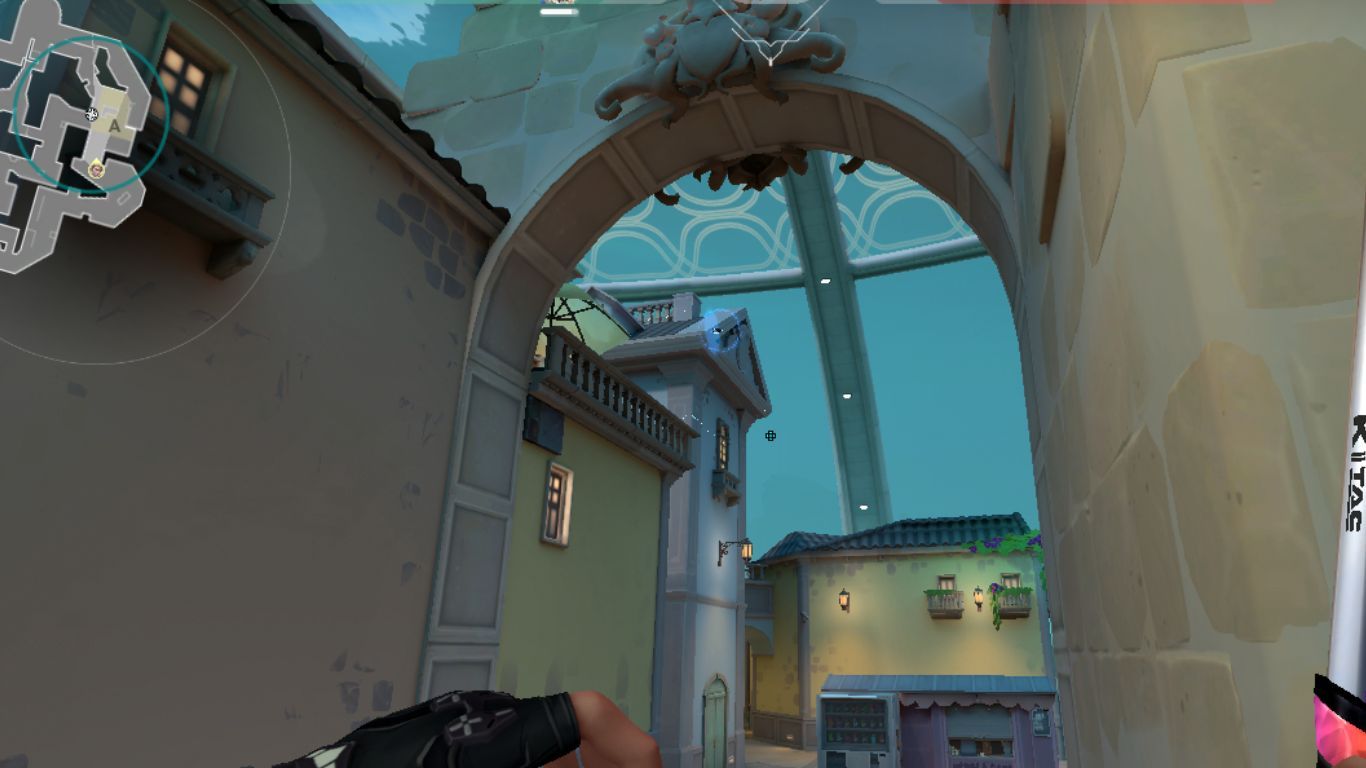
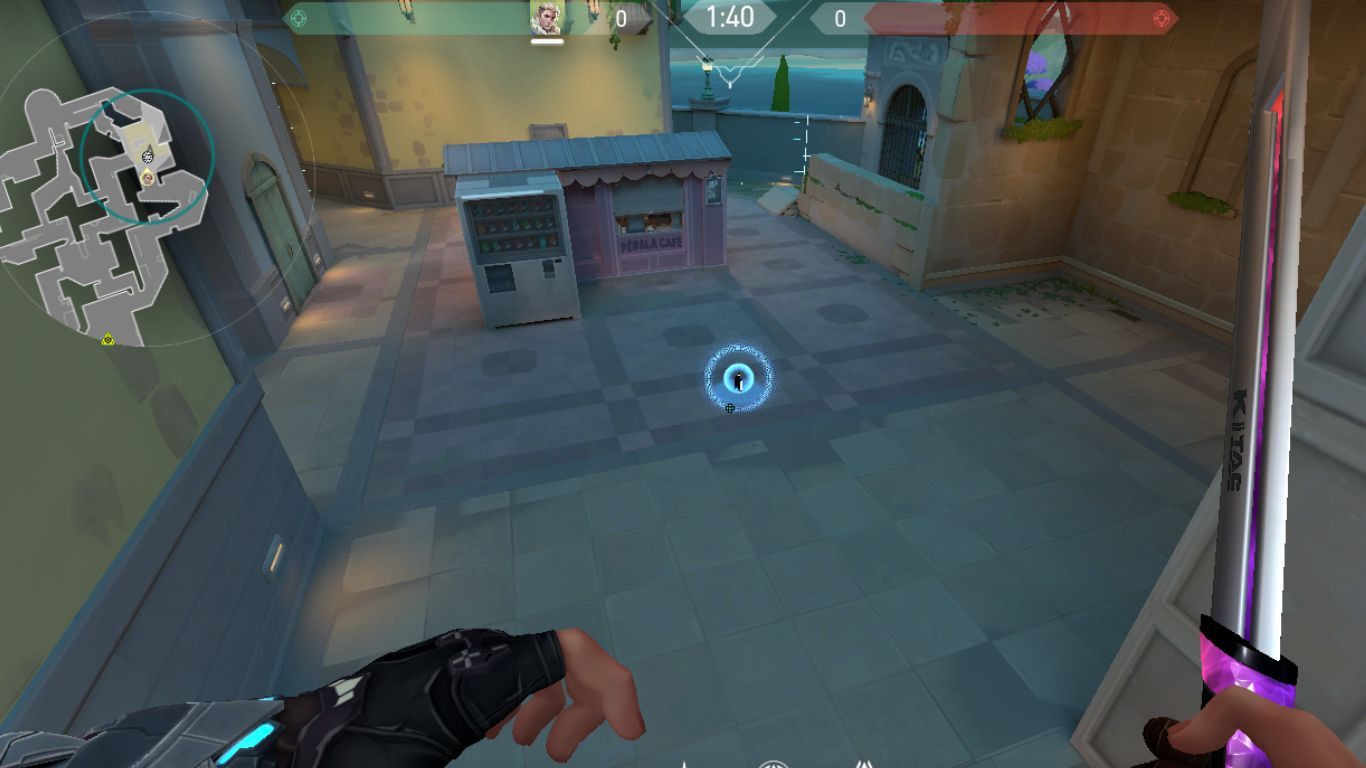
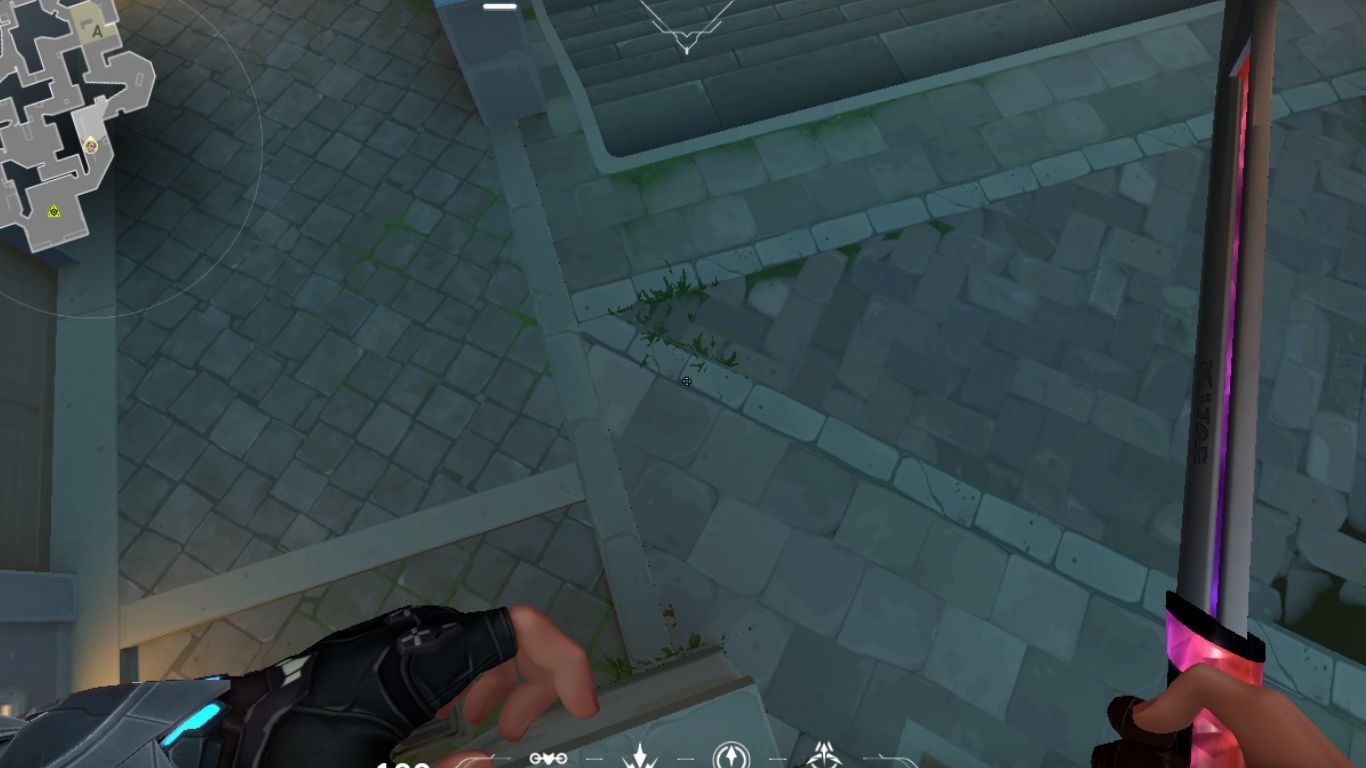
To perform this, you need to be in A Restaurant. When you're there, you will see an elevated platform beside the first set of staircases right in front of the two-box stack in the area. Stand at the very edge of this platform and look upwards.
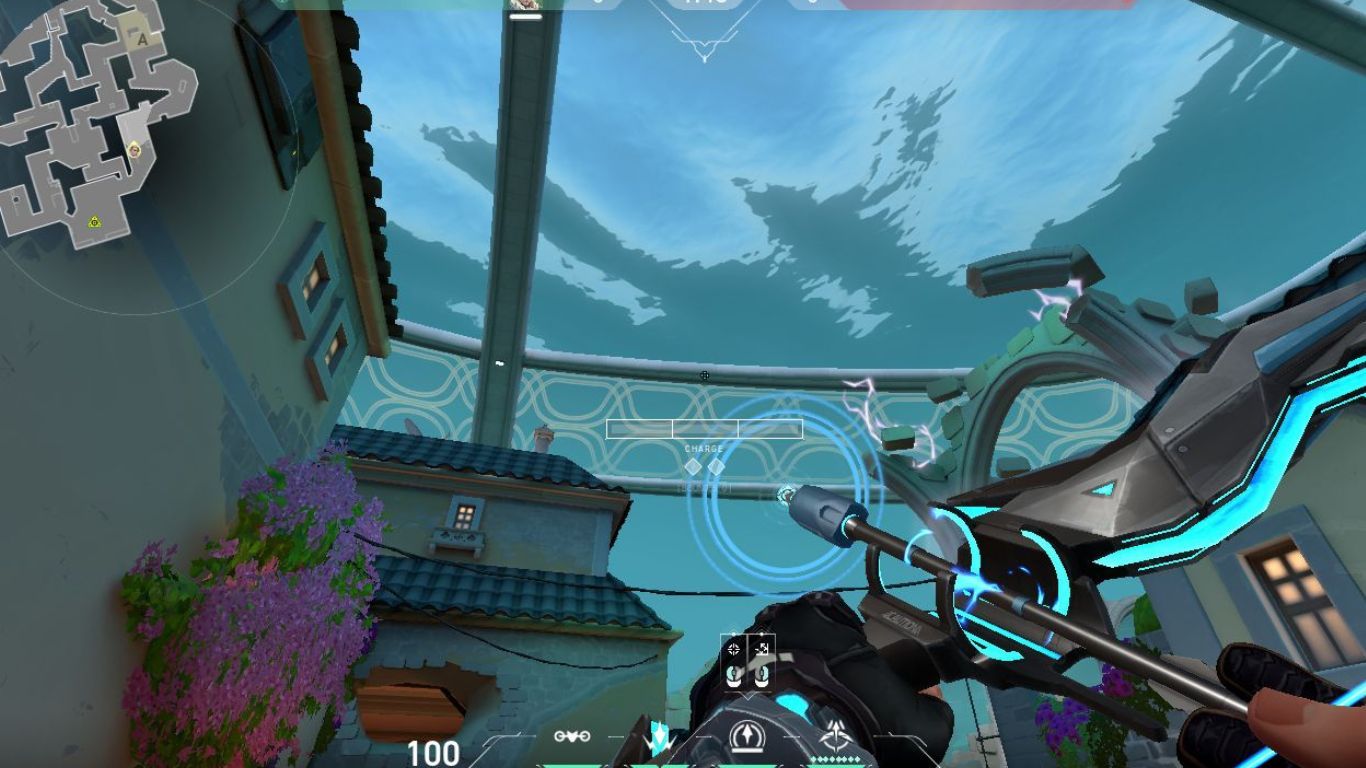
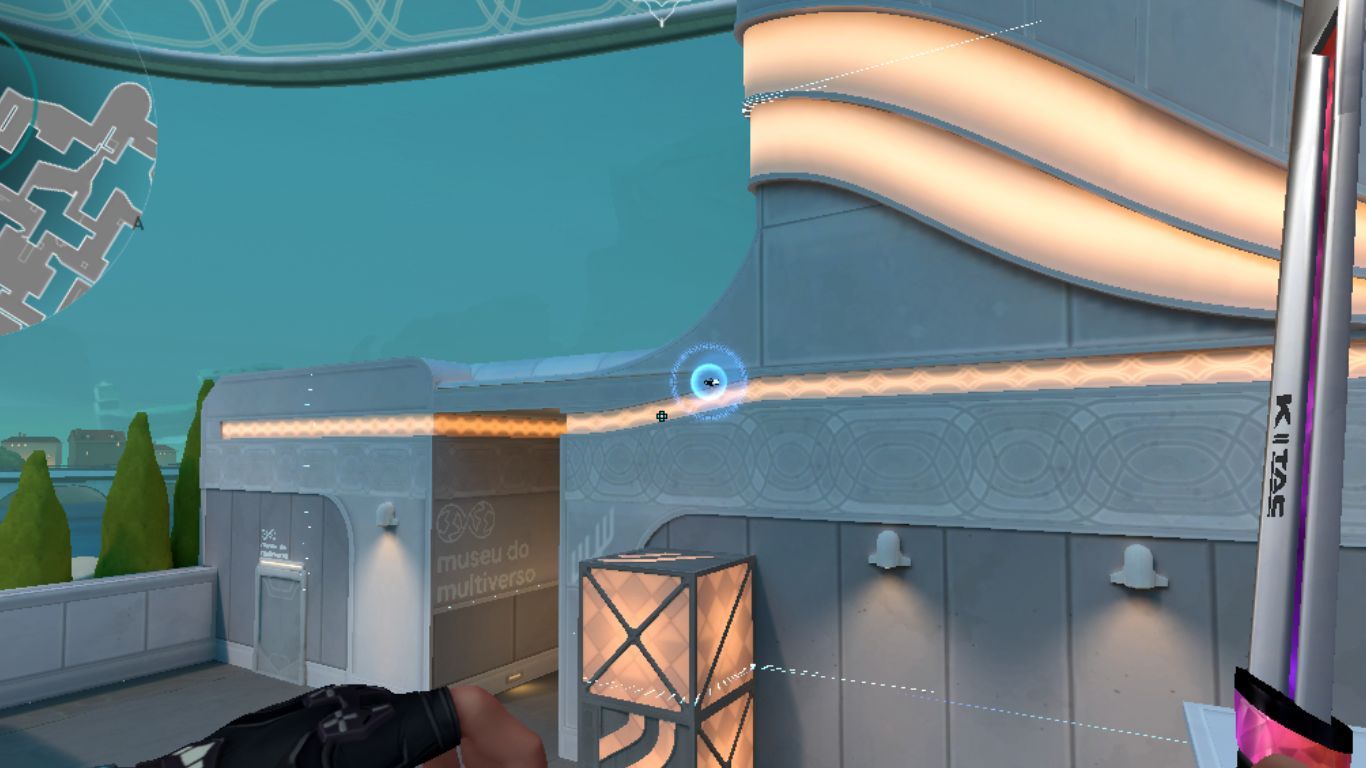
Aim at the white stripe at the very top from the edge of that platform. To figure out the exact spot, you can try lining up your HP HUD right below the gap in the wall of the building on the left.
Once you've lined it up, just press M1. Don't hold it, as any amount of charge will completely ruin this lineup. All you need to give it is a gentle tap.
Lineup From A Restaurant To Mid Doors
If used at the right time, this lineup can be absolutely devastating for an enemy who is trying to camp Mid Doors. Once you've learned this one, your dart will land right above the box near Mid Doors and reveal anyone who's in Mid Doors and B Link.
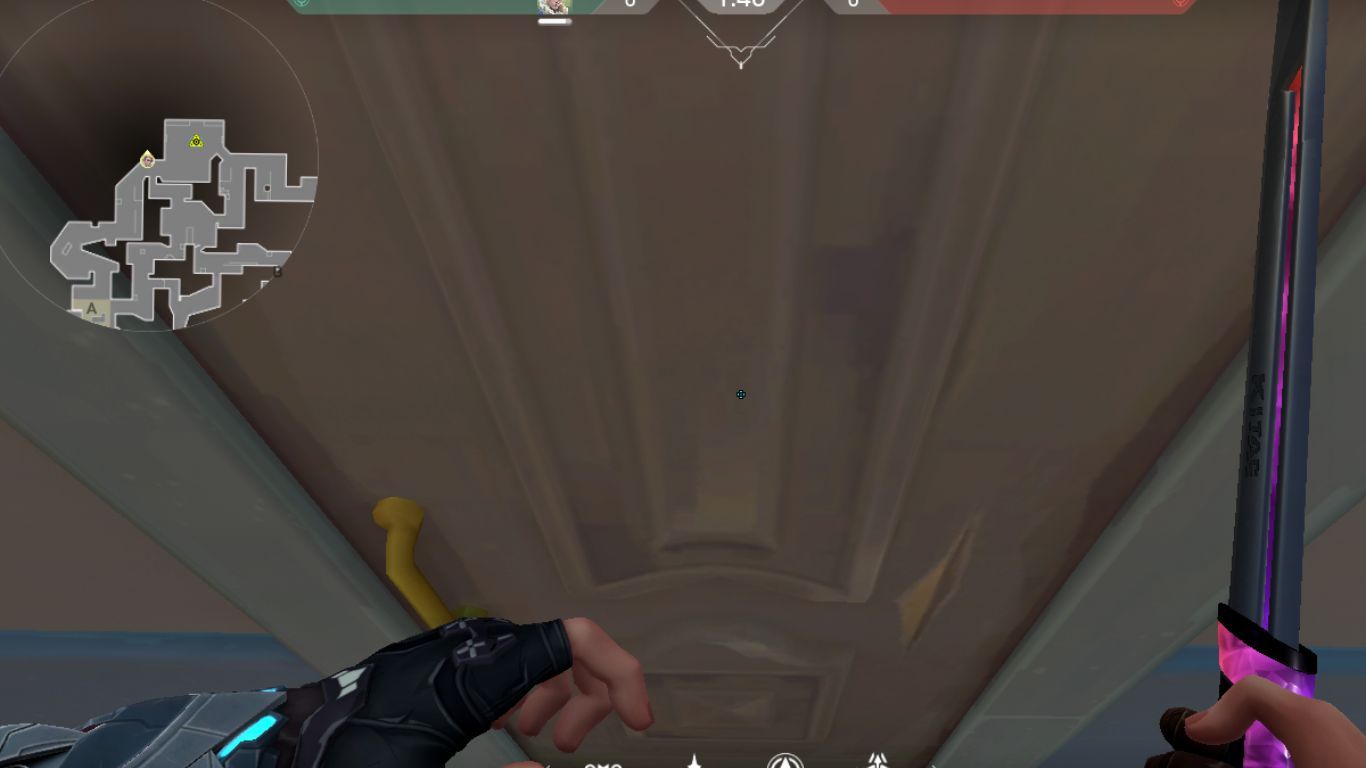
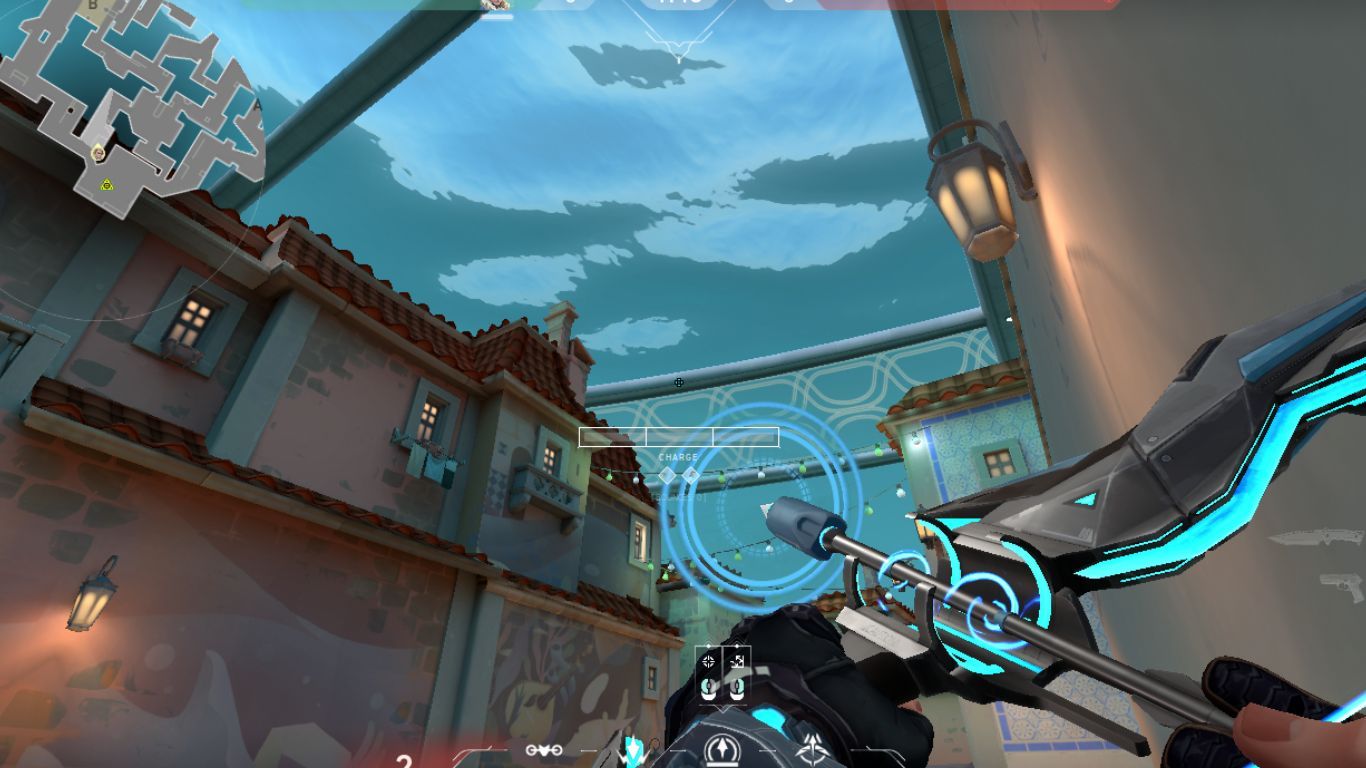
As soon as you head forward from Attackers Spawn and look towards the restaurant, there will be a brown door with a yellow handle. This is the door of the first building on the right-hand side. Place yourself right in the middle of this door and press up to it as much as you can, and then turn around.
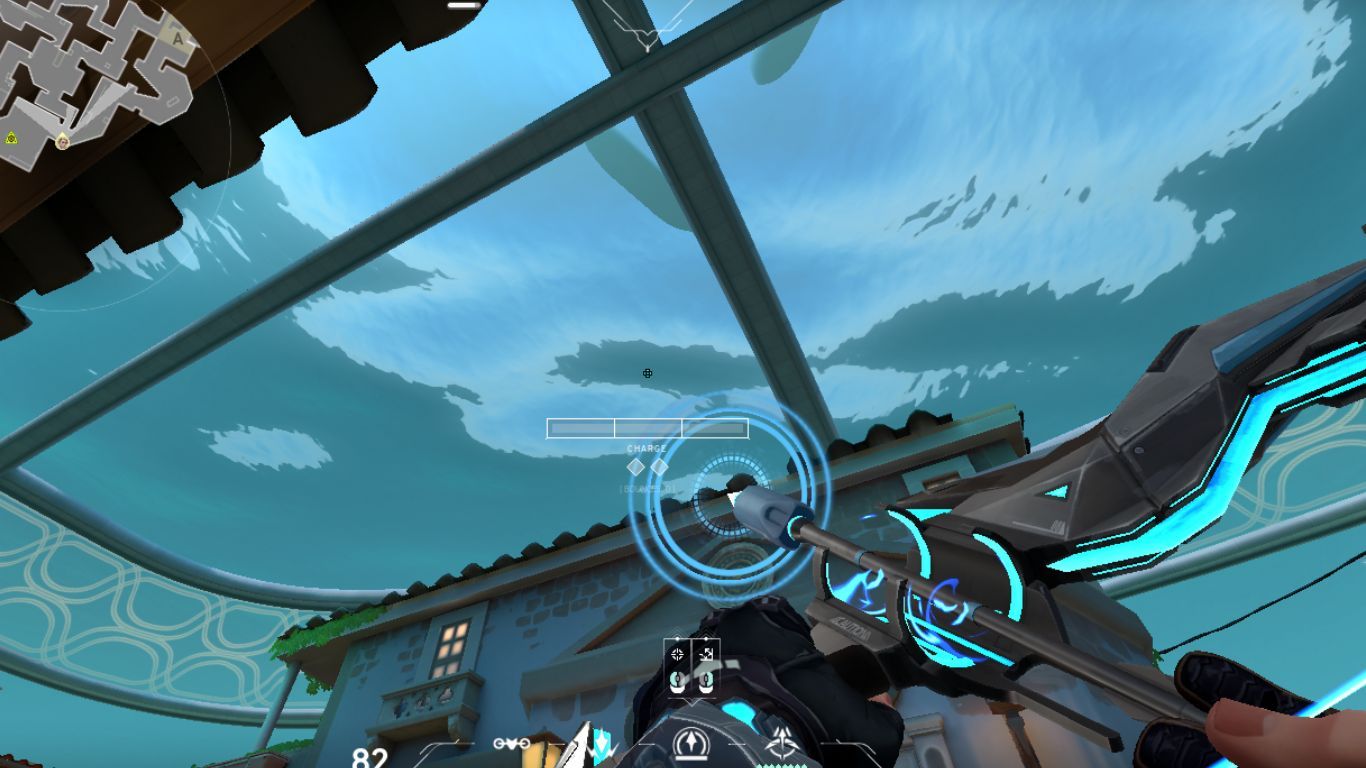
This is the tricky part. Aim up high and make sure the left wheel of your drone ability HUD at the bottom lines up with the top right of the left lamp on the doorway to mid. For clarification, you can refer to the image above.
Once you have it lined up, charge your bar up to one and a half before shooting the dart. While this might take a while to learn, it will be very easy afterward.
The most satisfying thing about this lineup is when someone is camping in Mid Doors. The doors are fragile and bullets can pierce them. As soon as you shoot the dart, you can run towards Top Mid with your gun out and by the time it lands, you will be in position.
As soon as the dart reveals that person, you can wallbang and kill them. They won't even know what hit them.
Lineup From Mid Plaza To A Site
So you've taken control of Mid, but you have no idea where enemies are on A Site, and you plan to take over the site. Don't worry, this lineup has your back! Once you've got this down, the dart will land on the edge of Dugout clearing A Link and the front site.
This can also land in Dugout, which still clears one of the hardest parts of A Site.
In the middle of the Plaza, there is a white elevated structure in the middle. You can find it on the right side of the Mid Doors. Make sure you have the entire mid cleared before attempting this lineup as you don't want to get found with utility in your hands.
Press yourself right in the middle of this elevated platform until you cannot go forward and then look towards the air on your right side.
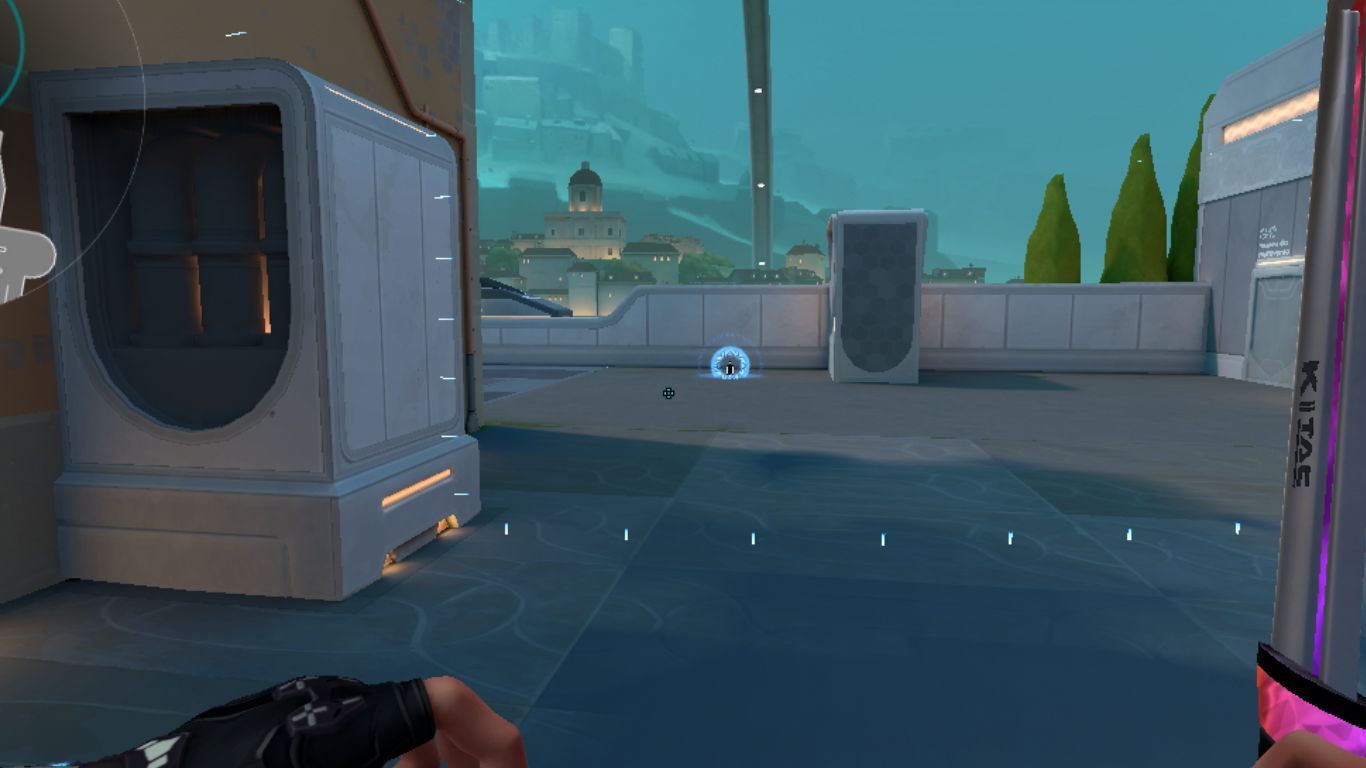
There is a gap in the building on the right side at the top. Line your drone icon on the HUD on the bottom-right edge of this gap as shown in the image above. Next, just charge your shot up to a little past the first bar before shooting the dart, and it will land right on the edge of Dugout.
Lineup From A Site To A Main
One of the easier yet very effective lineups is one from the back A Site to A Main. If timed right, this can reveal any push coming along from A Main while you're defending the site.
Not only will that give you an upper hand, but it will also let the rest of your team know if they're pushing up.
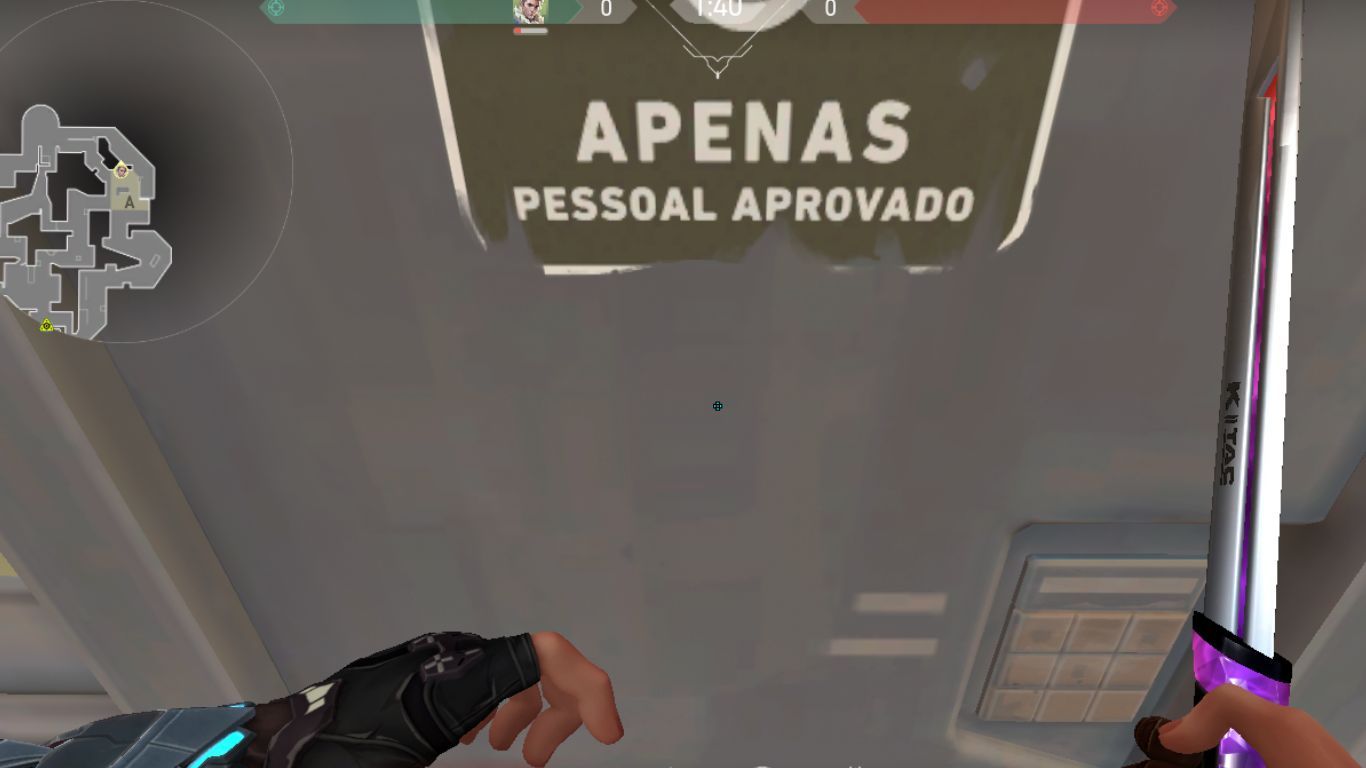
When you're at the back site, behind the structure in the middle, you will see a door with "APENAS" written on it. Push yourself towards this door until you can't go forward and look towards the doorway in the middle leading to A Main.
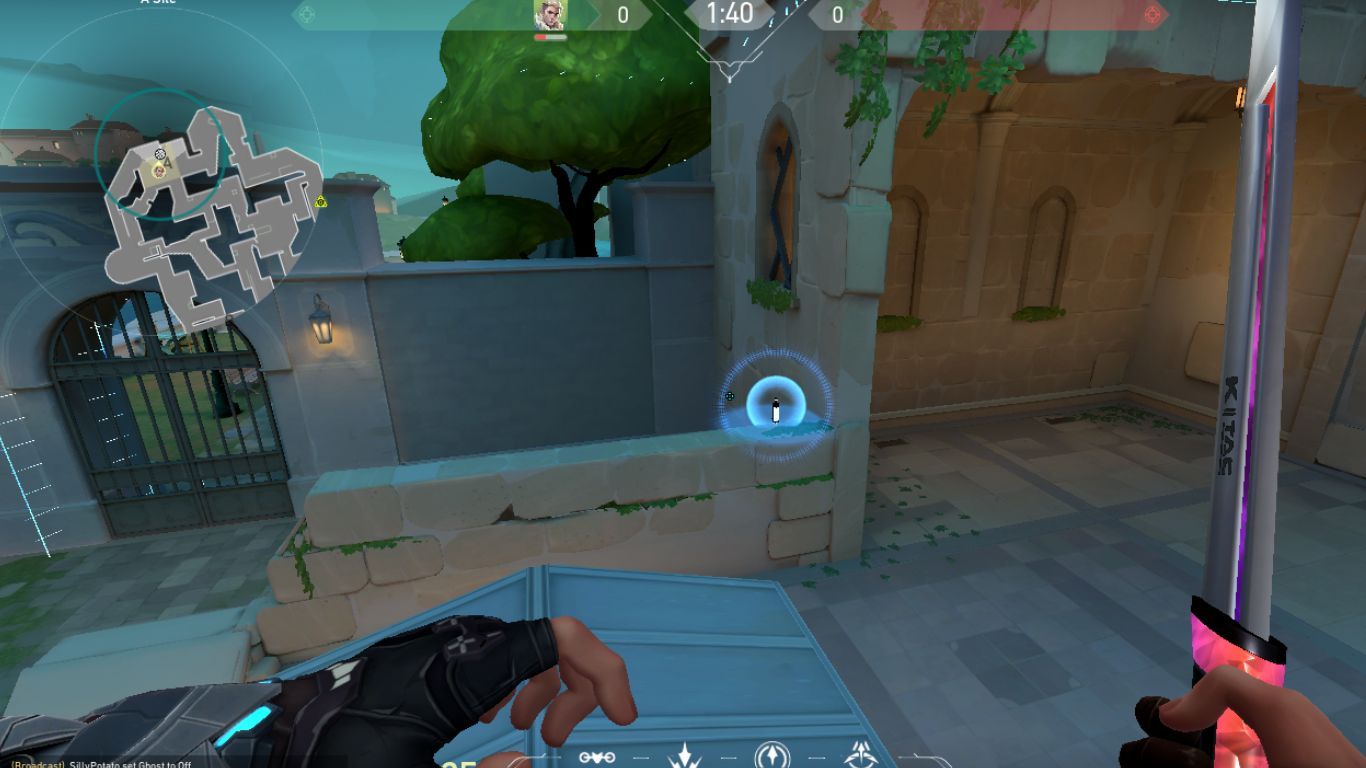
There is a figure at the top of the door in front (it kind of looks like a frog with eyes, at least it will be easier to line this up if you think of it that way). Aim at the top center of the figure as shown in the image above.
Charge your shot up to a little past the first charge and let it go. The recon will go to the area in between A Main and Restaurant where there is a high chance of Attacker presence.
You can also charge this shot a little below the first bar, and it will simply go towards A Main where it'll reveal if there's an enemy close to the site and either force them to back off or give you an advantage if they peak.
Lineup From Defender Spawn To B Main
B Site can be a tricky one to take over as attackers, but if you're a defender and attackers have somehow managed to plant the Spike on B, it will be equally hard to retake it.
This lineup can make your job a little easier by revealing any of the enemies in B Mail and beside the box on Site which is usually where the Spike is planted.
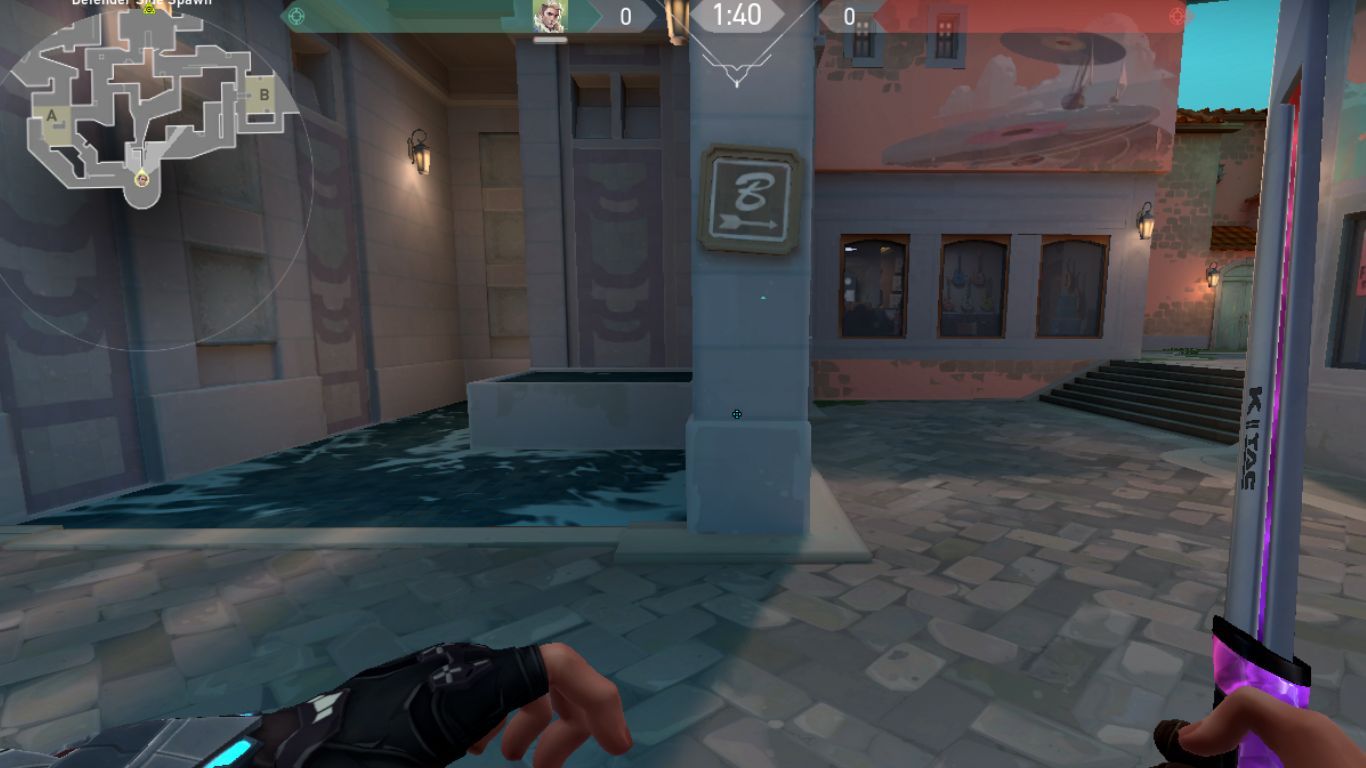
Right in from of Defender's Spawn, there are two pillars on each side of Waters with the Site labels on them. Head to the pillar with the B Site label on it and get as close to it as you can while the pillar is in the middle of your screen. Once you've done this, look to your right towards the site.
Aim your crosshair on the hut of the building on the right side. It should be just a little left to the edge of the building, so the dart doesn't get stuck on the building. Once you've aimed it right, charge the arrow up to the first bar and let it go to reveal the enemies in B Main and site.
Lineup From Attacker Spawn To B Main
Attacking B Site and planning to take it over can be particularly hard on Pearl. It is one of the most Defensive sites in the game, but this lineup can help you capture it.
The lineup reveals anyone peaking from Tower or tunnel, and also forces the camper behind Screens to leave the area (and possibly get shot in the process).
As you look at your left from Attacker Side Spawn, there is a little alleyway that leads up to Mid Shops and B Club. Go through this alleyway and as soon as you're through it, on the right side there is a little edge dividing the two walls. Push up to the edge as much as you can and then turn around.
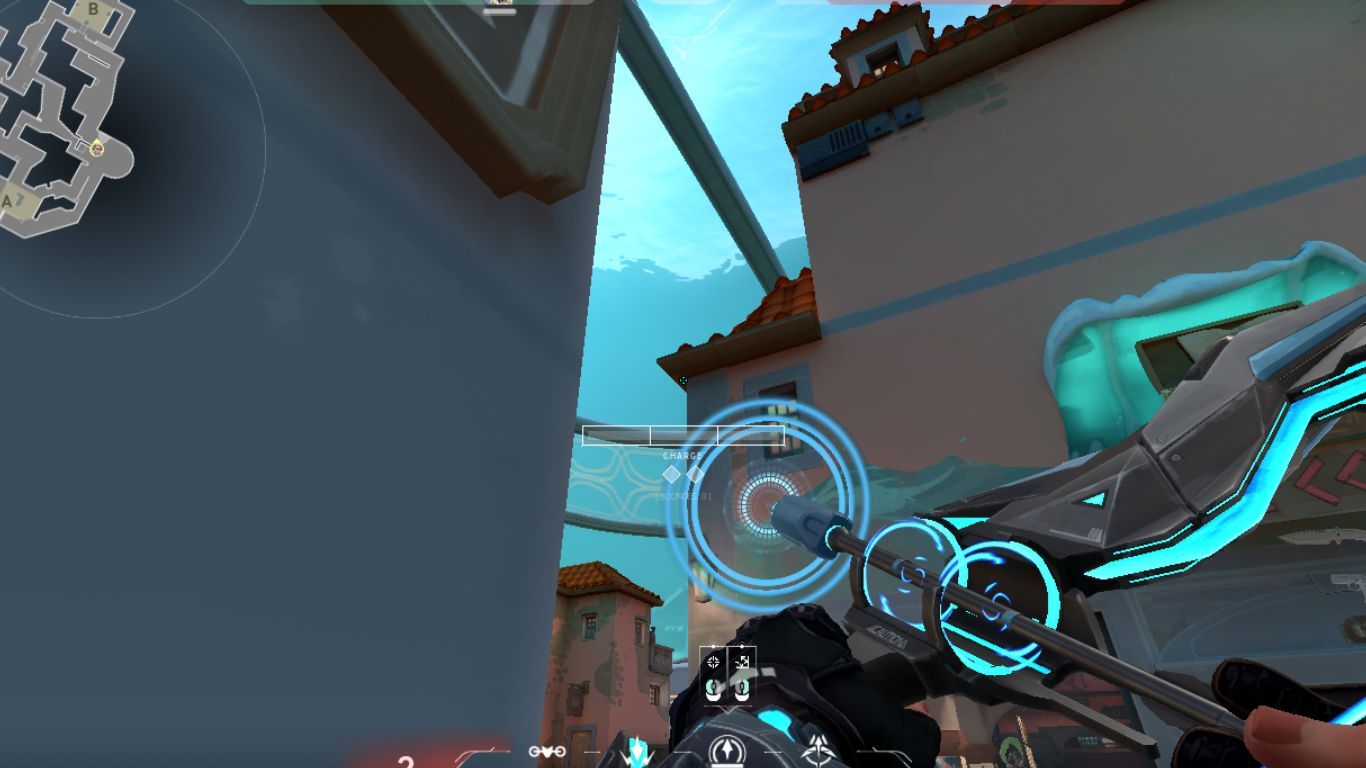
The next step is to line up the shot. This can be a little tricky as you have to aim at the white stripe at the top. The exact location for this one isn't necessary as long as it's anywhere near the one shown in the image above.
Once you have it lined up, you can charge the shot a little past the first bar and let it go to reveal the enemies on B Site, and they won't even know where it came from.

