Quick Links
Wolfenstein: The New Order is chock-full of huge, winding, detailed levels. Most chapters in-game feel unique in style from any other, with the exception being the familiar locations you revisit throughout the campaign. Despite this, much of the brutalist architecture, snaking paths, and dead Nazis can make even the smaller levels difficult to navigate.
Fear not though, as the developers have placed maps around each level to help you get your bearings, move towards objectives, and find the various collectables hidden throughout the game. So in this guide, we’ll go through where each map can be found in each chapter.
After stealth-killing your first commander, you’ll unlock the first stealth skill. It reveals collectables on your map each time you kill a commander quietly and without being noticed. This ability is worth its weight in gold, especially for a completionist run.
Chapter One
Map #1

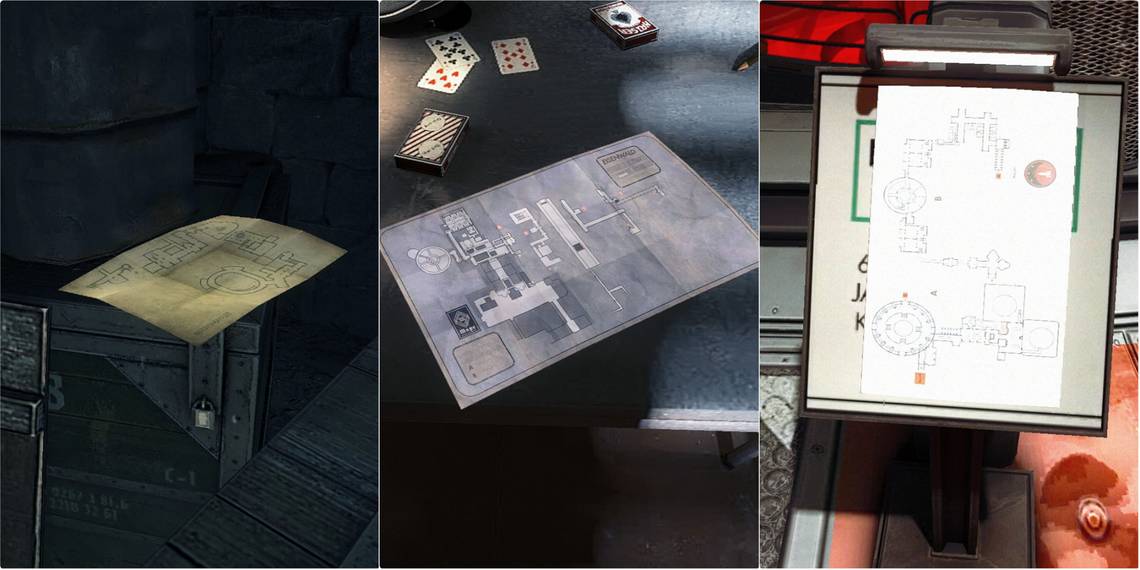
After storming the beach and blowing up the machine gun nest. Head downstairs, go along the trench, and into the pillbox at the end. The map is on some crates, behind the inactive turret.
Map #2

When infiltrating the bunker, destroy the main blast door with the explosives and follow the tracks until you see a storage room on the left. The second map is on the back shelf in the room.
Map #3

Once you’ve scaled the wall, you need to raise the gate for your squad. Drop down the left counterweight, then drop down again through the hole next to it. Open the wooden door and follow the corridor into a storage room with a patrolling commander. The map is next to the destructible crate in the storage area.
Before heading through the wooden door, go right into a dead-end corridor to find a silencer for the pistol. This makes stealth kills on commanders much easier.
Chapter Two

Leave the room Blazkowicz has been sitting in for the last 14 years and kill the Nazi outside it, then look to the left side of the corridor. The map is on a wall next to a barricaded door marked S-2.
Chapter Three

After leaving Anya’s grandparents’ car, head to the first checkpoint to find two large buildings connected by a catwalk. Go up the closest building, across the catwalk, and into the top floor of the next building over. The map is on the wall in front of you, next to a desk.
Chapter Four
Map #1

In chapter four, you’ll enter the secret police headquarters through a window. The first room you enter contains lots of desks and has a chalkboard flanked by two Nazi swastikas. The first map is pinned to this chalkboard.
Map #2

After you’re first chased by the Panzerhund in Eisenwald Prison, you’ll soon find yourself in a set of toilets. Head out of here, then take a right into the prison guard dormitory. The second map is on the table in the middle of the room.
Chapter Five

When you reach the hideout, go upstairs, and grab the crowbar from the spare bedroom two doors down from Blazkowicz’s room. Then go into Max’s room and use the crowbar to grab the folder.
Head back downstairs and Caroline’s room will now be open. You can find the map on top of a box next to the toilet in her room.
Chapter Six

Once you reach the laboratory in the London Nautica facility, a cutscene will play as you drop through the vent. When you regain control, look on the left wall, between the doors, to find the map.
There is no map for Chapter 7.
Chapter Eight

After being captured by ‘The Knife’, you’ll come to in an incinerator. Leave the incinerator and go up the ramp to your left. At the top of the ramp in the same room, look left and grab the map above the table.
There is no map for Chapter 9.
Chapter Ten

When going through the sewers, you’ll have to raise the water level in a nearby basin. When you go into the room with the water level controller in, turn directly left to find the map on top of an oil barrel.
Chapter 11

Once you’ve left the torpedo, clear the room of enemies, and open the door. As you turn right, you’ll see the map on the wall.
Chapter 12

When you spawn in the helicopter, turn around and look at the back seats to find the map. Grab the map before activating the ‘spindly torque’ device.
Chapter 13

After landing on the moon and grabbing your equipment, continue onwards until you reach a big, circular room with two commanders inside. The map is directly on the other side of the room, to the right of the turret on a sign.
Chapter 14

Get to the room with the collapsed wall and floor, where you’re attacked by the helicopter. As you enter, go right and you’ll see the map on the counter.
There is no map for Chapter 15.
Chapter 16

Once you’ve climbed out of the dungeons through the rubble, you’ll need to kill a dog in the corridor. Follow this corridor to the very end where you’ll enter a room full of desks and computers. Turn left, and on the second desk on the right, you’ll find the last map of the game.