Quick Links
Xenoblade Chronicles 3 is a massive game with an immense number of ways to upgrade its characters, making Ouroboros the most formidable group in all of Aionios. Whether you're eating meals to earn extra EXP or equipping better Accessories to give yourself better Stats, there's always something you can be improving to increase your performance in combat.
RELATED: Xenoblade Chronicles 3: Guide To Currency
One of these ways is through the game's Gem Crafting system, which allows you to slot up to three Gems on each character, granting buffs to things such as Healing Power, HP, Critical Rates, and much more. Gems are a fundamental part of Xenoblade Chronicles 3, and its many options give you near-unlimited ways to draw out your character's true potential.
Gem Crafting Overview

Gems are a crucial part of Xenoblade Chronicles 3, allowing you to buff specific aspects of your character up, enabling them to perform better with their Class. There are many Gems in the game, which we will touch on later, but every Gem belongs to a specific grouping, signifying they're better suited for certain Classes than others. While you are free to use any of the Gems you craft and mix and match them to your heart's content, that may not always be the best decision, as your Class determines your role in battle, which makes some Gems naturally a much better fit for you than others.
Furthermore, every character can equip three Gems total, allowing you to buff their Stats by a significant margin if you use them correctly. Additionally, once you make a Gem, it can be equipped by everyone in your party and used on everyone simultaneously. This fantastic feature removes the annoyance and tedium of having to craft the same Gem six times or having to unequip it from one character to put on another. This also makes changing everyone's Class to a new one whenever they reach max-level much less painful, which is very much welcomed. However, you will not always have three Gem Slots available, as they come by leveling up, which you can find out more about below:
- Gem Slot 1: Level 1
- Gem Slot 2: Level 20
- Gem Slot 3: Level 40
That's the long and short of it without getting into what each Gem does or how to make them. For that, please check out the following sections, which cover every Gem in the game, their effects, and the required Materials needed to make and upgrade them!
Every Gem And What They Do

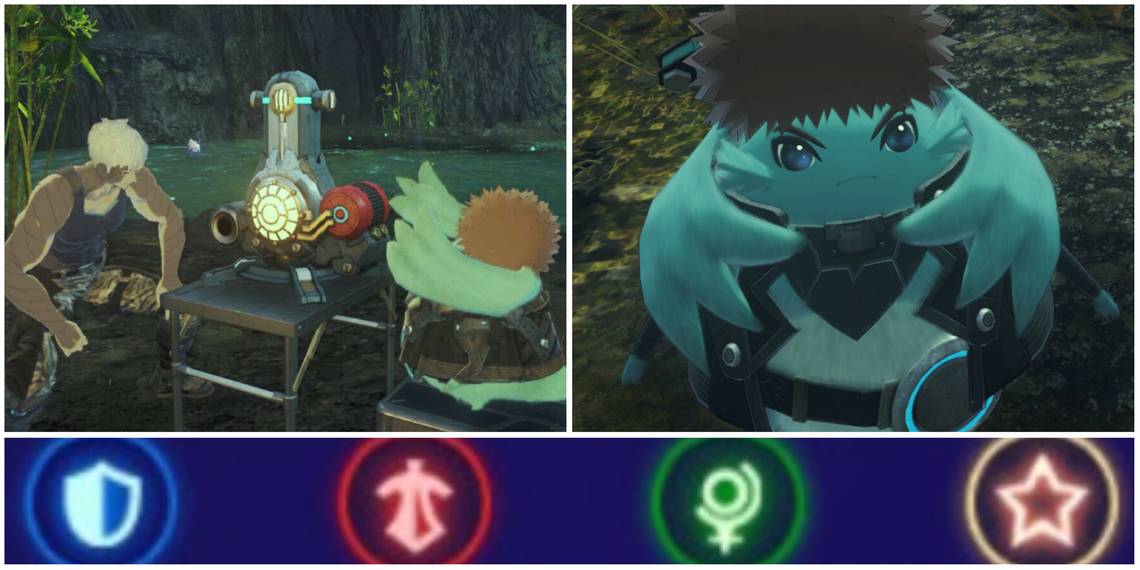
There are four Gem groupings in Xenoblade Chronicles 3, with each group having stats that benefit a specific role more than others. These Gem groups are as follows:
- Defender Gems (Blue)
- Tank Classes
- Attacker Gems (Red)
- DPS Classes
- Healer Gems (Green)
- Healing Classes
- Universal Gems (Yellow)
- All Classes
Furthermore, every Gem grouping has five Gems, all with ten tiers that make their effects much more potent than before, giving you many options at your disposal to beef up your characters and classes. For more information on the four types of Gems, their effects, and what each Tier does, please check out the chart below!
Defender Gems
|
I |
II |
III |
IV |
V |
VI |
VII |
VIII |
IX |
X |
|
|---|---|---|---|---|---|---|---|---|---|---|
|
Tailwind |
+10 to Agility |
+12 to Agility |
+15 to Agility |
+17 to Agility |
+20 to Agility |
+22 to Agility |
+25 to Agility |
+27 to Agility |
+30 to Agility |
+35 to Agility |
|
Steel Protection |
+5 Percent to Block Rate |
+7 Percent to Block Rate |
+10 Percent to Block Rate |
+12 Percent to Block Rate |
+15 Percent to Block Rate |
+17 Percent to Block Rate |
+20 Percent to Block Rate |
+22 Percent to Block Rate |
+25 Percent to Block Rate |
+30 Percent to Block Rate |
|
Ultimate Counter |
When taking damage, deal 80 Percent damage. |
When taking damage, deal 100 Percent damage. |
When taking damage, deal 120 Percent damage. |
When taking damage, deal 140 Percent damage. |
When taking damage, deal 160 Percent damage. |
When taking damage, deal 180 Percent damage. |
When taking damage, deal 200 Percent damage. |
When taking damage, deal 220 Percent damage. |
When taking damage, deal 240 Percent damage. |
When taking damage, deal 280 Percent damage. |
|
Brimming Spirit |
When using Arts, your Aggro is boosted by 20 Percent. |
When using Arts, your Aggro is boosted by 22 Percent. |
When using Arts, your Aggro is boosted by 25 Percent. |
When using Arts, your Aggro is boosted by 27 Percent. |
When using Arts, your Aggro is boosted by 30 Percent. |
When using Arts, your Aggro is boosted by 32 Percent. |
When using Arts, your Aggro is boosted by 35 Percent. |
When using Arts, your Aggro is boosted by 37 Percent. |
When using Arts, your Aggro is boosted by 40 Percent. |
When using Arts, your Aggro is boosted by 45 Percent. |
|
Perilous Presence |
Pull Aggro at the start of each battle. |
Pull Aggro at the start of each battle. |
Pull Aggro at the start of each battle. |
Pull Aggro at the start of each battle. |
Pull Aggro at the start of each battle. |
Pull Aggro at the start of each battle. |
Pull Aggro at the start of each battle. |
Pull Aggro at the start of each battle. |
Pull Aggro at the start of each battle. |
Pull Aggro at the start of each battle. |
Attacker Gems
|
I |
II |
III |
IV |
V |
VI |
VII |
VIII |
IX |
X |
|
|---|---|---|---|---|---|---|---|---|---|---|
|
Steelcleaver |
+10 to Attack |
+25 to Attack |
+30 to Attack |
+35 to Attack |
+40 to Attack |
+45 to Attack |
+50 to Attack |
+55 to Attack |
+60 to Attack |
+70 to Attack |
|
Accurate Grace |
+20 to Dexterity |
+22 to Dexterity |
+25 to Dexterity |
+27 to Dexterity |
+30 to Dexterity |
+33 to Dexterity |
+35 to Dexterity |
+37 to Dexterity |
+40 to Dexterity |
+40 to Dexterity |
|
Analyze Weakness |
Damage from Critical Attacks is increased by 20 Percent. |
Damage from Critical Attacks is increased by 25 Percent. |
Damage from Critical Attacks is increased by 30 Percent. |
Damage from Critical Attacks is increased by 35 Percent. |
Damage from Critical Attacks is increased by 40 Percent. |
Damage from Critical Attacks is increased by 45 Percent. |
Damage from Critical Attacks is increased by 50 Percent. |
Damage from Critical Attacks is increased by 55 Percent. |
Damage from Critical Attacks is increased by 60 Percent. |
Damage from Critical Attacks is increased by 70 Percent. |
|
Swelling Scourge |
The potency of Debuffs is increased by 25 Percent. |
The potency of Debuffs is increased by 27 Percent. |
The potency of Debuffs is increased by 30 Percent. |
The potency of Debuffs is increased by 33 Percent. |
The potency of Debuffs is increased by 35 Percent. |
The potency of Debuffs is increased by 37 Percent. |
The potency of Debuffs is increased by 40 Percent. |
The potency of Debuffs is increased by 42 Percent. |
The potency of Debuffs is increased by 45 Percent. |
The potency of Debuffs is increased by 50 Percent. |
|
Refined Incantation |
Increases Debuff duration by 25 Percent. |
Increases Debuff duration by 27 Percent. |
Increases Debuff duration by 30 Percent. |
Increases Debuff duration by 33 Percent. |
Increases Debuff duration by 35 Percent. |
Increases Debuff duration by 37 Percent. |
Increases Debuff duration by 40 Percent. |
Increases Debuff duration by 42 Percent. |
Increases Debuff duration by 45 Percent. |
Increases Debuff duration by 50 Percent. |
Healer Gems
|
I |
II |
III |
IV |
V |
VI |
VII |
VIII |
IX |
X |
|
|---|---|---|---|---|---|---|---|---|---|---|
|
Lifebearer |
+20 to Healing Power |
+22 to Healing Power |
+25 to Healing Power |
+27 to Healing Power |
+30 to Healing Power |
+33 to Healing Power |
+35 to Healing Power |
+37 to Healing Power |
+40 to Healing Power |
+45 to Healing Power |
|
Soothing Breath |
+5 to Healing Power and revives incapacitated allies with 20 Percent more HP. |
+6 to Healing Power and revives incapacitated allies with 22 Percent more HP. |
+7 to Healing Power and revives incapacitated allies with 25 Percent more HP. |
+8 to Healing Power and revives incapacitated allies with 27 Percent more HP. |
+9 to Healing Power and revives incapacitated allies with 30 Percent more HP. |
+10 to Healing Power and revives incapacitated allies with 32 Percent more HP. |
+11 to Healing Power and revives incapacitated allies with 35 Percent more HP. |
+12 to Healing Power and revives incapacitated allies with 37 Percent more HP. |
+13 to Healing Power and revives incapacitated allies with 40 Percent more HP. |
+15 to Healing Power and revives incapacitated allies with 45 Percent more HP. |
|
Lifesaving Expertise |
+5 to Healing Power and increases the speed of reviving allies by 20 Percent. |
+6 to Healing Power and increases the speed of reviving allies by 22 Percent. |
+7 to Healing Power and increases the speed of reviving allies by 25 Percent. |
+8 to Healing Power and increases the speed of reviving allies by 27 Percent. |
+9 to Healing Power and increases the speed of reviving allies by 30 Percent. |
+10 to Healing Power and increases the speed of reviving allies by 32 Percent. |
+11 to Healing Power and increases the speed of reviving allies by 35 Percent. |
+12 to Healing Power and increases the speed of reviving allies by 37 Percent. |
+13 to Healing Power and increases the speed of reviving allies by 40 Percent. |
+15 to Healing Power and increases the speed of reviving allies by 45 Percent. |
|
Swelling Blessing |
Increases the potency of buffs you cast by 25 Percent. |
Increases the potency of buffs you cast by 27 Percent. |
Increases the potency of buffs you cast by 30 Percent. |
Increases the potency of buffs you cast by 33 Percent. |
Increases the potency of buffs you cast by 35 Percent. |
Increases the potency of buffs you cast by 37 Percent. |
Increases the potency of buffs you cast by 40 Percent. |
Increases the potency of buffs you cast by 42 Percent. |
Increases the potency of buffs you cast by 45 Percent. |
Increases the potency of buffs you cast by 50 Percent. |
|
Refined Blessing |
Increases the duration of buffs you cast by 25 Percent. |
Increases the duration of buffs you cast by 27 Percent. |
Increases the duration of buffs you cast by 30 Percent. |
Increases the duration of buffs you cast by 33 Percent. |
Increases the duration of buffs you cast by 35 Percent. |
Increases the duration of buffs you cast by 37 Percent. |
Increases the duration of buffs you cast by 40 Percent. |
Increases the duration of buffs you cast by 42 Percent. |
Increases the duration of buffs you cast by 45 Percent. |
Increases the duration of buffs you cast by 50 Percent. |
Universal Gems
|
I |
II |
III |
IV |
V |
VI |
VII |
VIII |
IX |
X |
|
|---|---|---|---|---|---|---|---|---|---|---|
|
Ironclad |
+100 to HP |
+250 to HP |
+400 to HP |
+550 to HP |
+700 to HP |
+850 to HP |
+1000 to HP |
+1150 to HP |
+1300 to HP |
+1500 to HP |
|
Steady Striker |
The time between Auto-Attacks is decreased by 15 Percent. |
The time between Auto-Attacks is decreased by 17 Percent. |
The time between Auto-Attacks is decreased by 20 Percent. |
The time between Auto-Attacks is decreased by 22 Percent. |
The time between Auto-Attacks is decreased by 25 Percent. |
The time between Auto-Attacks is decreased by 27 Percent. |
The time between Auto-Attacks is decreased by 30 Percent. |
The time between Auto-Attacks is decreased by 32 Percent. |
The time between Auto-Attacks is decreased by 35 Percent. |
The time between Auto-Attacks is decreased by 40 Percent. |
|
Doublestrike |
You have a 15 Percent chance to attack twice during an Auto-Attack. |
You have a 17 Percent chance to attack twice during an Auto-Attack. |
You have a 20 Percent chance to attack twice during an Auto-Attack. |
You have a 22 Percent chance to attack twice during an Auto-Attack. |
You have a 25 Percent chance to attack twice during an Auto-Attack. |
You have a 27 Percent chance to attack twice during an Auto-Attack. |
You have a 30 Percent chance to attack twice during an Auto-Attack. |
You have a 32 Percent chance to attack twice during an Auto-Attack. |
You have a 35 Percent chance to attack twice during an Auto-Attack. |
You have a 40 Percent chance to attack twice during an Auto-Attack. |
|
Empowered Combo |
Increases damage by 25 Percent when canceling attacks. |
Increases damage by 30 Percent when canceling attacks. |
Increases damage by 35 Percent when canceling attacks. |
Increases damage by 40 Percent when canceling attacks. |
Increases damage by 45 Percent when canceling attacks. |
Increases damage by 50 Percent when canceling attacks. |
Increases damage by 55 Percent when canceling attacks. |
Increases damage by 60 Percent when canceling attacks. |
Increases damage by 65 Percent when canceling attacks. |
Increases damage by 75 Percent when canceling attacks. |
|
Disperse Bloodlust |
When using Arts, your Aggro is reduced by 20 Percent. |
When using Arts, your Aggro is reduced by 22 Percent. |
When using Arts, your Aggro is reduced by 25 Percent. |
When using Arts, your Aggro is reduced by 27 Percent. |
When using Arts, your Aggro is reduced by 30 Percent. |
When using Arts, your Aggro is reduced by 32 Percent. |
When using Arts, your Aggro is reduced by 35 Percent. |
When using Arts, your Aggro is reduced by 37 Percent. |
When using Arts, your Aggro is reduced by 40 Percent. |
When using Arts, your Aggro is reduced by 45 Percent. |
Defender Gem Crafting Requirements

Now that you know what every Gem is capable of, it's time to go over how to craft the Defender Gems. To craft Gems, you will need Materials that increase in rarity and volume with each new Tier reached. Each Gem has ten tiers, with each Gem Grouping having five Gems, meaning you will be farming and grinding for Materials if you want to upgrade every Gem. If you want to see what each Gem requires to be made, look no further than the many long tables below!
Also, please remember that you can bypass tiers by spending Gold Nopon Coins, which will not only give you a boost in Gem Quality but also allow you to move onto the next Tier without needing the Materials. You can see the cost of Gold Nopon Coins for each Tier on the far right of each table!
Material Rarity Chart
|
Common |
Rare |
Legendary |
|---|---|---|
|
Plain Text |
🟨 |
🟪 |
Tailwind
|
Gemstone Tier |
Materials Needed |
Gold Nopon Coin Bypass |
|---|---|---|
|
Tailwind I |
|
|
|
Tailwind II |
|
|
|
Tailwind III |
|
|
|
Tailwind IV |
|
|
|
Tailwind V |
|
|
|
Tailwind VI |
|
|
|
Tailwind VII |
|
|
|
Tailwind VIII |
|
|
|
Tailwind IX |
|
|
|
Tailwind X |
|
|
Steel Protection
|
Gemstone Tier |
Materials Needed |
Gold Nopon Coin Bypass |
|---|---|---|
|
Steel Protection I |
|
|
|
Steel Protection II |
|
|
|
Steel Protection III |
|
|
|
Steel Protection IV |
|
|
|
Steel Protection V |
|
|
|
Steel Protection VI |
|
|
|
Steel Protection VII |
|
|
|
Steel Protection VIII |
|
|
|
Steel Protection IX |
|
|
|
Steel Protection X |
|
|
Ultimate Counter
|
Gemstone Tier |
Materials Needed |
Gold Nopon Coin Bypass |
|---|---|---|
|
Ultimate Counter I |
|
|
|
Ultimate Counter II |
|
|
|
Ultimate Counter III |
|
|
|
Ultimate Counter IV |
|
|
|
Ultimate Counter V |
|
|
|
Ultimate Counter VI |
|
|
|
Ultimate Counter VII |
|
|
|
Ultimate Counter VIII |
|
|
|
Ultimate Counter IX |
|
|
|
Ultimate Counter X |
|
|
Brimming Spirit
|
Gemstone Tier |
Materials Needed |
Gold Nopon Coin Bypass |
|---|---|---|
|
Brimming Spirit I |
|
|
|
Brimming Spirit II |
|
|
|
Brimming Spirit III |
|
|
|
Brimming Spirit IV |
|
|
|
Brimming Spirit V |
|
|
|
Brimming Spirit VI |
|
|
|
Brimming Spirit VII |
|
|
|
Brimming Spirit VIII |
|
|
|
Brimming Spirit IX |
|
|
|
Brimming Spirit X |
|
|
Perilous Presence
|
Gemstone Tier |
Materials Needed |
Gold Nopon Coin Bypass |
|---|---|---|
|
Perilous Presence I |
|
|
|
Perilous Presence II |
|
|
|
Perilous Presence III |
|
|
|
Perilous Presence IV |
|
|
|
Perilous Presence V |
|
|
|
Perilous Presence VI |
|
|
|
Perilous Presence VII |
|
|
|
Perilous Presence VIII |
|
|
|
Perilous Presence IX |
|
|
|
Perilous Presence X |
|
|
Attacker Gem Crafting Requirements

The Attacker Gems follow the same principles as the Defender Gems in that you will need a boatload of Materials if you want to make all of them. The higher tiers require lots of Rare and Legendary Materials that will require quite a bit of grinding and farming to obtain, which may or may not be your style. Nonetheless, you can find every Attacker Gem and what is required from you to upgrade each of them!
Don't forget that you can bypass tiers by spending Gold Nopon Coins. This method allows you to jump ahead to another tier without needing any of the Materials, making it useful if you somehow have the required materials for the next Tier but not the one you're currently on. We have the Gold Nopon Coin price for each tier skip on the righthand side of every table!
Rarity Chart
|
Common |
Rare |
Legendary |
|---|---|---|
|
Plain Text |
🟨 |
🟪 |
Steelcleaver
|
Gemstone Tier |
Materials Needed |
Gold Nopon Coin Bypass |
|---|---|---|
|
Steelcleaver I |
|
|
|
Steelcleaver II |
|
|
|
Steelcleaver III |
|
|
|
Steelcleaver IV |
|
|
|
Steelcleaver V |
|
|
|
Steelcleaver VI |
|
|
|
Steelcleaver VII |
|
|
|
Steelcleaver VII |
|
|
|
Steelcleaver IX |
|
|
|
Steelcleaver X |
|
|
Accurate Grace
|
Gemstone Tier |
Materials Needed |
Gold Nopon Coin Bypass |
|---|---|---|
|
Accurate Grace I |
|
|
|
Accurate Grace II |
|
|
|
Accurate Grace III |
|
|
|
Accurate Grace IV |
|
|
|
Accurate Grace V |
|
|
|
Accurate Grace VI |
|
|
|
Accurate Grace VII |
|
|
|
Accurate Grace VIII |
|
|
|
Accurate Grace IX |
|
|
|
Accurate Grace X |
|
|
Analyze Weakness
|
Gemstone Tier |
Materials Needed |
Gold Nopon Coin Bypass |
|---|---|---|
|
Analyze Weakness I |
|
|
|
Analyze Weakness II |
|
|
|
Analyze Weakness III |
|
|
|
Analyze Weakness IV |
|
|
|
Analyze Weakness V |
|
|
|
Analyze Weakness VI |
|
|
|
Analyze Weakness VII |
|
|
|
Analyze Weakness VIII |
|
|
|
Analyze Weakness IX |
|
|
|
Analyze Weakness X |
|
|
Swelling Scourge
|
Gemstone Tier |
Materials Needed |
Gold Nopon Coin Bypass |
|---|---|---|
|
Swelling Scourge I |
|
|
|
Swelling Scourge II |
|
|
|
Swelling Scourge III |
|
|
|
Swelling Scourge IV |
|
|
|
Swelling Scourge V |
|
|
|
Swelling Scourge VI |
|
|
|
Swelling Scourge VII |
|
|
|
Swelling Scourge VIII |
|
|
|
Swelling Scourge IX |
|
|
|
Swelling Scourge X |
|
|
Refined Incantation
|
Gemstone Tier |
Materials Needed |
Gold Nopon Coin Bypass |
|---|---|---|
|
Refined Incantation I |
|
|
|
Refined Incantation II |
|
|
|
Refined Incantation III |
|
|
|
Refined Incantation IV |
|
|
|
Refined Incantation V |
|
|
|
Refined Incantation VI |
|
|
|
Refined Incantation VII |
|
|
|
Refined Incantation VIII |
|
|
|
Refined Incantation IX |
|
|
|
Refined Incantation X |
|
|
Healer Gem Crafting Requirements

Healer Gems work the same way as the Defender and Attacker ones, requiring you to go out and scavenge an unholy amount of Materials to upgrade to each Tier, especially if you're looking to reach Tier X with every Gem. The higher the Tier, the more Rare and Legendary Materials are needed, making progress slow the further you upgrade each Gem. With that in mind, let's look at everything required to craft each Healer Gem!
Gold Nopon Coins can skip Gem Tiers, enabling you to bypass gathering the resources needed to upgrade. While the higher Tiers require tons of Gold Nopon Coins to use this feature, the early to mid-Tiers aren't too bad, making it a viable option in some cases.
Rarity Chart
|
Common |
Rare |
Legendary |
|---|---|---|
|
Plain Text |
🟨 |
🟪 |
Lifebearer
|
Gemstone Tier |
Materials Needed |
Gold Nopon Coin Bypass |
|---|---|---|
|
Lifebearer I |
|
|
|
Lifebearer II |
|
|
|
Lifebearer III |
|
|
|
Lifebearer IV |
|
|
|
Lifebearer V |
|
|
|
Lifebearer VI |
|
|
|
Lifebearer VII |
|
|
|
Lifebearer VIII |
|
|
|
Lifebearer IX |
|
|
|
Lifebearer X |
|
|
Soothing Breath
|
Gemstone Tier |
Materials Needed |
Gold Nopon Coin Bypass |
|---|---|---|
|
Soothing Breath I |
|
|
|
Soothing Breath II |
|
|
|
Soothing Breath III |
|
|
|
Soothing Breath IV |
|
|
|
Soothing Breath V |
|
|
|
Soothing Breath VI |
|
|
|
Soothing Breath VII |
|
|
|
Soothing Breath VIII |
|
|
|
Soothing Breath IX |
|
|
|
Soothing Breath X |
|
|
Lifesaving Expertise
|
Gemstone Tier |
Materials Needed |
Gold Nopon Coin Bypass |
|---|---|---|
|
Lifesaving Expertise I |
|
|
|
Lifesaving Expertise II |
|
|
|
Lifesaving Expertise III |
|
|
|
Lifesaving Expertise IV |
|
|
|
Lifesaving Expertise V |
|
|
|
Lifesaving Expertise VI |
|
|
|
Lifesaving Expertise VII |
|
|
|
Lifesaving Expertise VIII |
|
|
|
Lifesaving Expertise IX |
|
|
|
Lifesaving Expertise X |
|
|
Swelling Blessing
|
Gemstone Tier |
Materials Needed |
Gold Nopon Coin Bypass |
|---|---|---|
|
Swelling Blessing I |
|
|
|
Swelling Blessing II |
|
|
|
Swelling Blessing III |
|
|
|
Swelling Blessing IV |
|
|
|
Swelling Blessing V |
|
|
|
Swelling Blessing VI |
|
|
|
Swelling Blessing VII |
|
|
|
Swelling Blessing VIII |
|
|
|
Swelling Blessing IX |
|
|
|
Swelling Blessing X |
|
|
Refined Blessing
|
Gemstone Tier |
Materials Needed |
Gold Nopon Coin Bypass |
|---|---|---|
|
Refined Blessing I |
|
|
|
Refined Blessing II |
|
|
|
Refined Blessing III |
|
|
|
Refined Blessing IV |
|
|
|
Refined Blessing V |
|
|
|
Refined Blessing VI |
|
|
|
Refined Blessing VII |
|
|
|
Refined Blessing VIII |
|
|
|
Refined Blessing IX |
|
|
|
Refined Blessing X |
|
|
Universal Gem Crafting Requirements

You guessed it, Universal Gems also require you to seek out Materials to craft, with each subsequent Tier demanding more and more Rare and Legendary resources to make. If you want to create every Gem in the game, you have your work cut out for you and will seemingly be busy for the rest of your life. Anywho, let's check out what each Gem needs to be made!
Yup, we're reminding you of the importance of Gold Nopon Coins once more! These precious Coins allow you to skip Gem Tiers, enabling you to craft Gems without any of the resources. Cheating? Kind of. Do we care? Absolutely not. Get those Gems without the grind, we say! Although, you sort of have to grind to get Gold Nopon Coins... But that's not the point!
Rarity Chart
|
Common |
Rare |
Legendary |
|---|---|---|
|
Plain Text |
🟨 |
🟪 |
Ironclad
|
Gemstone Tier |
Materials Needed |
Gold Nopon Coin Bypass |
|---|---|---|
|
Ironclad I |
|
|
|
Ironclad II |
|
|
|
Ironclad III |
|
|
|
Ironclad IV |
|
|
|
Ironclad V |
|
|
|
Ironclad VI |
|
|
|
Ironclad VII |
|
|
|
Ironclad VIII |
|
|
|
Ironclad IX |
|
|
|
Ironclad X |
|
|
Steady Striker
|
Gemstone Tier |
Materials Needed |
Gold Nopon Coin Bypass |
|---|---|---|
|
Steady Striker I |
|
|
|
Steady Striker II |
|
|
|
Steady Striker III |
|
|
|
Steady Striker IV |
|
|
|
Steady Striker V |
|
|
|
Steady Striker VI |
|
|
|
Steady Striker VII |
|
|
|
Steady Striker VIII |
|
|
|
Steady Striker IX |
|
|
|
Steady Striker X |
|
|
Doublestrike
|
Gemstone Tier |
Materials Needed |
Gold Nopon Coin Bypass |
|---|---|---|
|
Doublestrike I |
|
|
|
Doublestrike II |
|
|
|
Doublestrike III |
|
|
|
Doublestrike IV |
|
|
|
Doublestrike V |
|
|
|
Doublestrike VI |
|
|
|
Doublestrike VII |
|
|
|
Doublestrike VIII |
|
|
|
Doublestrike IX |
|
|
|
Doublestrike X |
|
|
Empowered Combo
|
Gemstone Tier |
Materials Needed |
Gold Nopon Coin Bypass |
|---|---|---|
|
Empowered Combo I |
|
|
|
Empowered Combo II |
|
|
|
Empowered Combo III |
|
|
|
Empowered Combo IV |
|
|
|
Empowered Combo V |
|
|
|
Empowered Combo VI |
|
|
|
Empowered Combo VII |
|
|
|
Empowered Combo VIII |
|
|
|
Empowered Combo IX |
|
|
|
Empowered Combo X |
|
|
Disperse Bloodlust
|
Gemstone Tier |
Materials Needed |
Gold Nopon Coin Bypass |
|---|---|---|
|
Disperse Bloodlust I |
|
|
|
Disperse Bloodlust II |
|
|
|
Disperse Bloodlust III |
|
|
|
Disperse Bloodlust IV |
|
|
|
Disperse Bloodlust V |
|
|
|
Disperse Bloodlust VI |
|
|
|
Disperse Bloodlust VII |
|
|
|
Disperse Bloodlust VIII |
|
|
|
Disperse Bloodlust IX |
|
|
|
Disperse Bloodlust X |
|
|